“The worst enemy to creativity is self-doubt.” So said Sylvia Plath, and we have a feeling she was on to something.
So we reached out to a few artists and art professors from New York's School of Visual Arts and asked them to let us in on some secrets to overcoming lapses in confidence and jumpstarting creativity. More specifically, we asked a group of painters, sculptors, photographers and multimedia masters to describe some art techniques that anyone -- from amateurs to professionals -- can do to tackle creative block.
Our friends did not disappoint. Here are 9 art techniques you can do to reignite the creative spark.
1. Paint an object from your home or office.

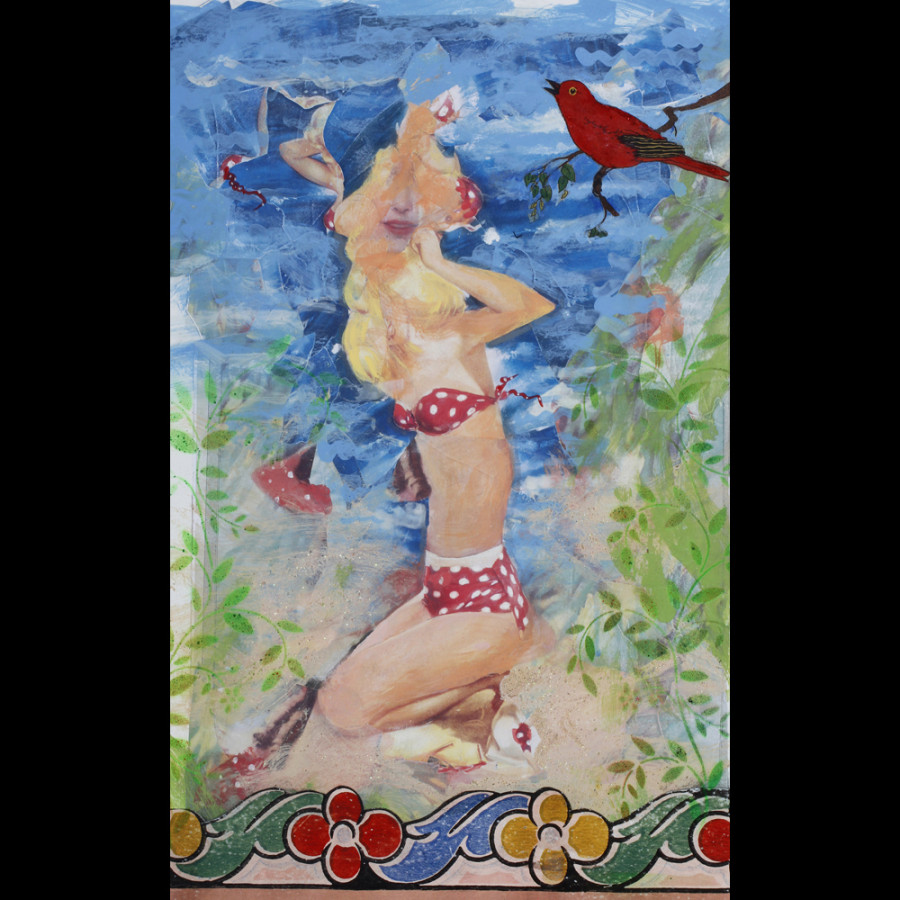
"The beginning draughtsman or painter should avoid drawing from photographs. This practice causes bad habits to form.
"To start, always draw from life -- and not necessarily a model. Simple convex objects like apples, pots, opaque bottles, or smooth rocks or seashells are tremendous subjects of study. Training the mind to see form and understand how it sees form, and the hand to represent that understanding, is the start to gaining the visual artist's tools of expression."
-Daniel Maidman, artist (Image: Daniel Maidman, The Red Pipes, oil on canvas, 24"x30", 2013)
2. Perfectly frame an architectural photograph.
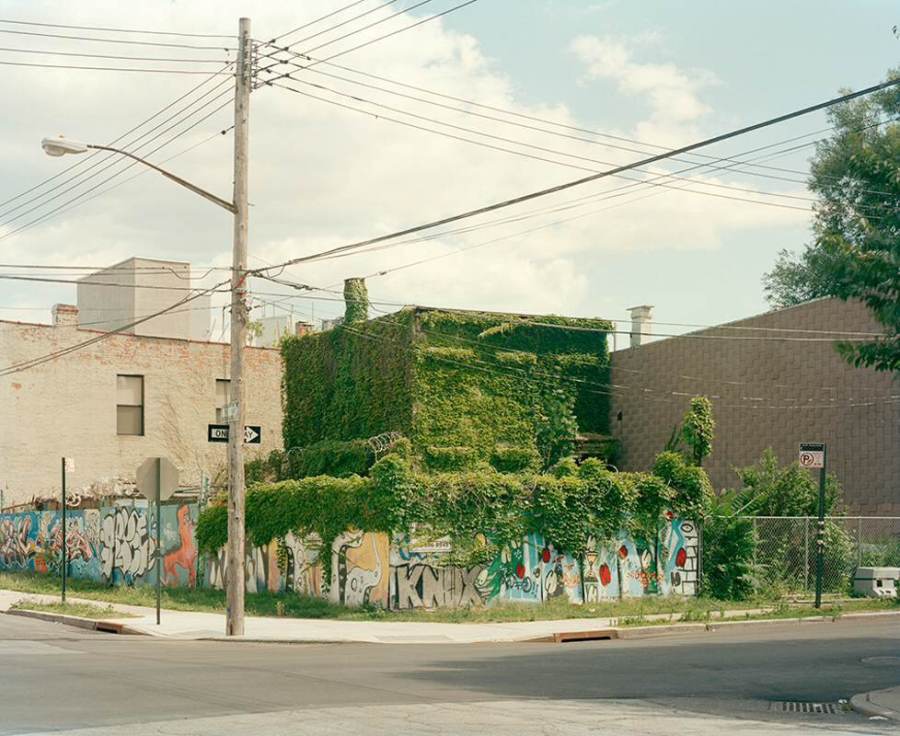
"It is good to study a photographic scene slowly and carefully, observing how objects interact in space. Simply shifting your angle in space in relation to your subject can make or break the dynamism of a photograph.
"Start out at a central point, then walk five feet to the left, five feet to the right, and keep photographing, observing how the spatial relationships shift with every step. Before you know it, you'll discover the 'sweet spot' from which to take your photograph."
-Jade Doskow, teaches Architectural Photography and Modern Ruins at SVA (Image: Jade Doskow, 'Green Mystery House,' 2011)
3. Design a whimsical collage.
"Collage, whose invention originally is attributed to Picasso, presents as a simple technique: the utilization of assorted printed paper, which is then altered and rearranged by cutting, shaping, and then gluing to construct something entirely different from the original supply. An attractive advantage to constructing a collage is that ability to draw is helpful, but not at all necessary, as collage is design-oriented; allowing the artist to 'sketch' by manipulating glued bits of paper together to create both abstract and narrative compositions.
"Unlike mixing oil or acrylic medium, complex printmaking, or sculpture, you can get started in a jiffy by selecting interesting sheets of the printed page and then cutting them up with a scissor or simply tearing them into pieces to reposition them and form the collage. Even though the paper materials are appropriated from another source, the adaptively re-used collage elements become unique, original and completely your own -- with collage, if you don’t have a particular plan in mind you can just begin on a whim!"
-Bruce Helander, artist (Image courtesy of Bruce Helander Studio)
4. Craft a metal sculpture from thin steel.
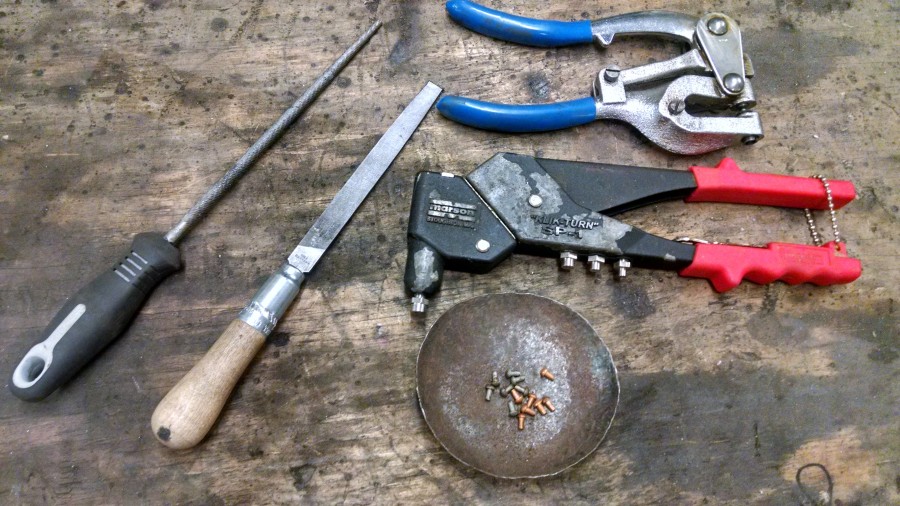
"If you can cut, fold and paste (as in paper, poster board, etc.), you can make metal sculptures and small steel objects.
"Cut shapes in thin sheet steel (18 gauge, less than 1/16 in. thick) with 'aviation' snips. Wear gloves and smooth any sharp edges with a metal file or sandpaper. Fold/bend parts using pliers or a table vise, or anything that can act as a wedge. Small non-weight bearing pieces can be epoxied, or notched and folded together. To attach bigger parts, make holes with a metal hand punch or electric drill using a drill bit for metal. Join pieces with hardware -- nuts and bolts, hammer rivets, pop rivets and riveter, or wire."
-Marsha Trattner, teaches Metal Sculpture, Metal Furniture Fabrication and Creative Blacksmithing, as well as a Weekend Welding Workshop and Metal Works Without Welding in the summer at SVA (Image courtesy of Marsha Trattner)
5. Make a fabric masterpiece.
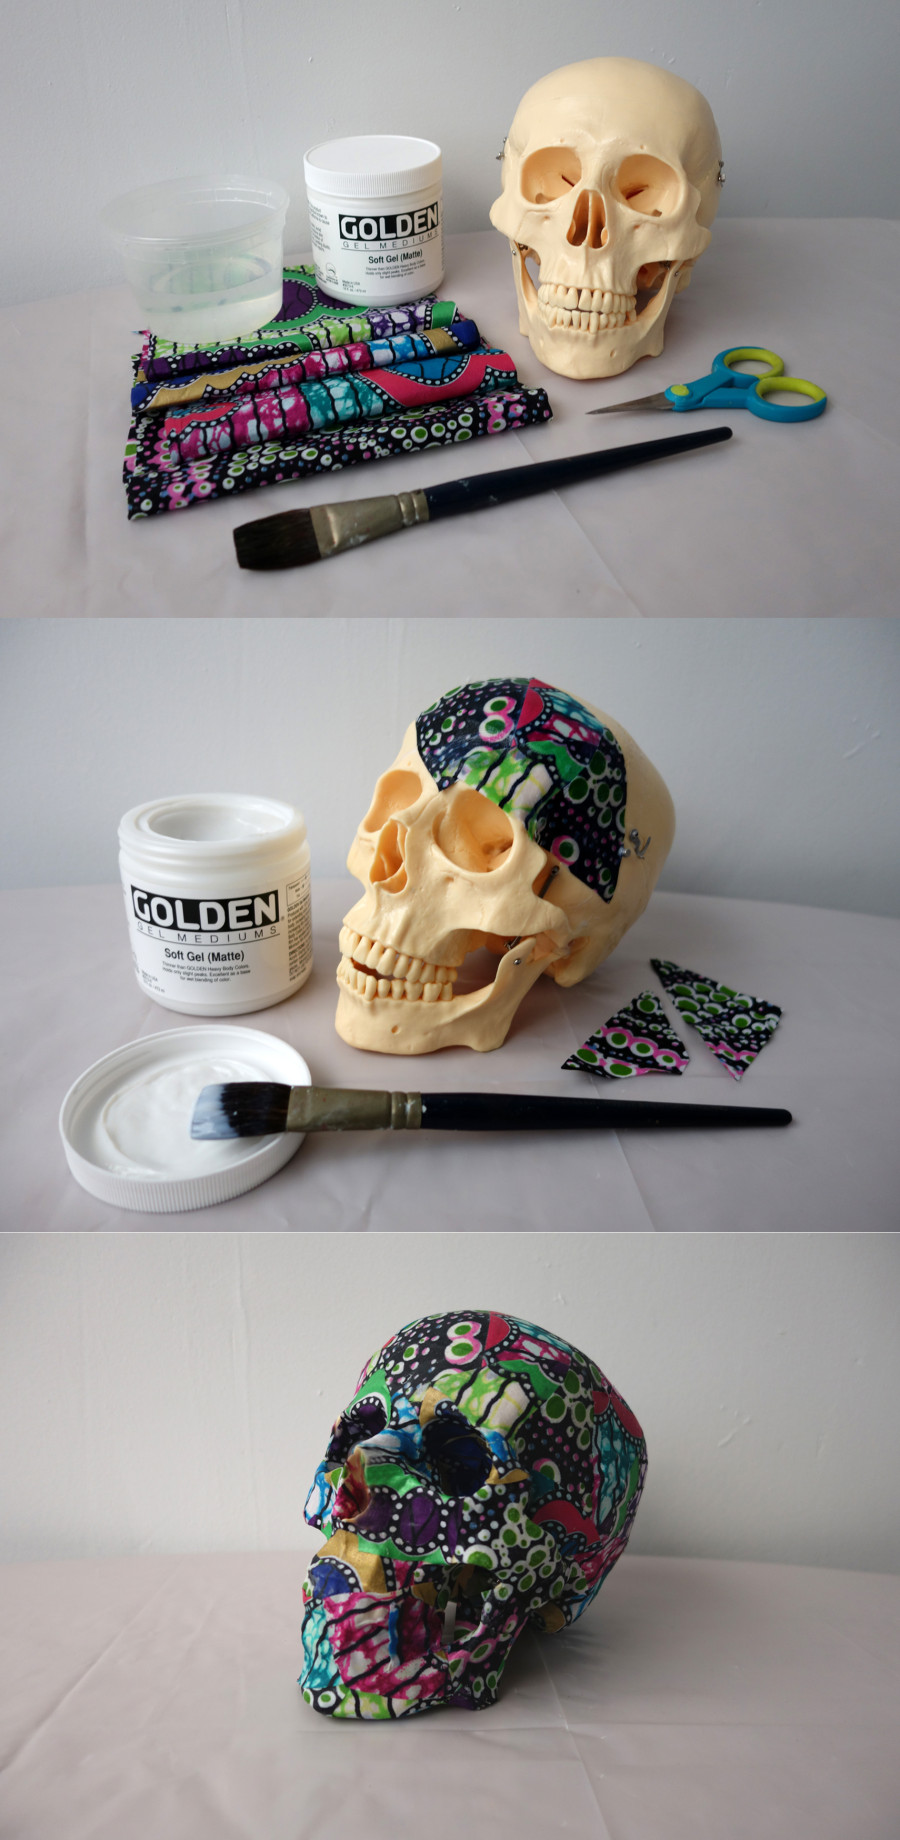
"Here is a quick and easy project with great results: 1) Mix gel medium with a small amount of water to create a more liquid consistency. 2) Apply mixture to the surface of the base object using the paintbrush. 3) Cut the fabric and arrange the pieces onto the object as desired. 4) Apply another coat of the gel medium on top of the fabric to ensure that it remains in place. 5) Cover the entire object and you're done!"
-Saya Woolfalk, artist (Image courtesy of Saya Woolfalk)
6. Turn your camera on the clouds.
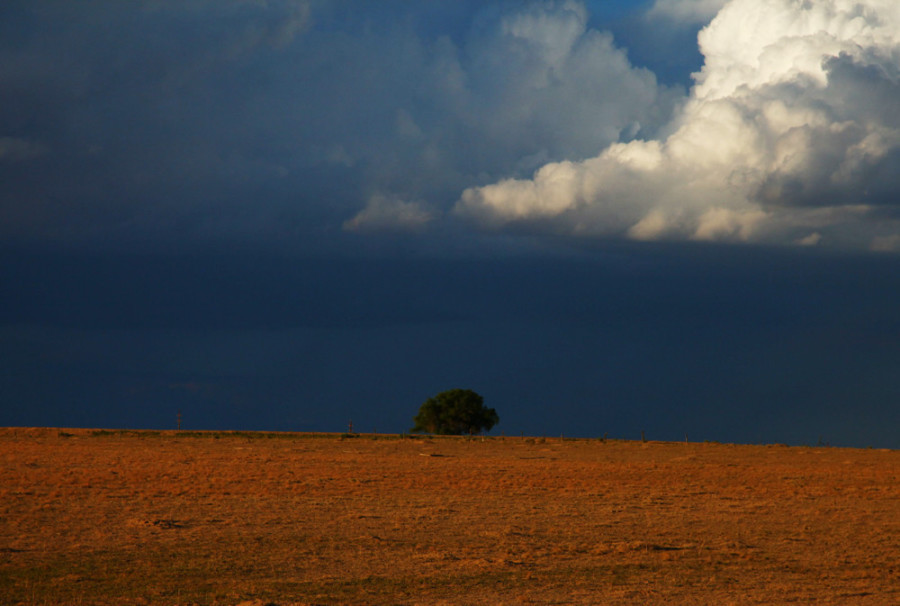
"When taking photographs in outdoor settings, especially when taking photos of landscapes use the natural elements to work in your advantage. They will provide drama, depth and uniqueness to your shots. Clouds could be a photographer's best friend but it requires a bit of patience to get the right mood in the shot.
"The same can be said for shadows, fog and snow. Playing with natural light is fun and the results can be striking without using heavy and expensive equipment. If a manual setting in your camera is too cumbersome set your camera to auto focus and you are ready to go."
-Jaime Rojo, photographer and co-founder of Brooklyn Street Art (Image: Colorado Prairie by Jaime Rojo)
7. Turn your journal into a visual diary.
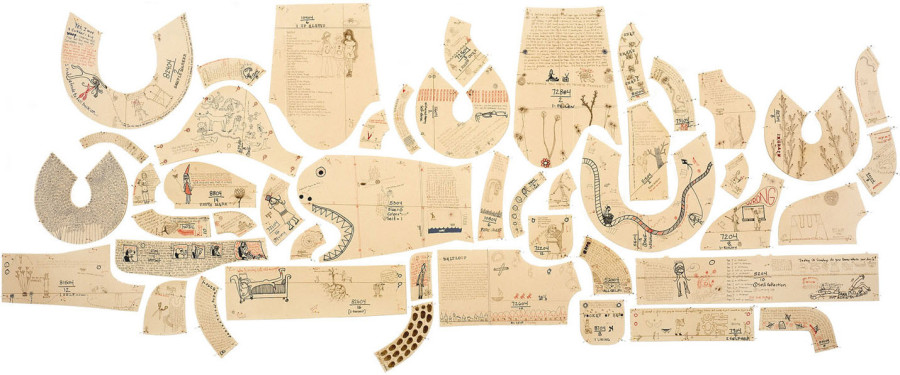
"Thinking outside the box is never that far a leap from your own self and the stuff you love to do anyway. I'm sure you've heard about 'journaling.' Anyone can do that. It's a wonderful practice in terms of doing lots of 'me-me-me' work. But don't feel self centered. It truly is a brave undertaking to venture deep into your own issues in order to experience any real life growth. From this place, now you could be ready to streamline your focus in terms of what you are documenting, and what makes aspects of your life original.
"Try going beyond the 'Dear Diary' book, and start looking right under your nose for things your already do every day, things that interest you, subjects you already deal with. Try a journal that focuses on one of these things, using the materials that pertain to the subject, like an accumulative project. I did this by using elements from the garment manufacturing industry, as I grew up as a pattern cutter in my family's business. I started this project in 2004 and have accumulated hundreds of journal pieces. Now I install them in groupings of about 50 at a time, attached to the wall with sewing pins.
"It's important to commit to your ideas, as 'stupid; as they might seem in the beginning, because concepts combined with the visual can really surprise you. Over time, you just might have a new style of documentation that has yet to be seen."
-Carol Es, artist (Image: Carol Es, Drawing Installation, 46 Days, 2011)
8. Fingerpaint.
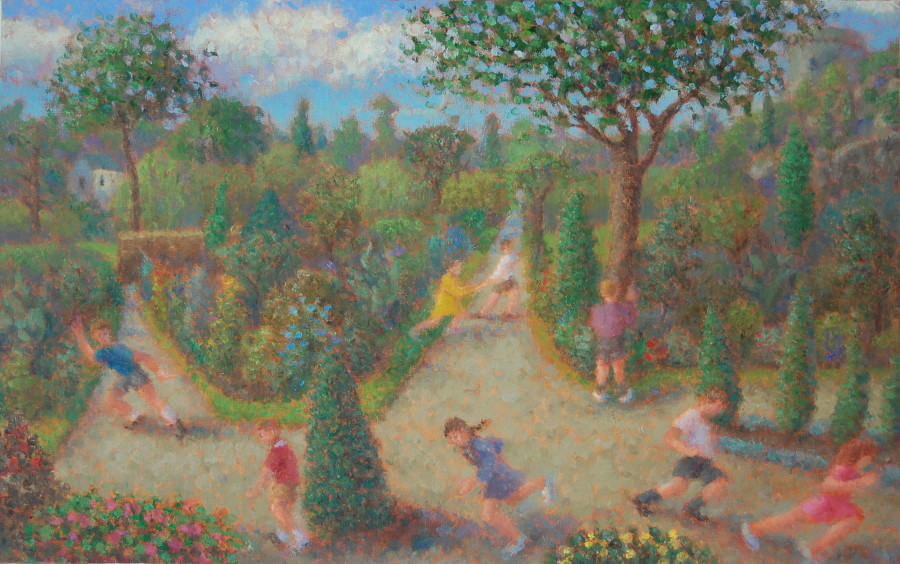
"Most of us enjoyed fingerpainting as children and surely it is still the most gloriously direct way of applying paint. The touch and feel of the artist is left up on the surface and the whole process is sensual, visceral and delightfully messy. I went back to it several years ago thinking that it would yield some adventurous and maybe slightly crude work.
"To my surprise I found that if I used a delicate touch, laying the paint gently onto the canvas, I could get a very rich, alluring surface. The fact that placement is a little imprecise gave the work and intriguing softness and suggestiveness. I worked with oil on a fine linen, using the paint fairly thick so that it sat up on the surface. I used a barrier cream to keep the paint out of my pores and avoided toxic pigments like lead whites or cadmiums.
"My last exhibition in New York was a show of images from my English childhood painted from memory in this technique. Adopting this childish technique allowed me better access to the memory and feel of childhood."
-John A. Parks, artist and teacher of courses in Realist Techniques, Portrait Painting, Drawing and Gouache techniques at SVA (Image: John A. Parks, “HIde and Seek” 2012. Oil on Linen. 20” x 30”)
9. Doodle like a traditional animator.
"I’m always encouraging my students to understand the basics of traditional animation and apply this your personal concepts, style, story or abstract ideas.
"It all starts with drawing. The rough idea of drawings, doodles, enthusiasm and sketches plays such a major part in the process of animation. We begin by drawing on paper and creating a personal stylistic approach, making drawings that move, a flow of story, design, animation principles, expressionistic style and content. The computers are there to make the finished film look colored and composited.
"There is no such thing as good or bad in art …it’s making it better. That's important. Take the principals and most of all give it your signature of personal style. Create images you want to see."
-Martin Abrahams, Instructor of Animation at SVA
Special thanks to our friends at the School of Visual Arts (SVA) in New York City, who graciously offered some great words of wisdom for this post.