If spending a small fortune on store-bought greeting cards doesn't appeal to you and you have an old phone book, scissors, and glue, maybe a bottle cap or two (and a bit of imagination), you can create a Valentine that expresses love for both your partner and the planet.
So here's a DIY tutorial on making a Valentine's Day card from upcycled trash, in this case, paper scraps and bottle caps from Ecuador, where I live, but the kind of thing available anywhere the garbage has yet to be collected.
I promise, if you can cut and paste, you can create the card below.
Supplies to start with:
•recycled phone book, flyers, and/or junk mail
•scrap paper
•bottle caps
•recycled ribbon
•used buttons
•white card stock
Tools you will need:

•scissors and/or X-ACTO knife
•glue: glue stick and glue gun or a bottle of white glue
•ruler
•needle nose pliers
•pencil
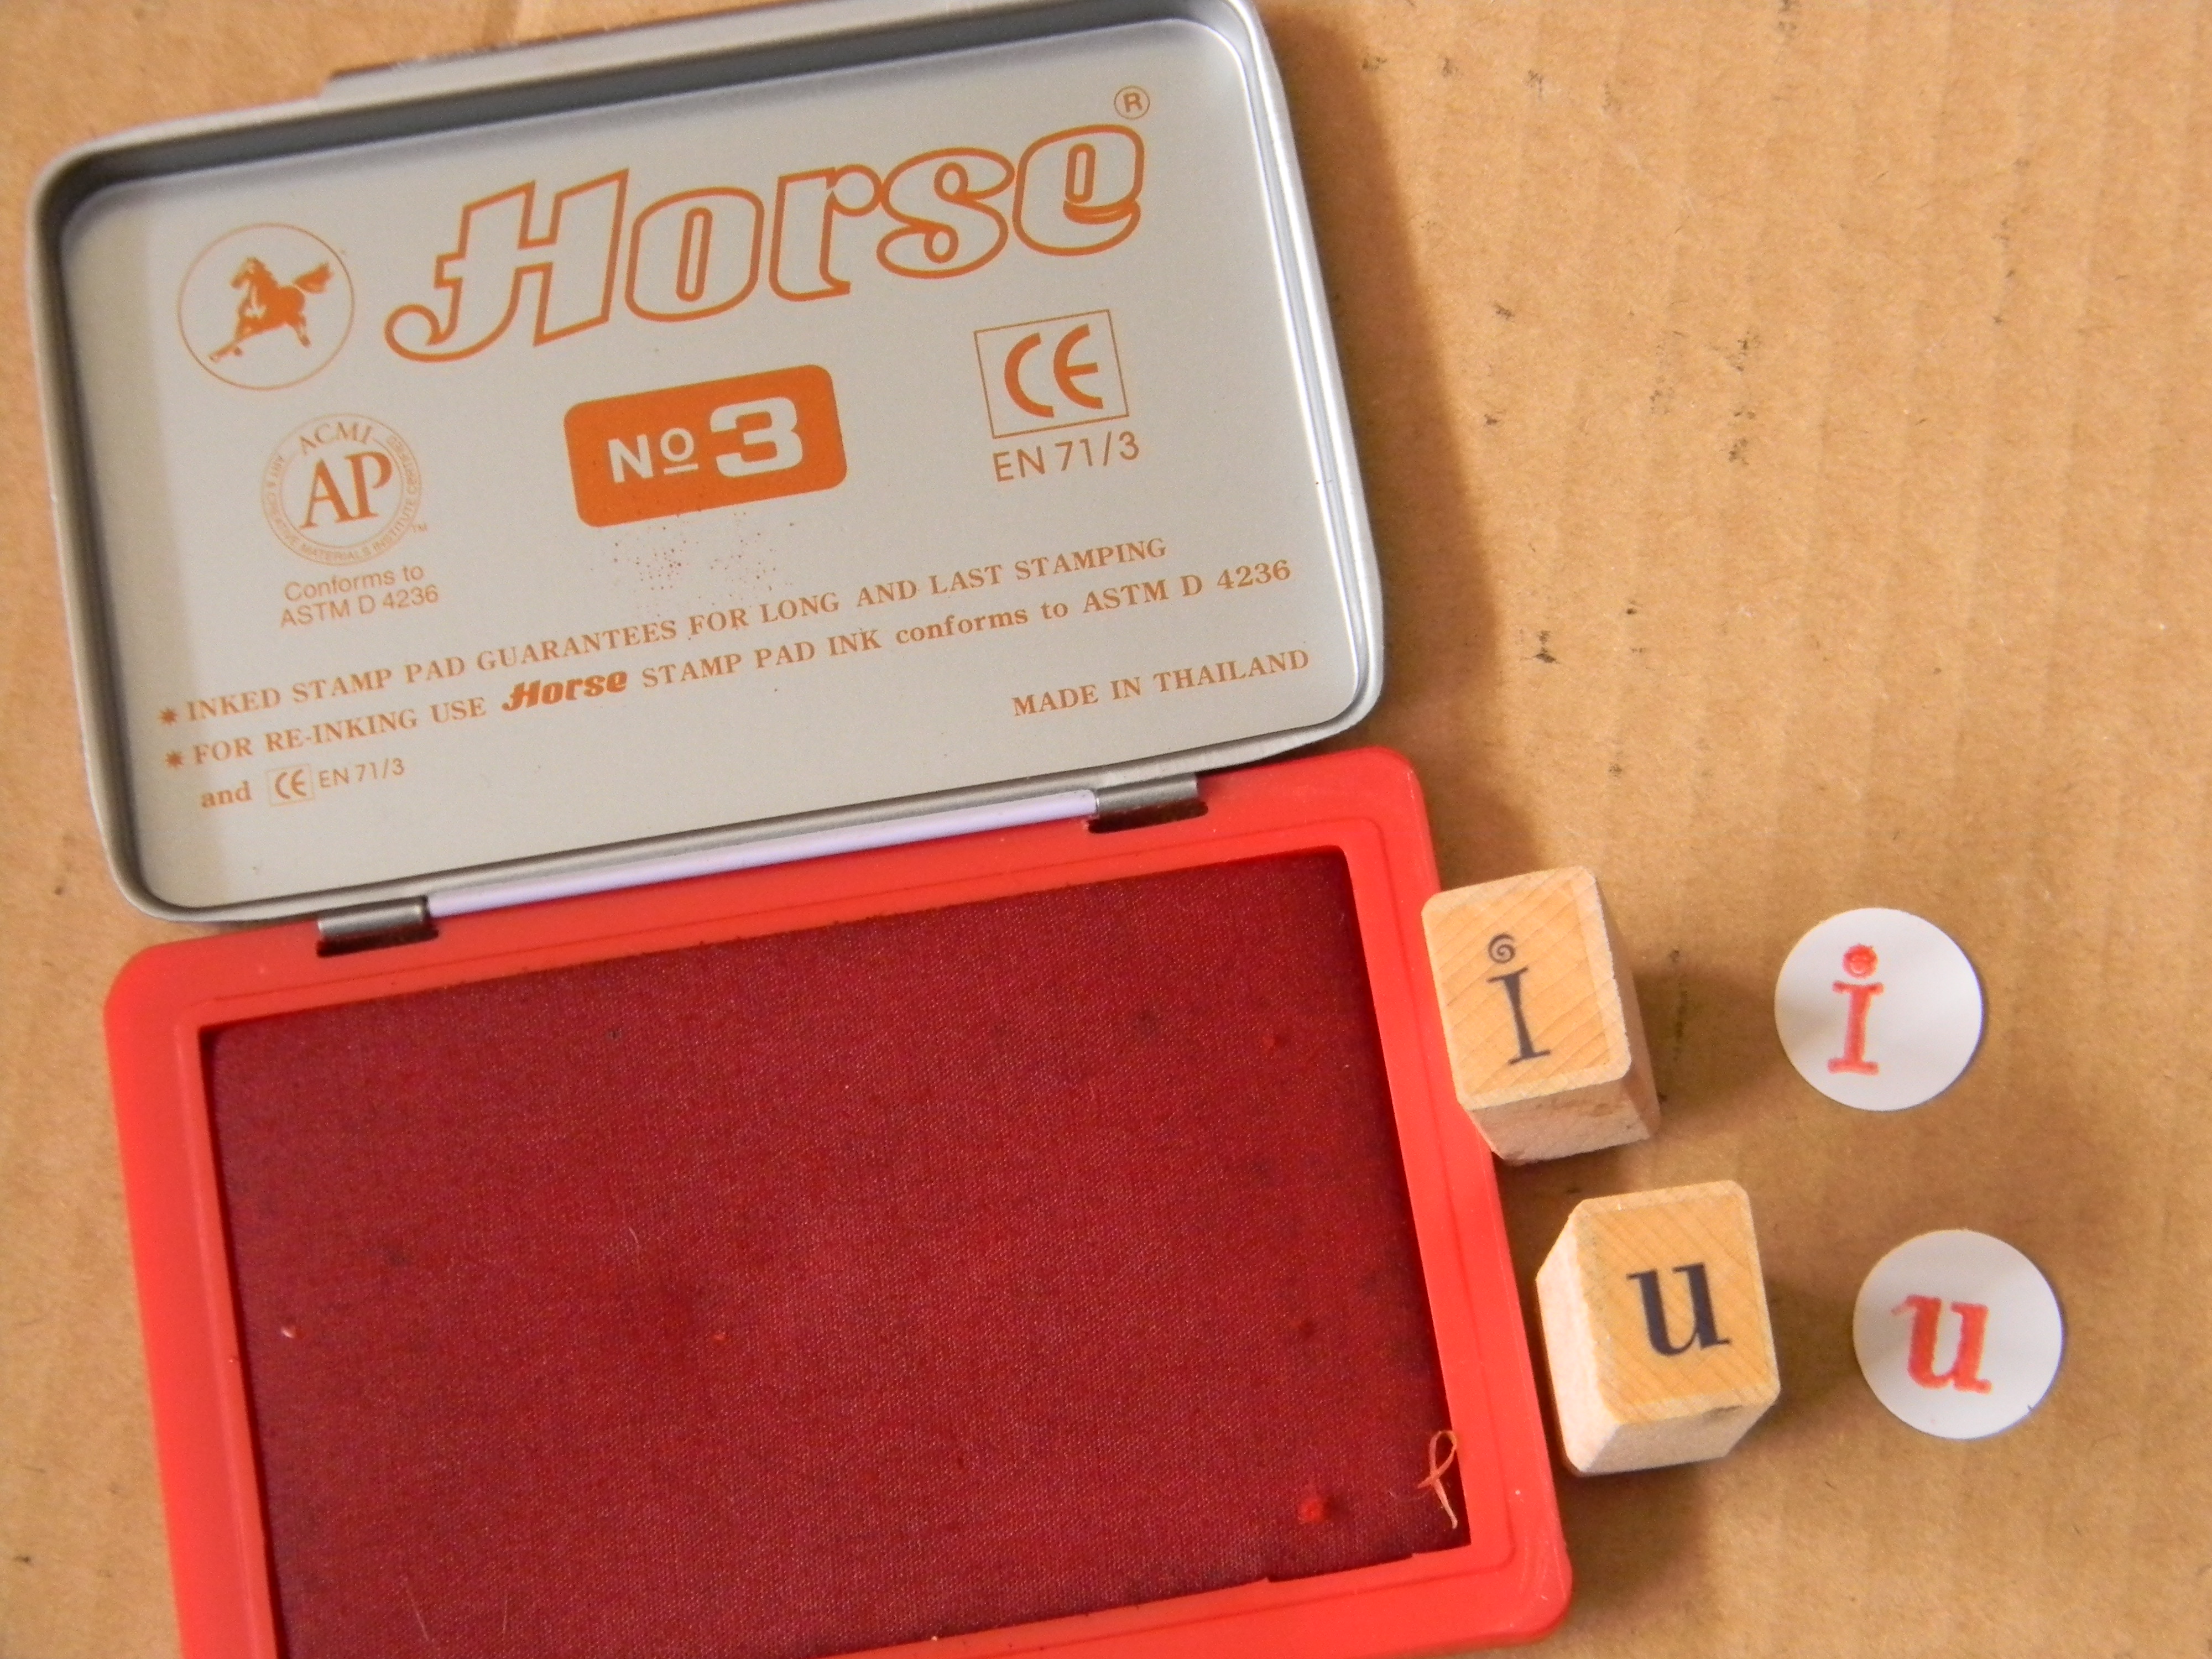
•black pen or the letters "I" and "U" pre-cut from a magazine
•circle stencil or circle punches
Step 1
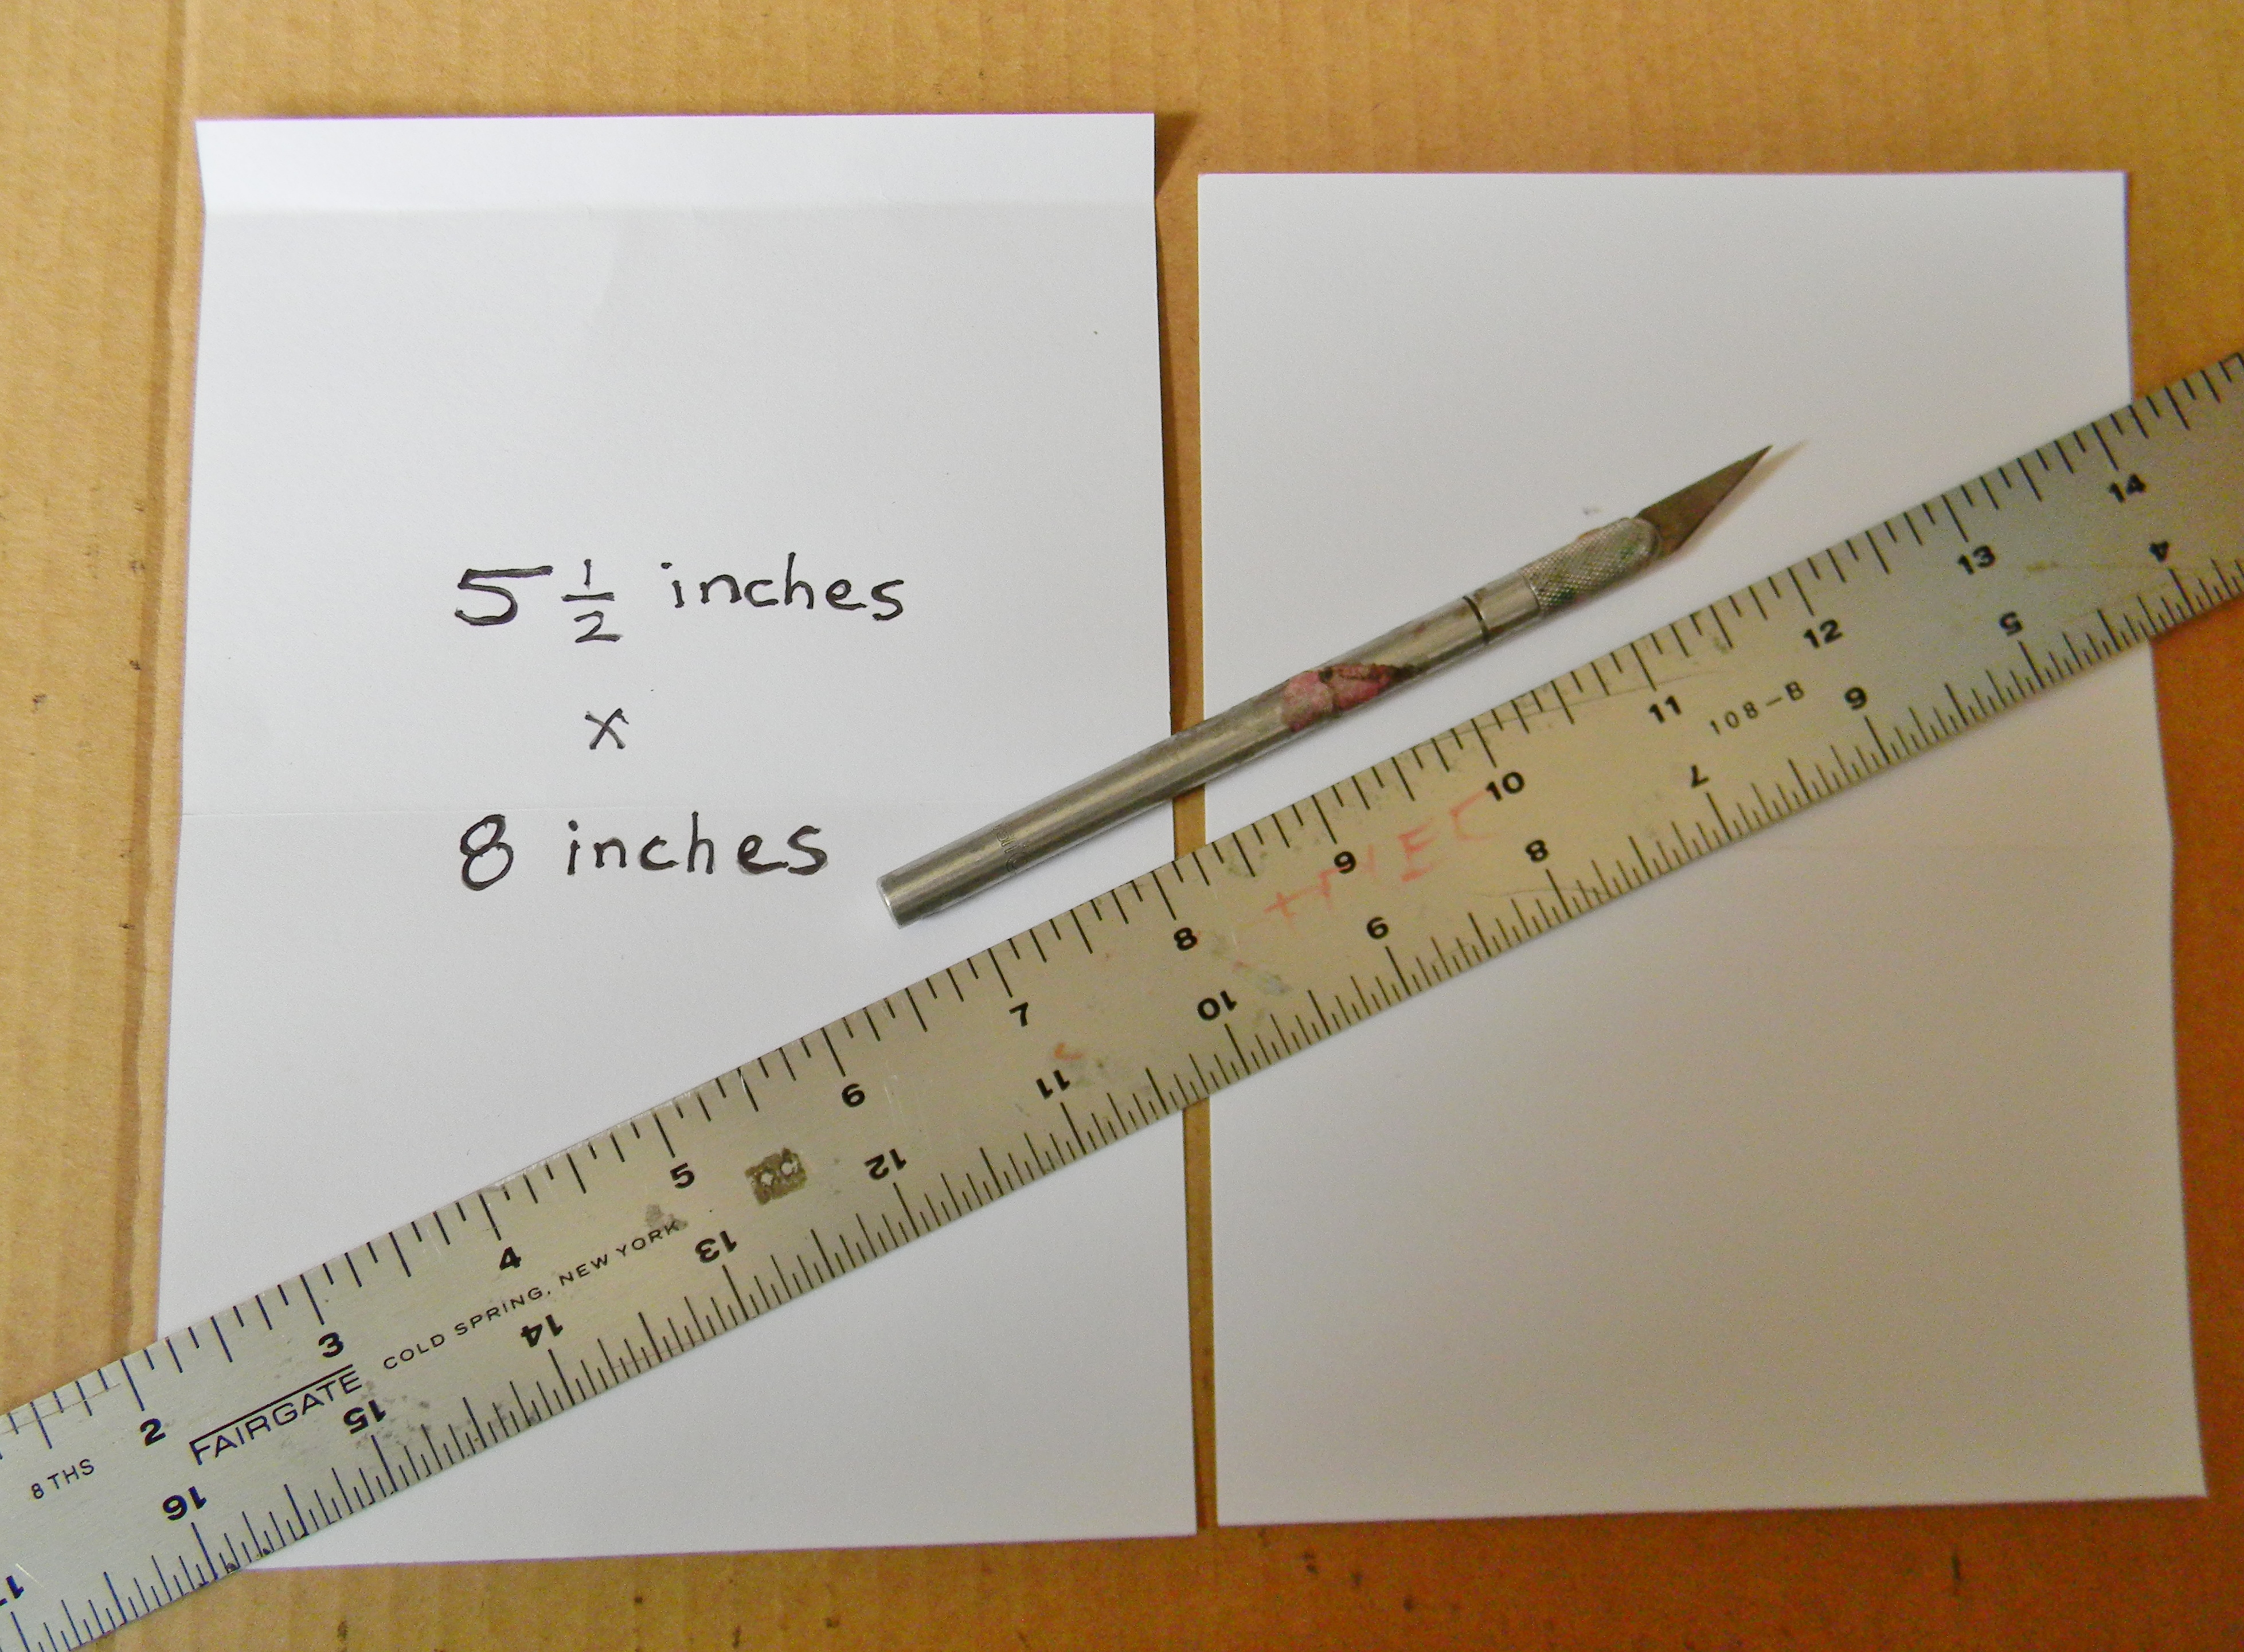
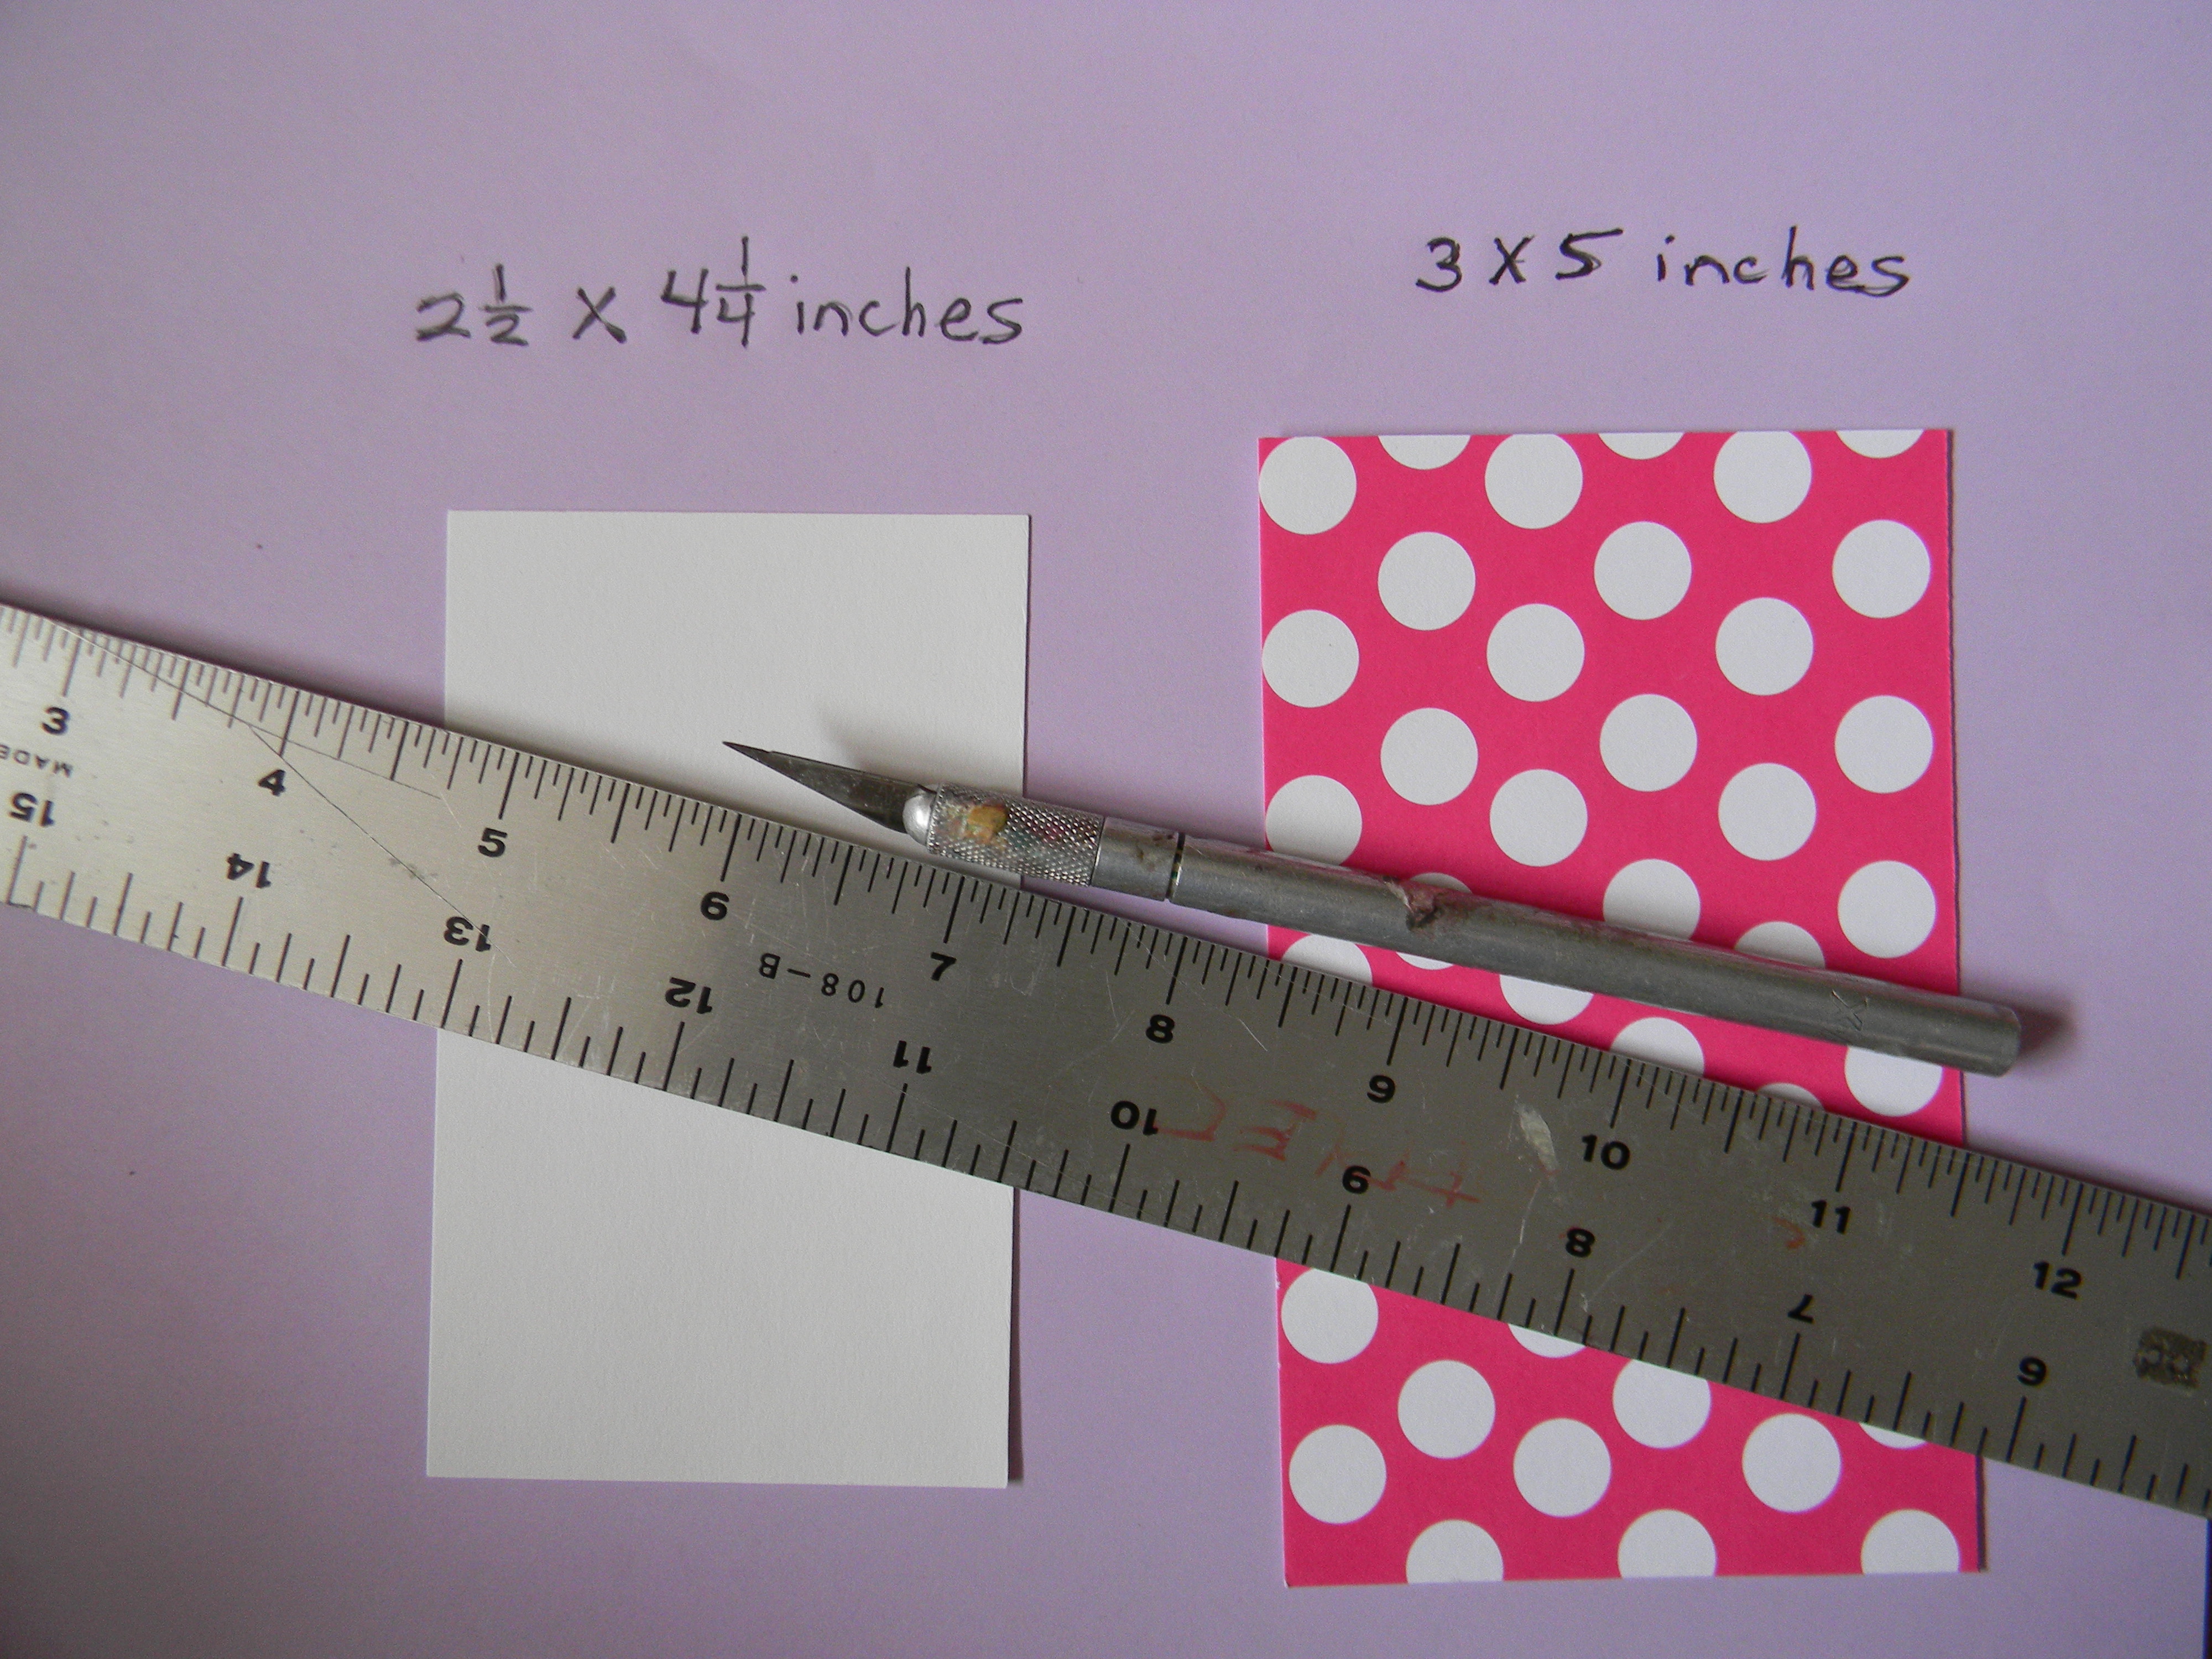
From a piece of 8.5 x 11 inch, white card stock, cut a piece of paper that is 5.5 x 8 inches. Then fold that paper in half and cut an additional 3/8 inch from the front flap.

Step 2
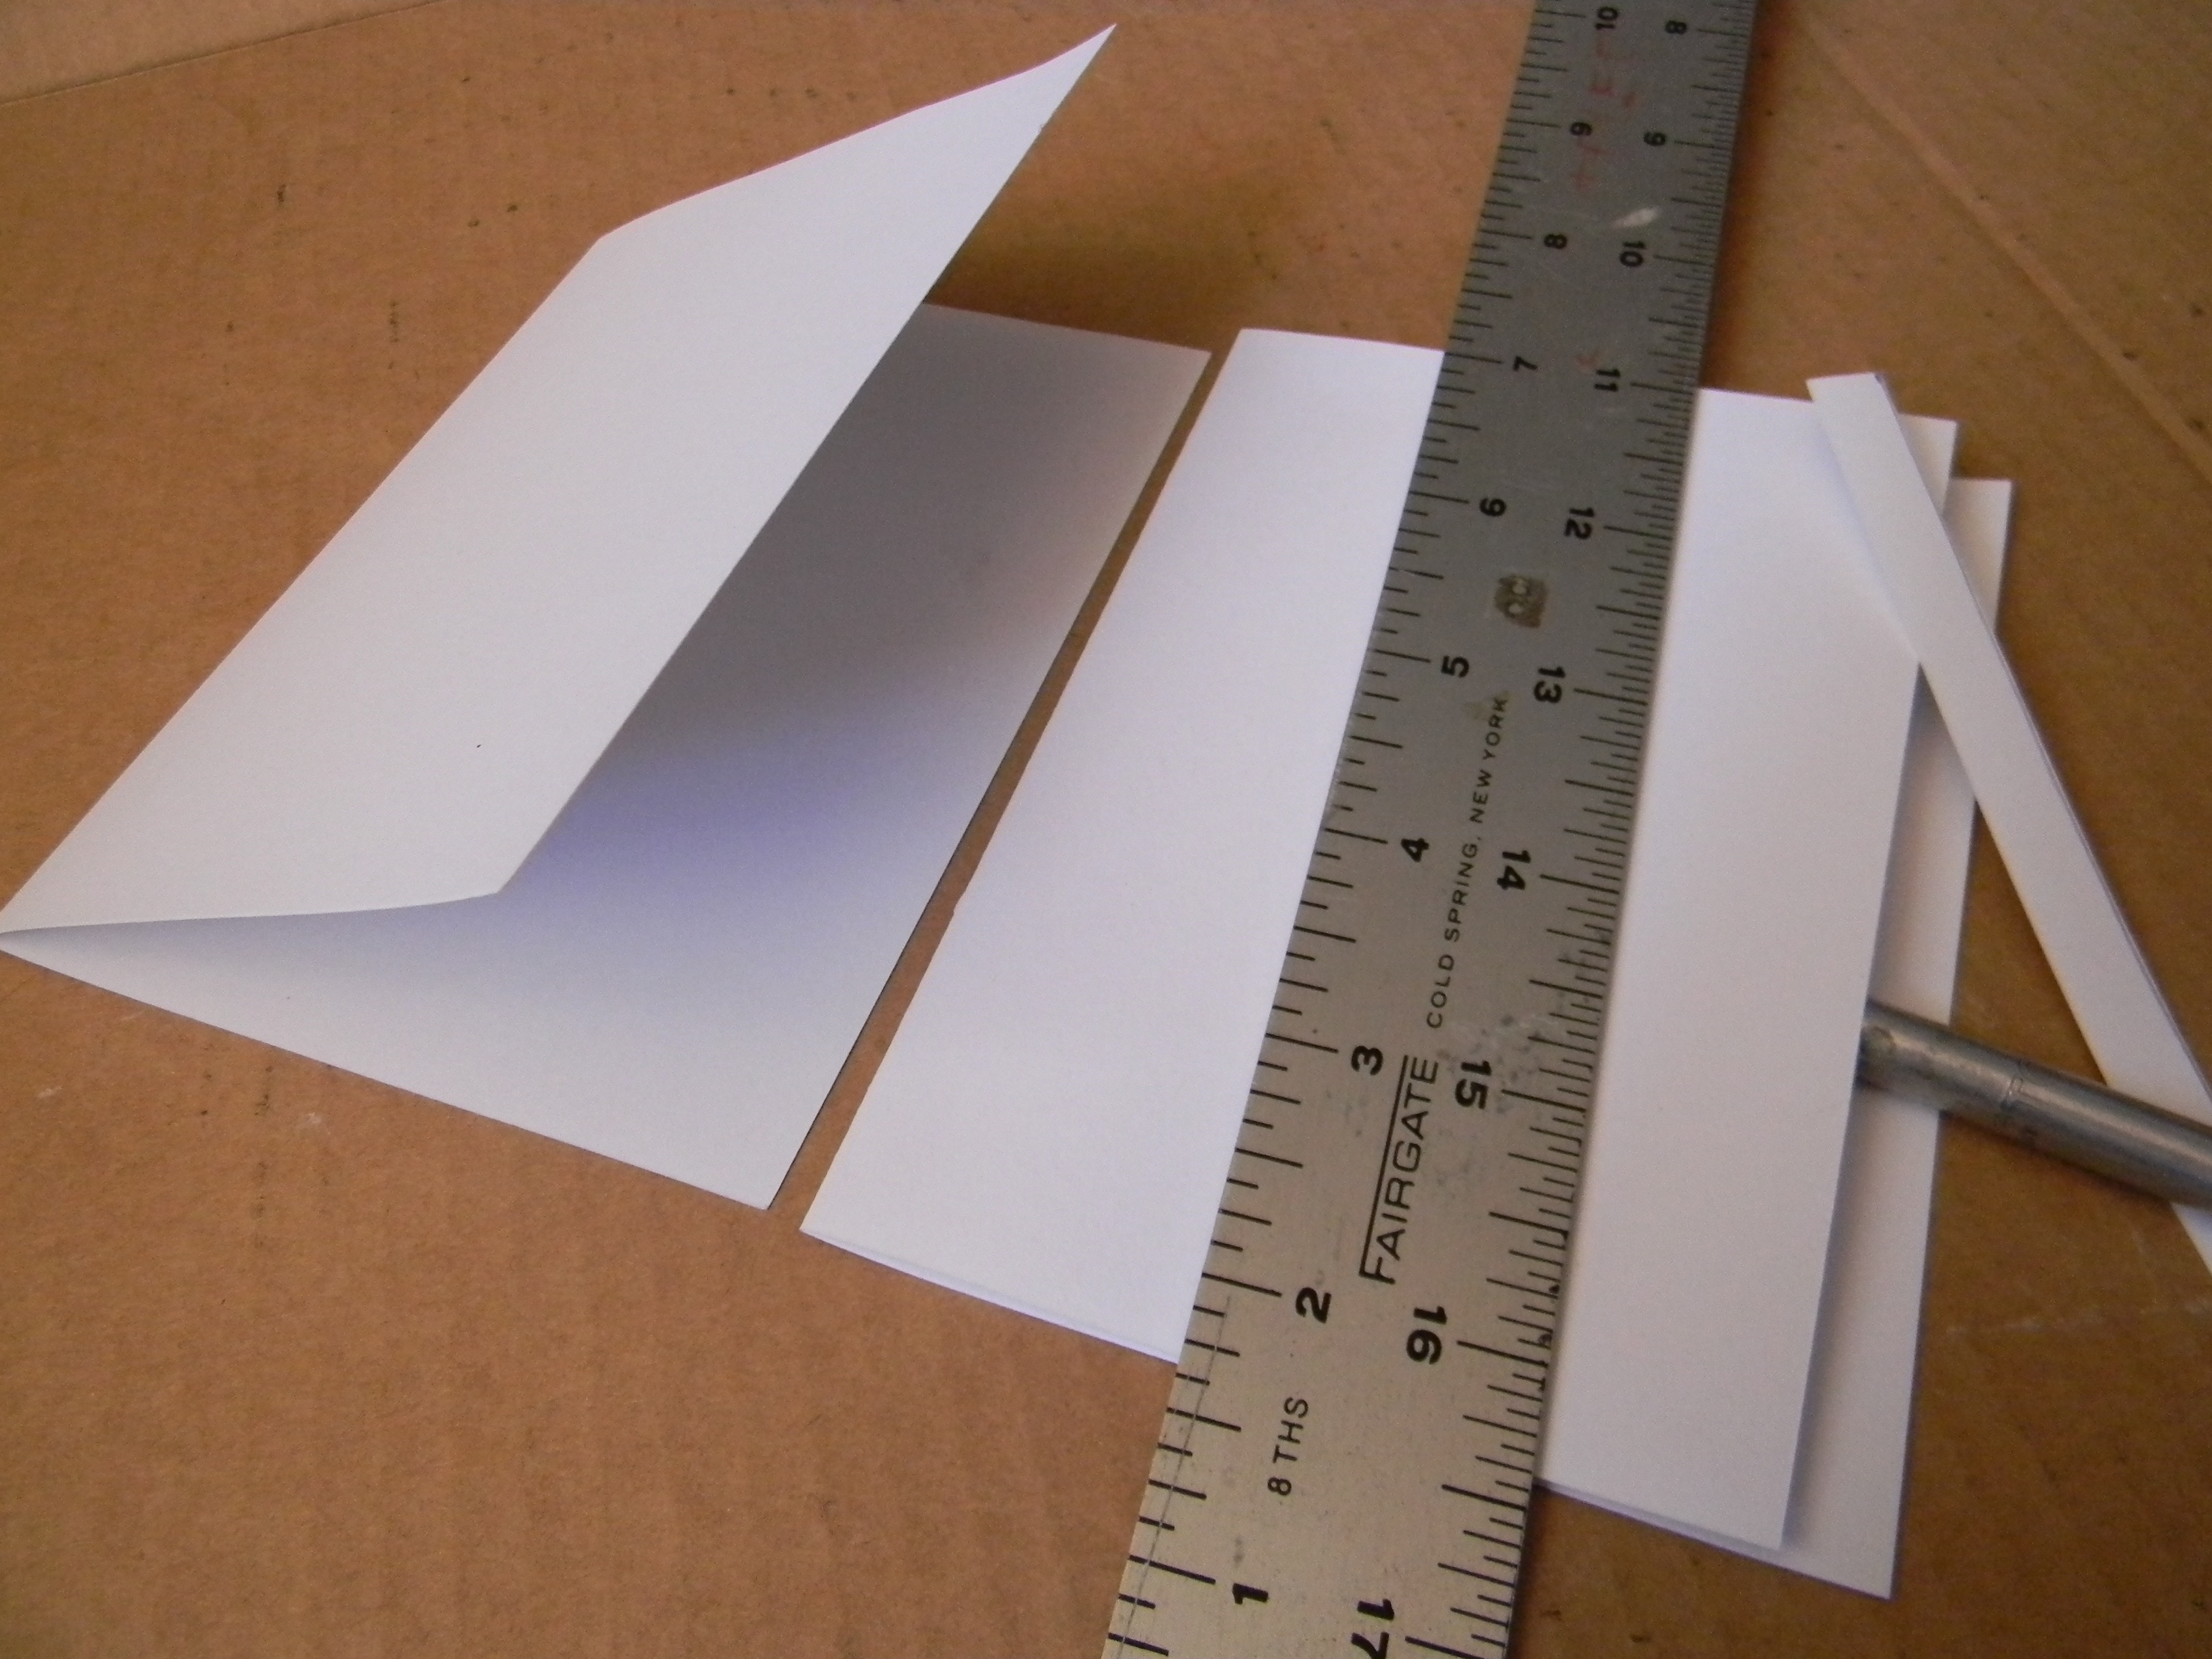
Cut a piece of ribbon that is approximately 5.5 inches long and 3/8 inch wide. I chose pink with white polka dots. Recycle whatever you have. Just be sure that the width of the ribbon corresponds to the width of paper you have cut from the card's front in step 1. You want the ribbon to be visible when the card is both closed and open.
I attached the ribbon to the card stock using a glue stick and then cut away the excess. It's easier to make the ribbon too long and cut any length you don't need, than to end up with a piece that is too short.


Step 3
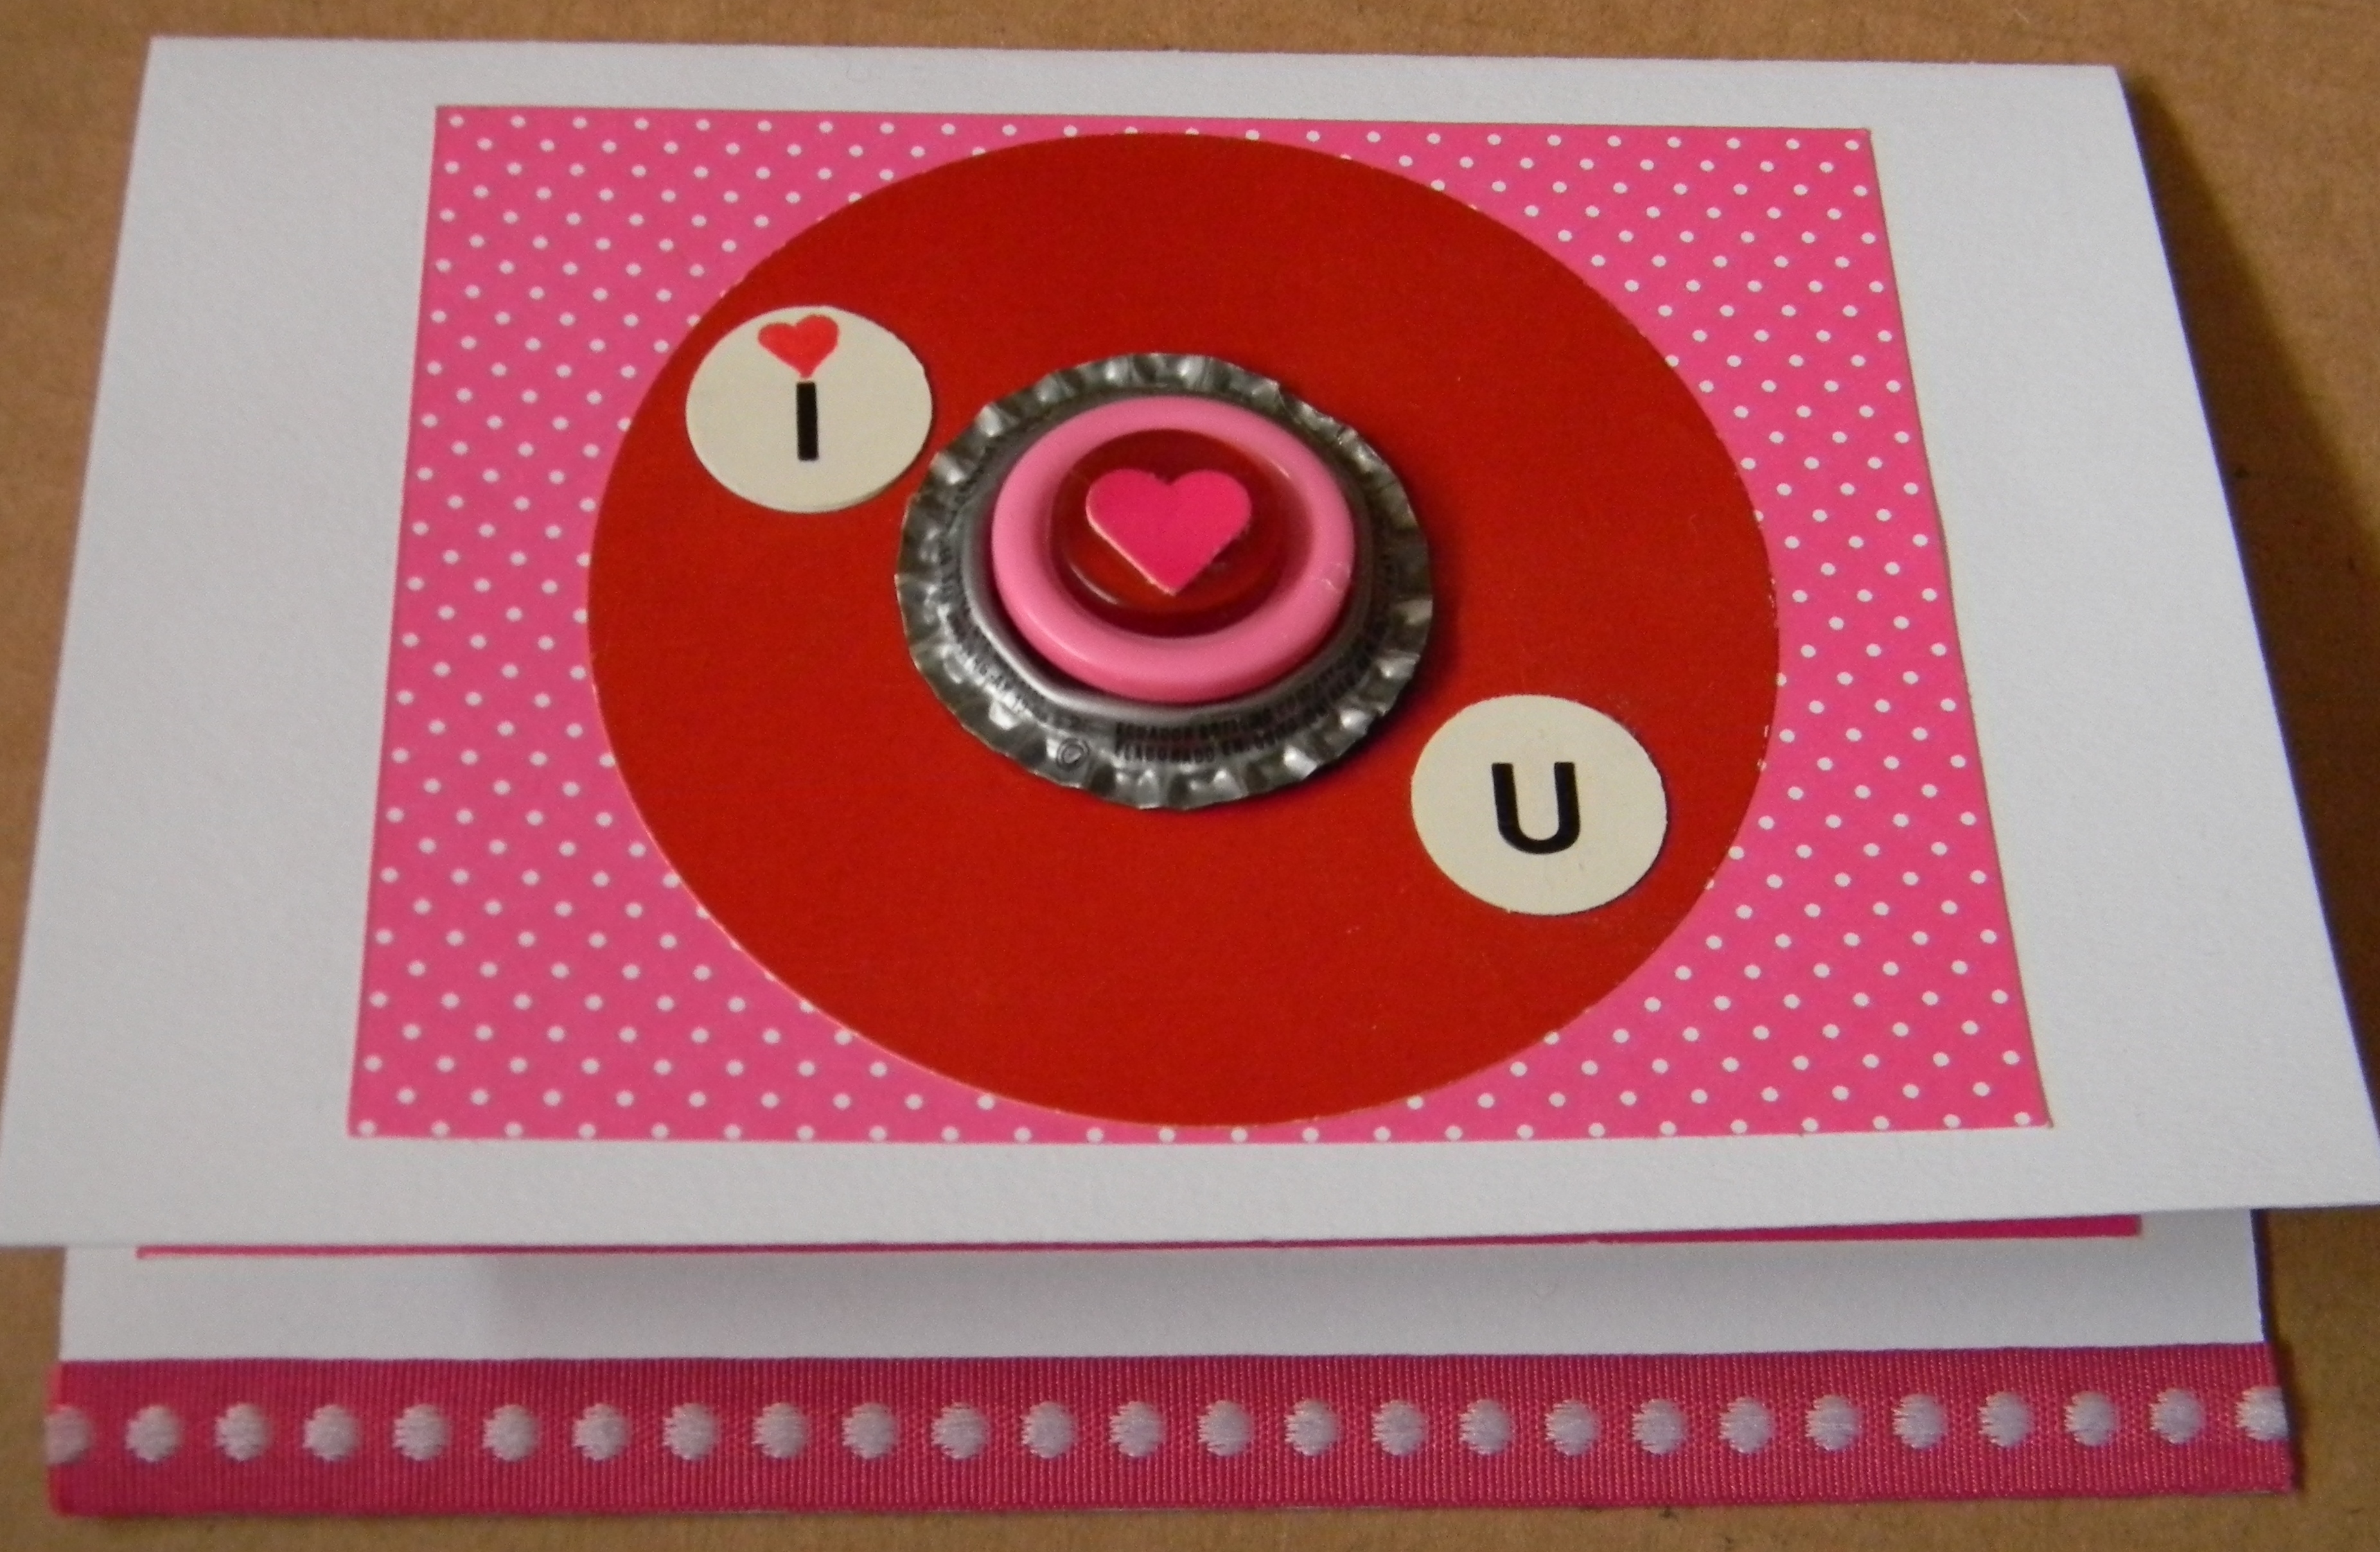
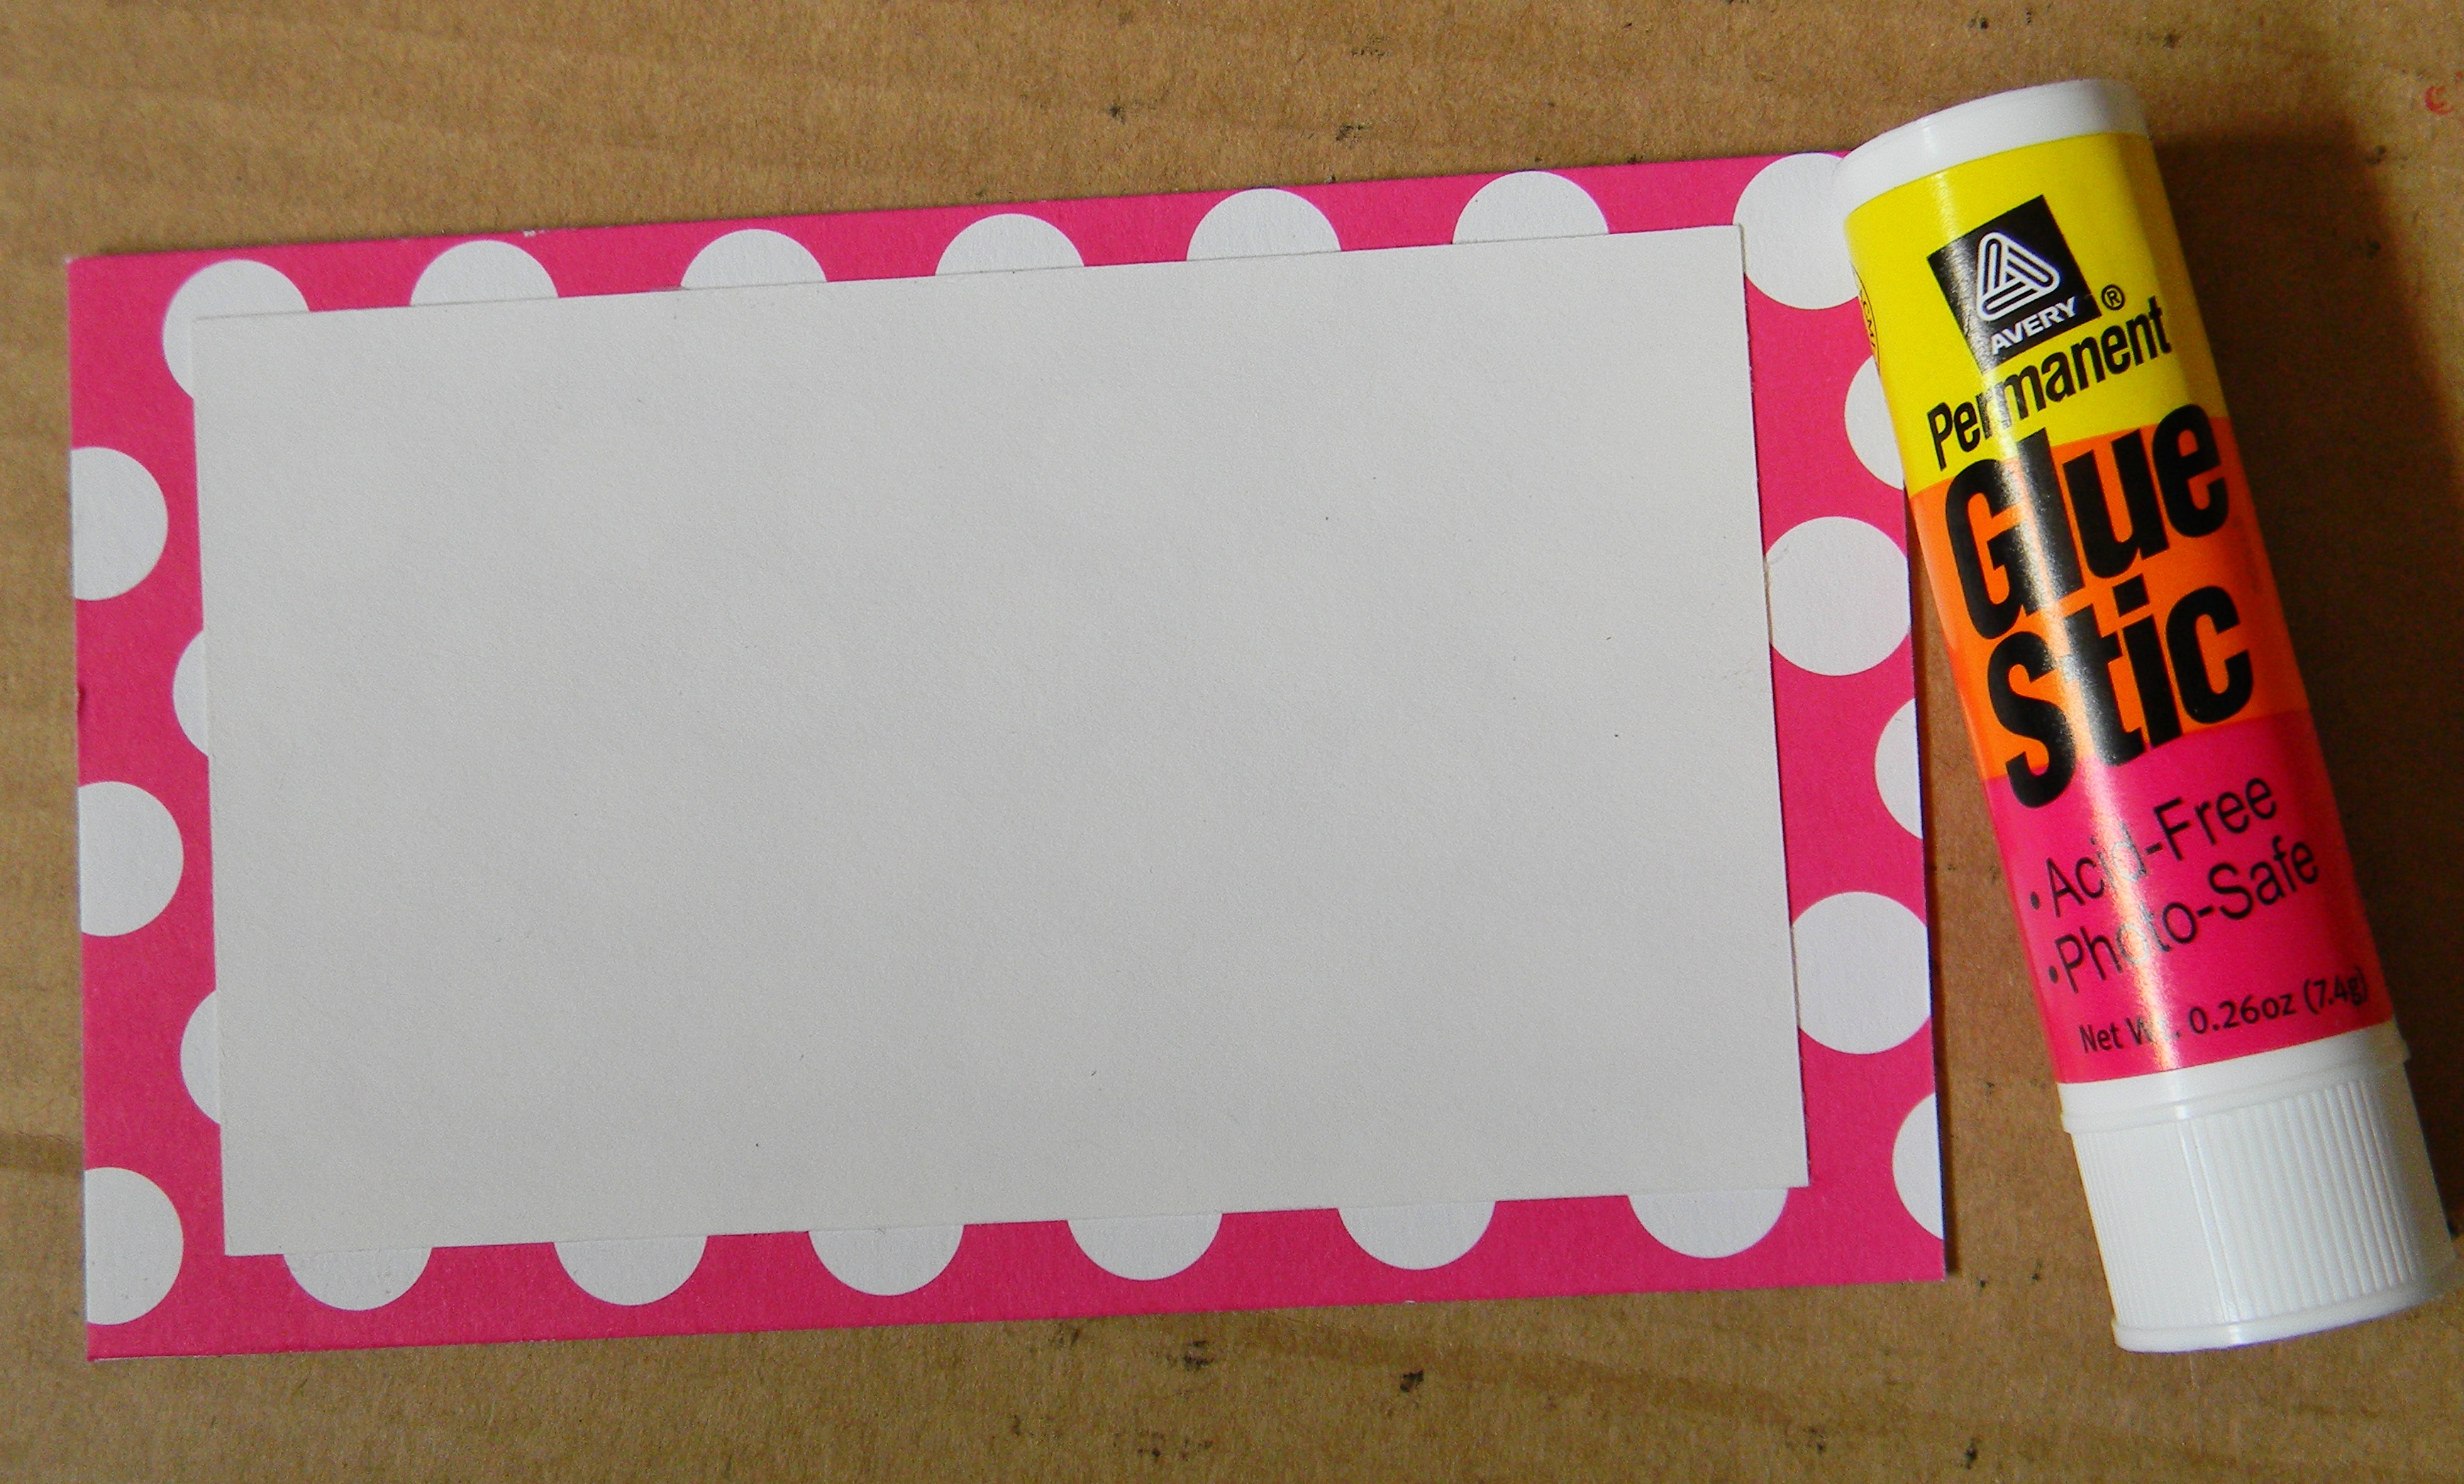
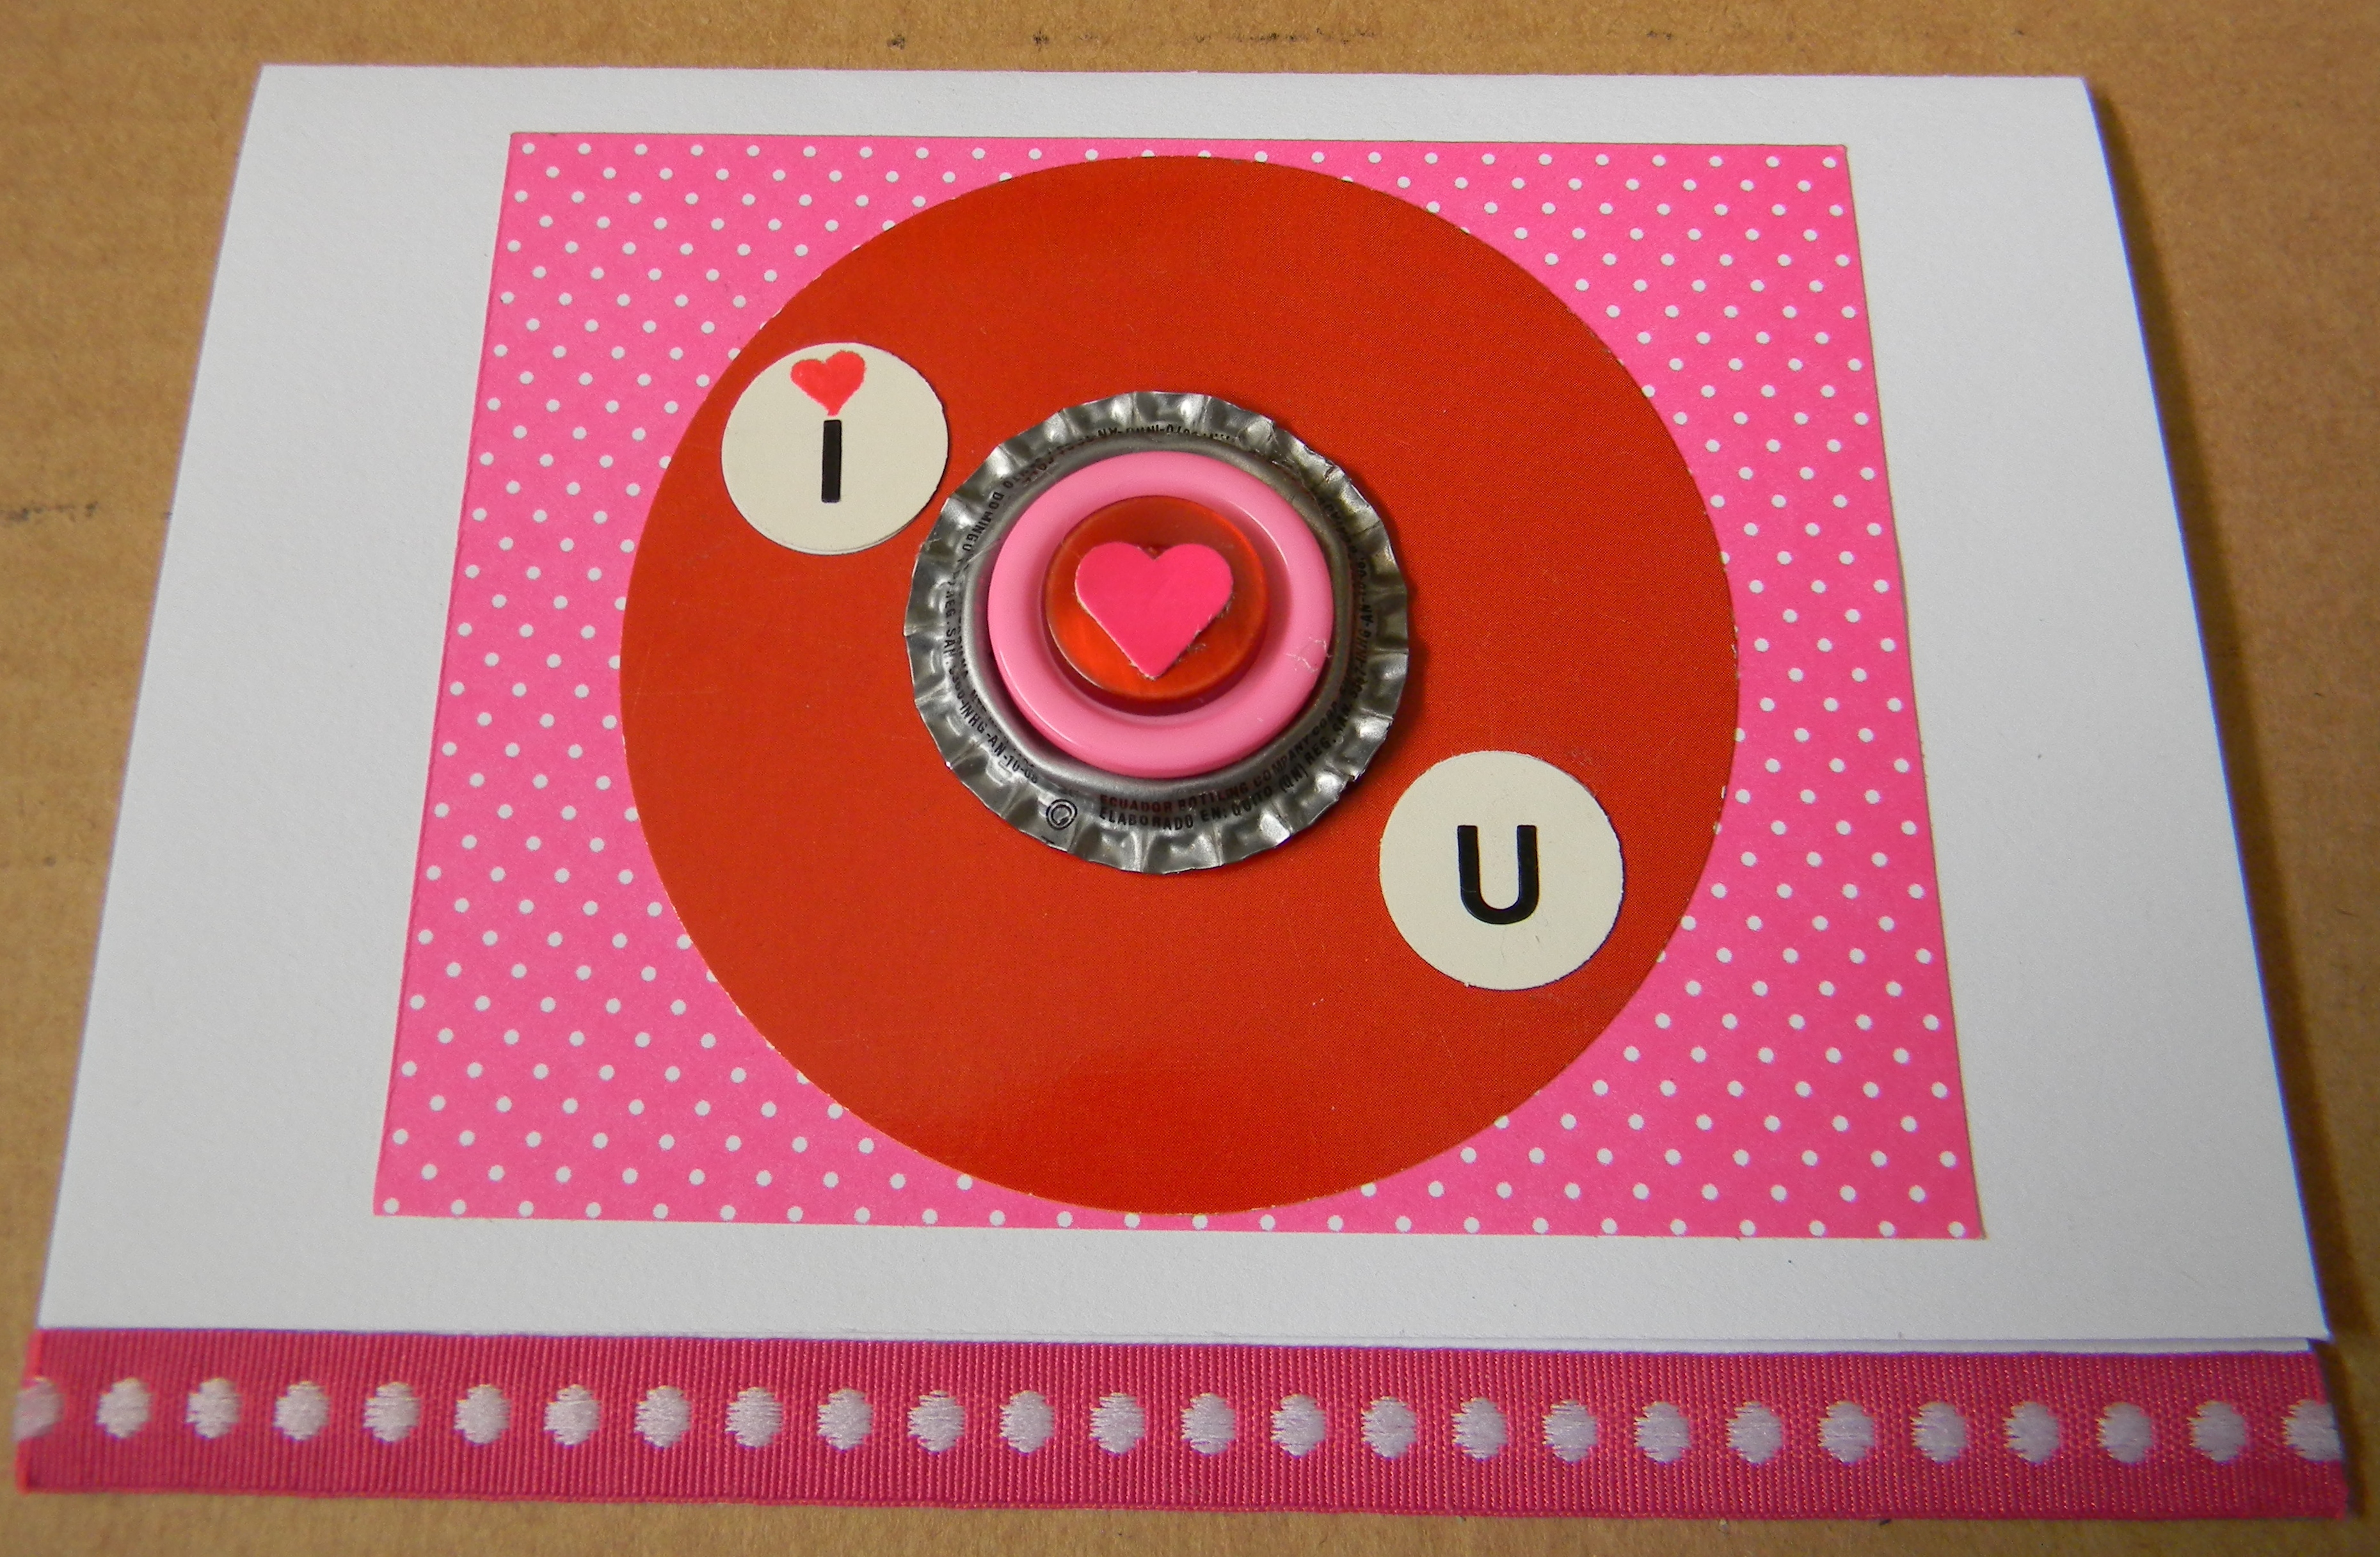
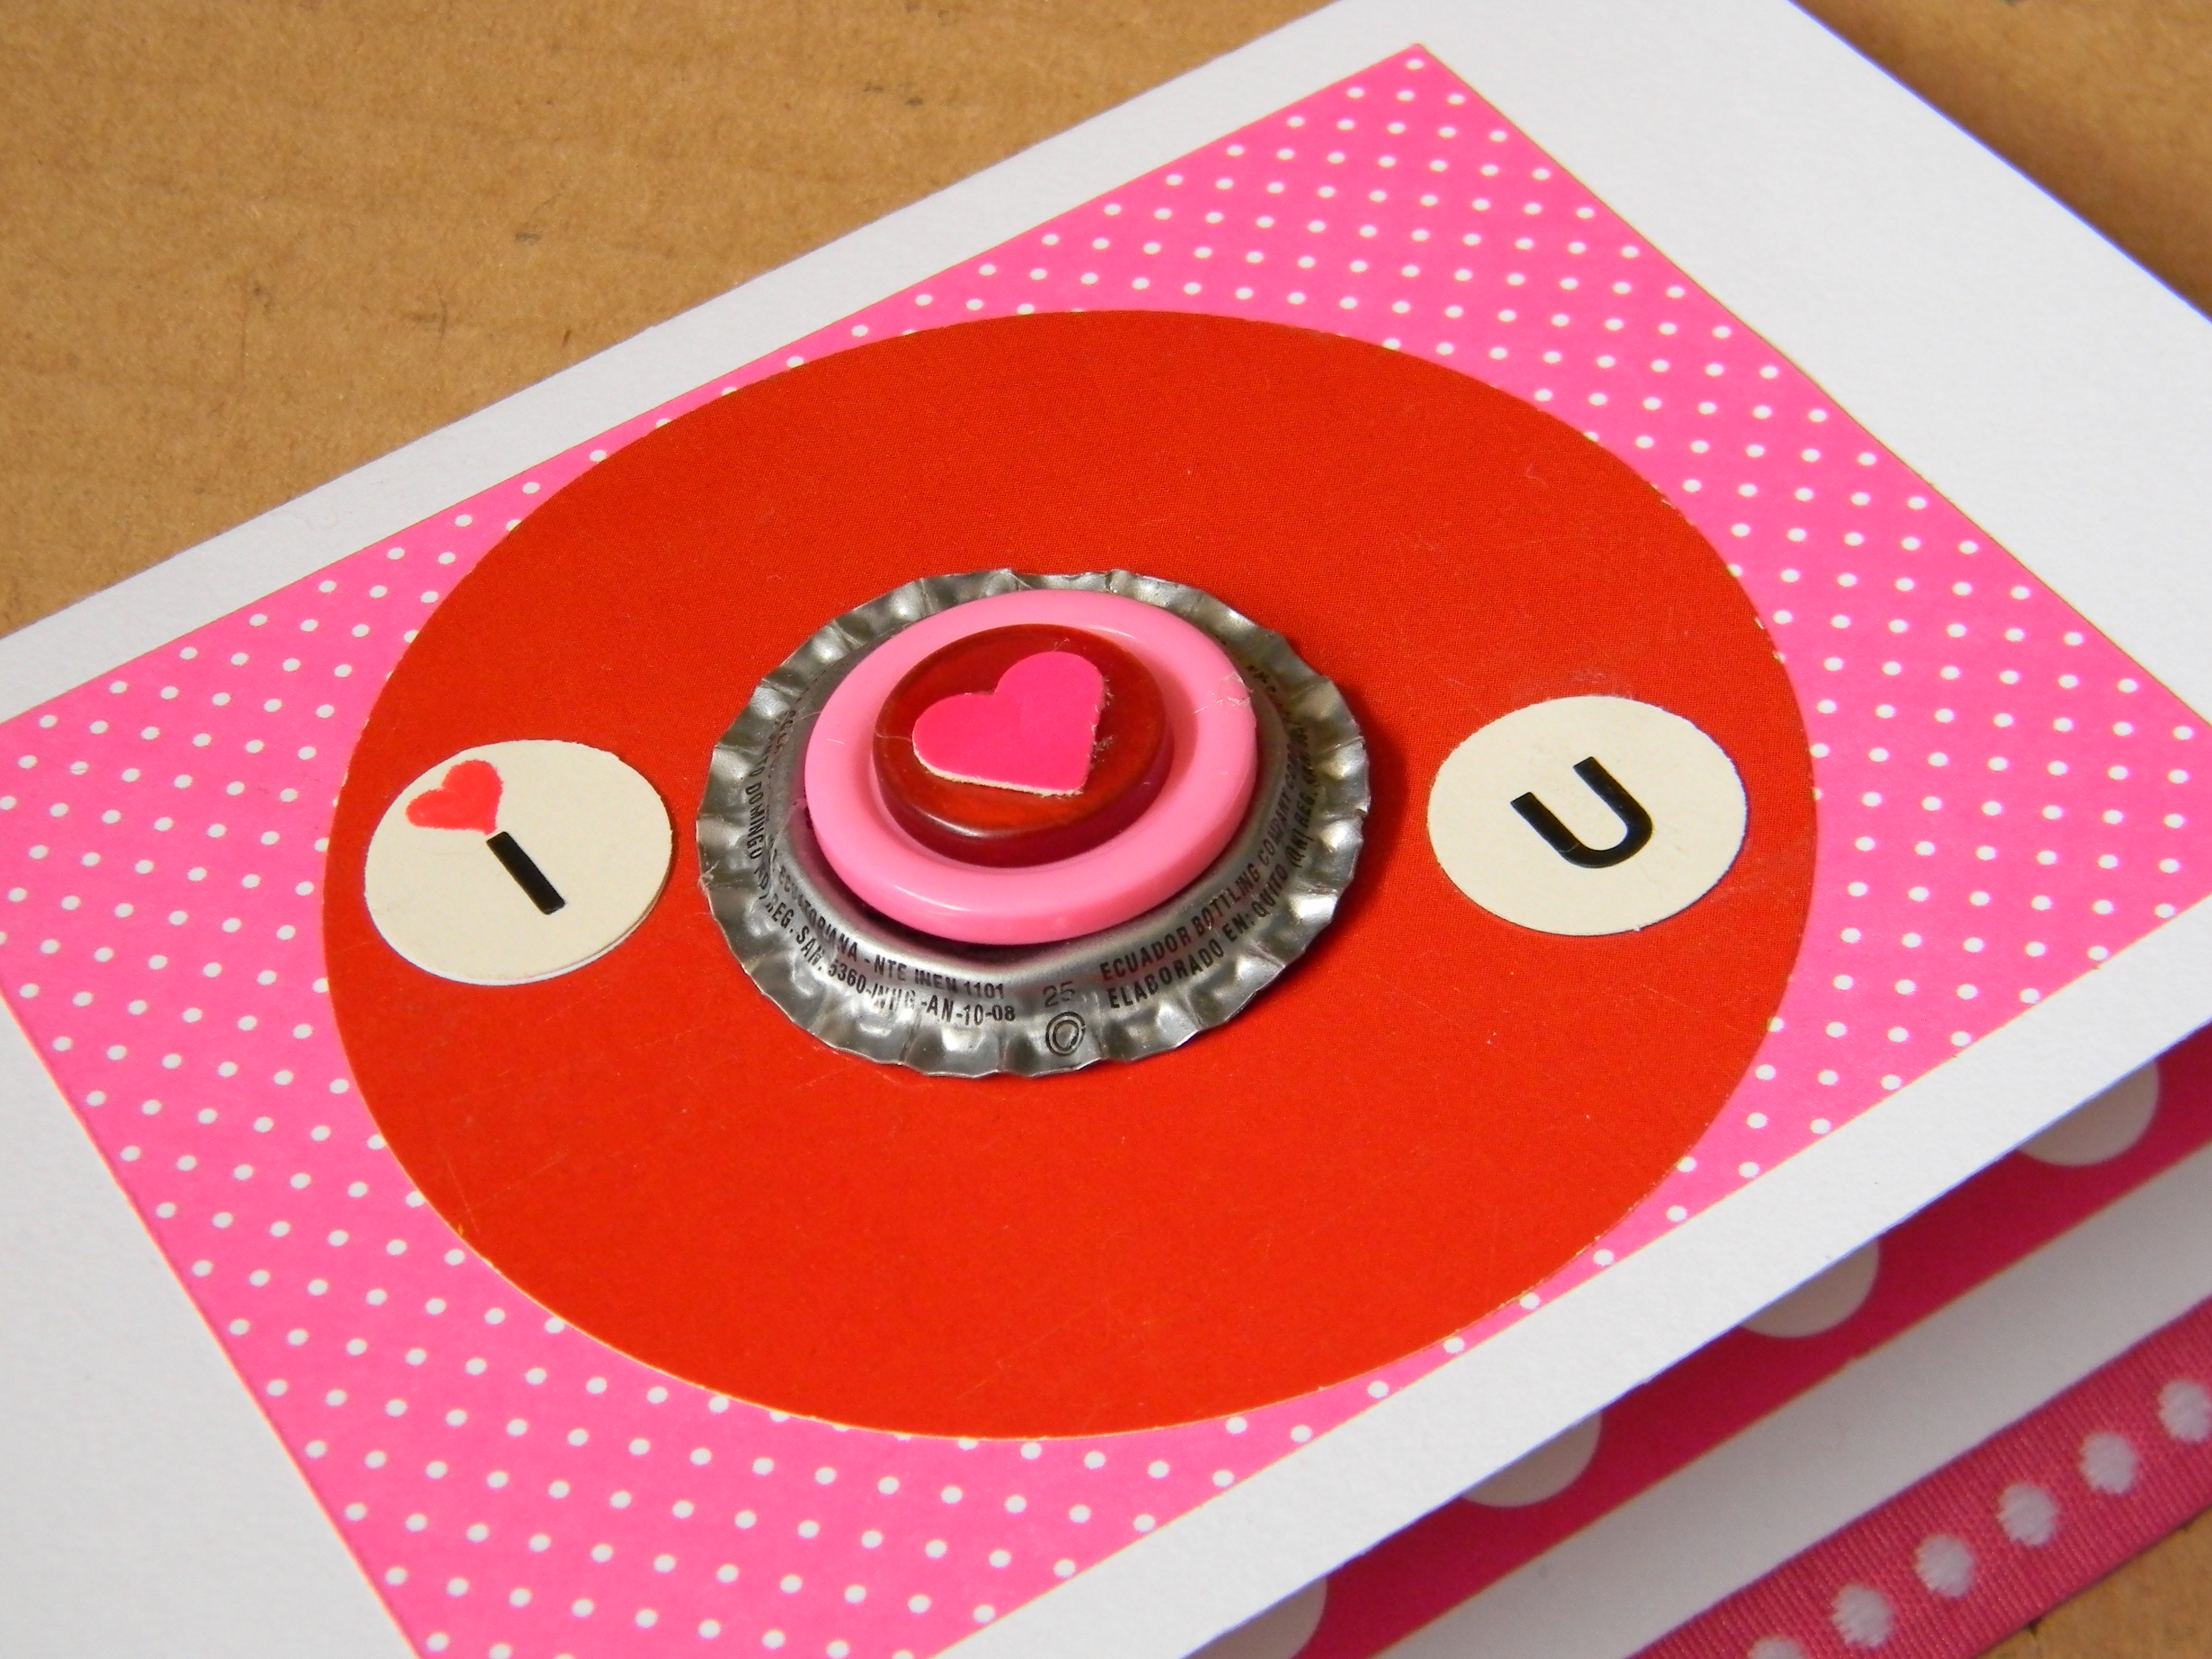
Cut and glue together the matte and circle that are the focal point of the card's front.
For the matte, I used a pink and while polka dot paper that I had left over from another project. Use whatever you have handy. You can even cut the paper from a piece of junk mail, magazine, flyer, or phone book. I cut my matte using a ruler and X-ACTO knife but scissors will work, as well. The matte should be approximately 3 x 4 inches.
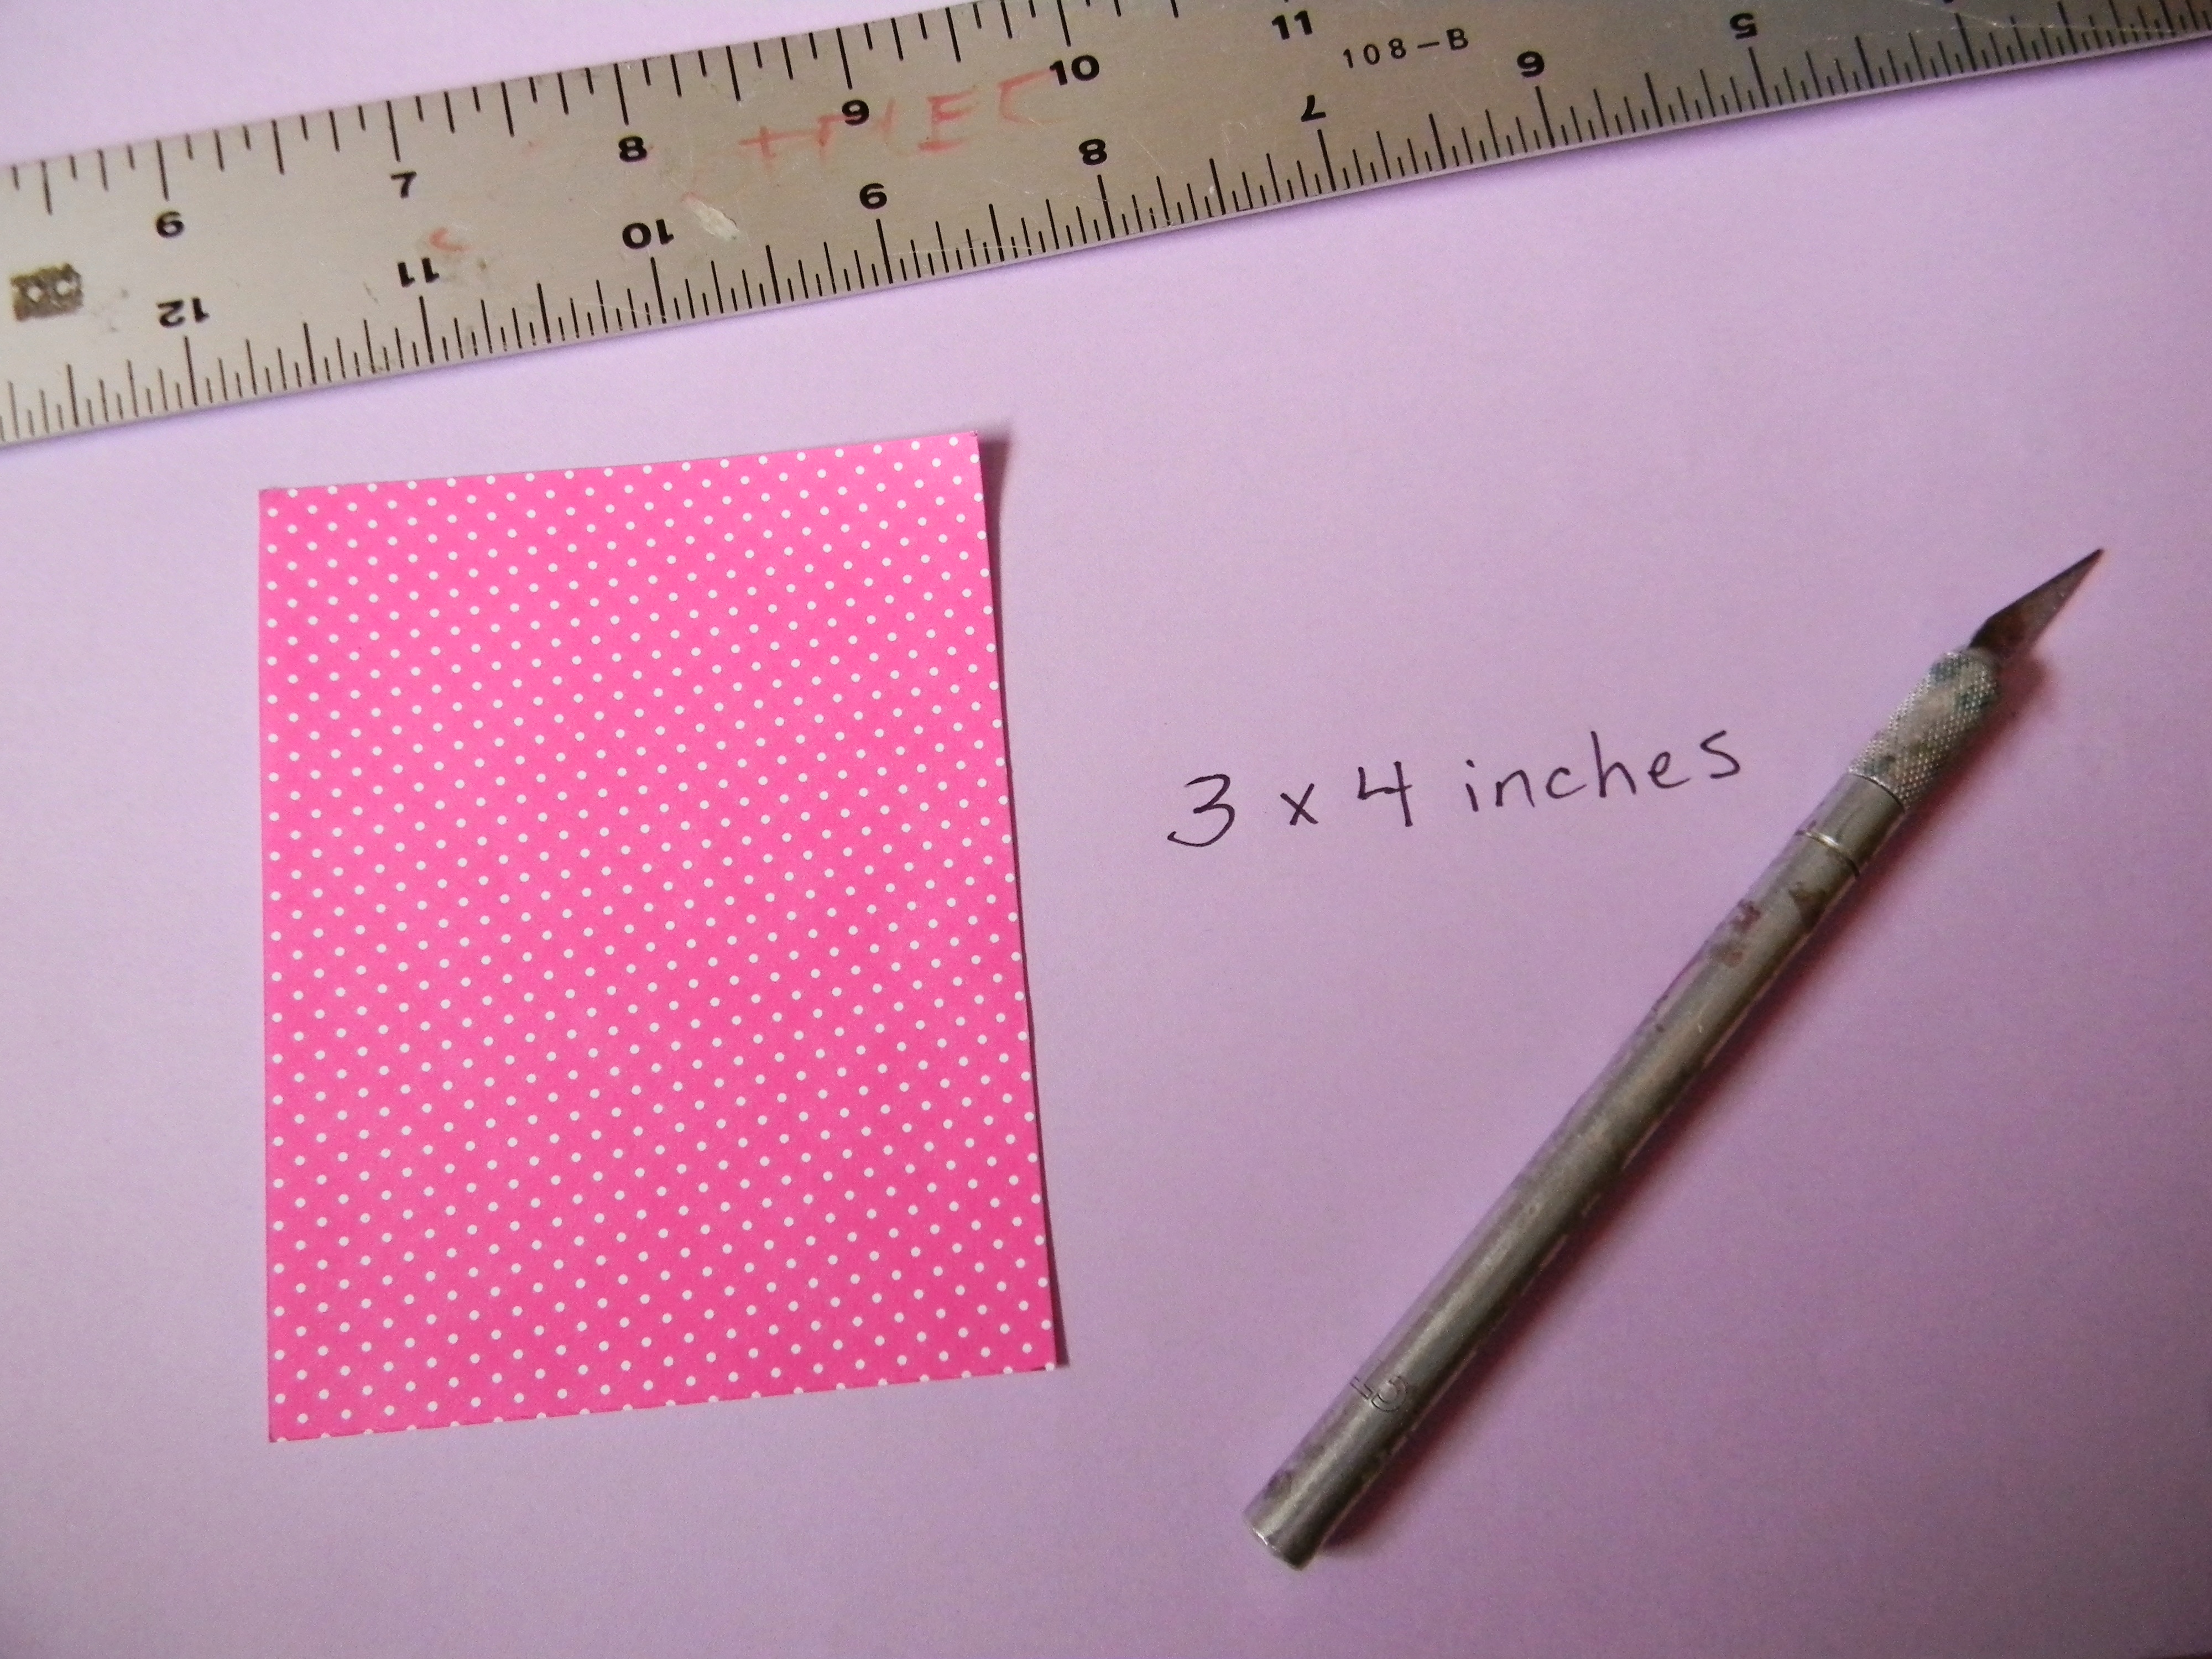
Next, cut a 3 inch circle from red paper. I recycled the cover from last year's, out-of-date phone book, which just happened to be the color I wanted. I used a 3 inch paper punch, but a stencil or any three-inch circular object you can trace works just as well. You can then cut out the circle with scissors.
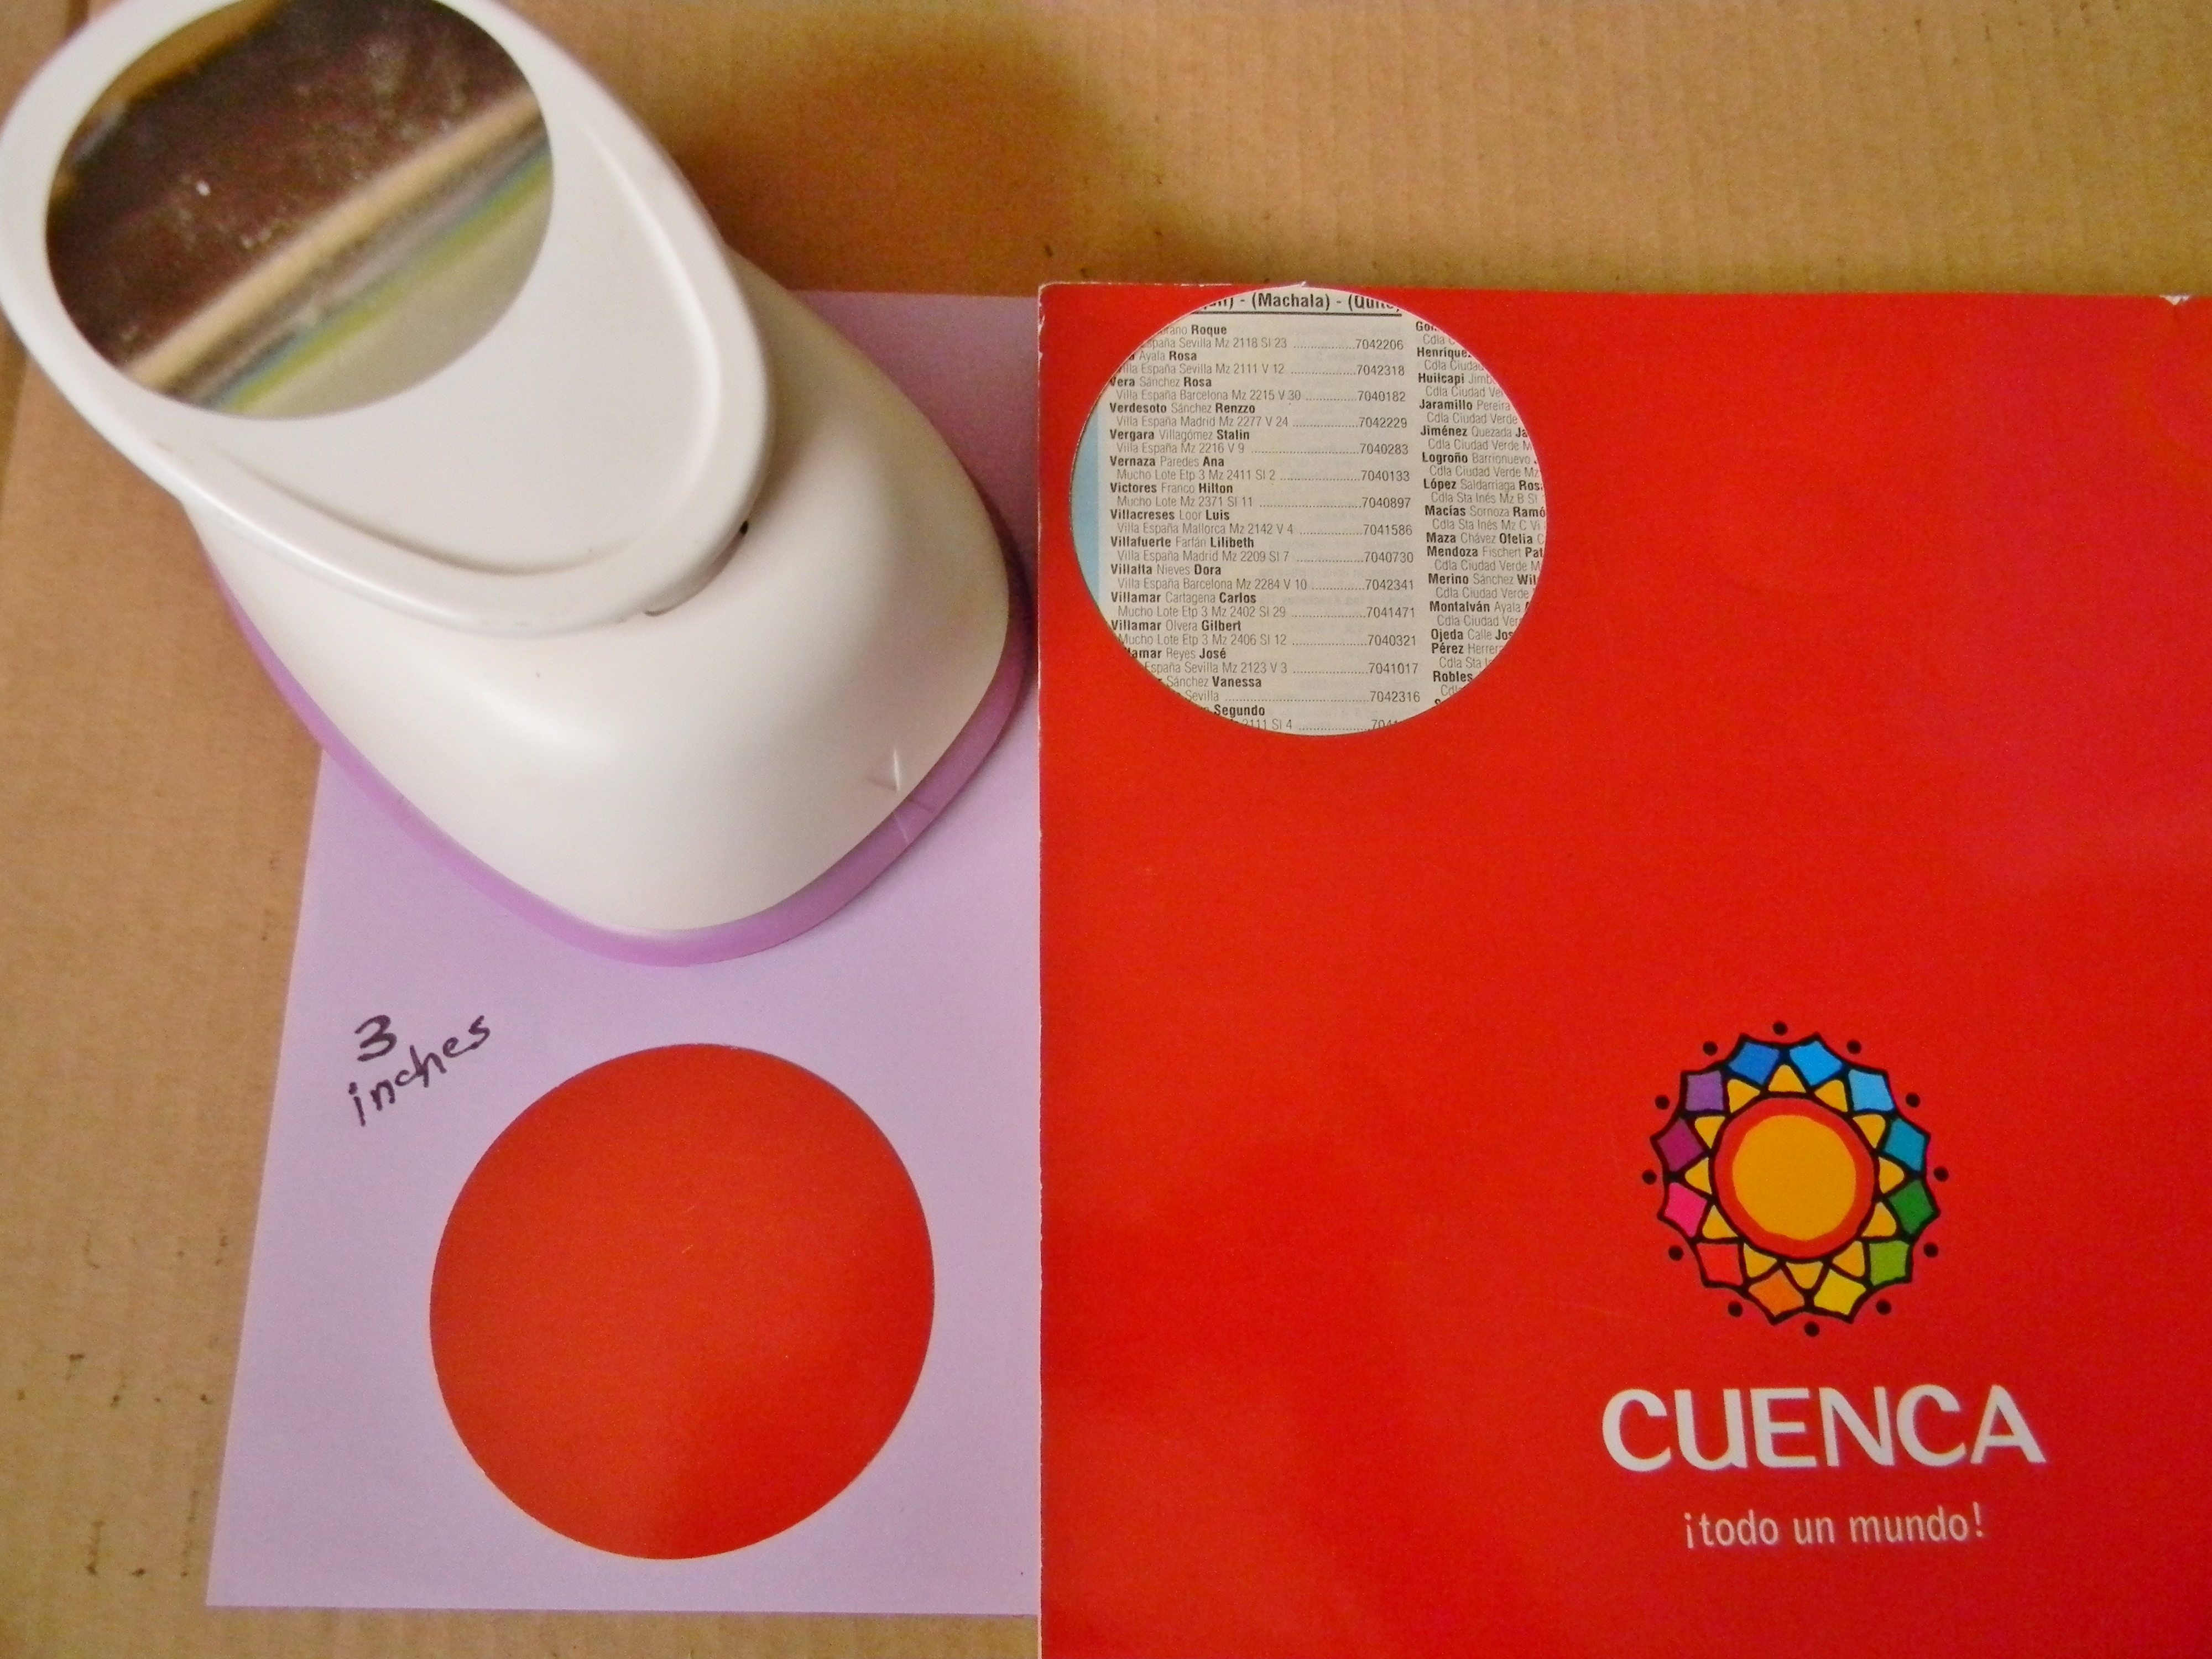
Finally, glue the circle to the center of your 3 x 4 inch matte and attach that to the center of your card front. I used a glue stick, but if you don't have one, grab whatever adhesive you have.

Step 4
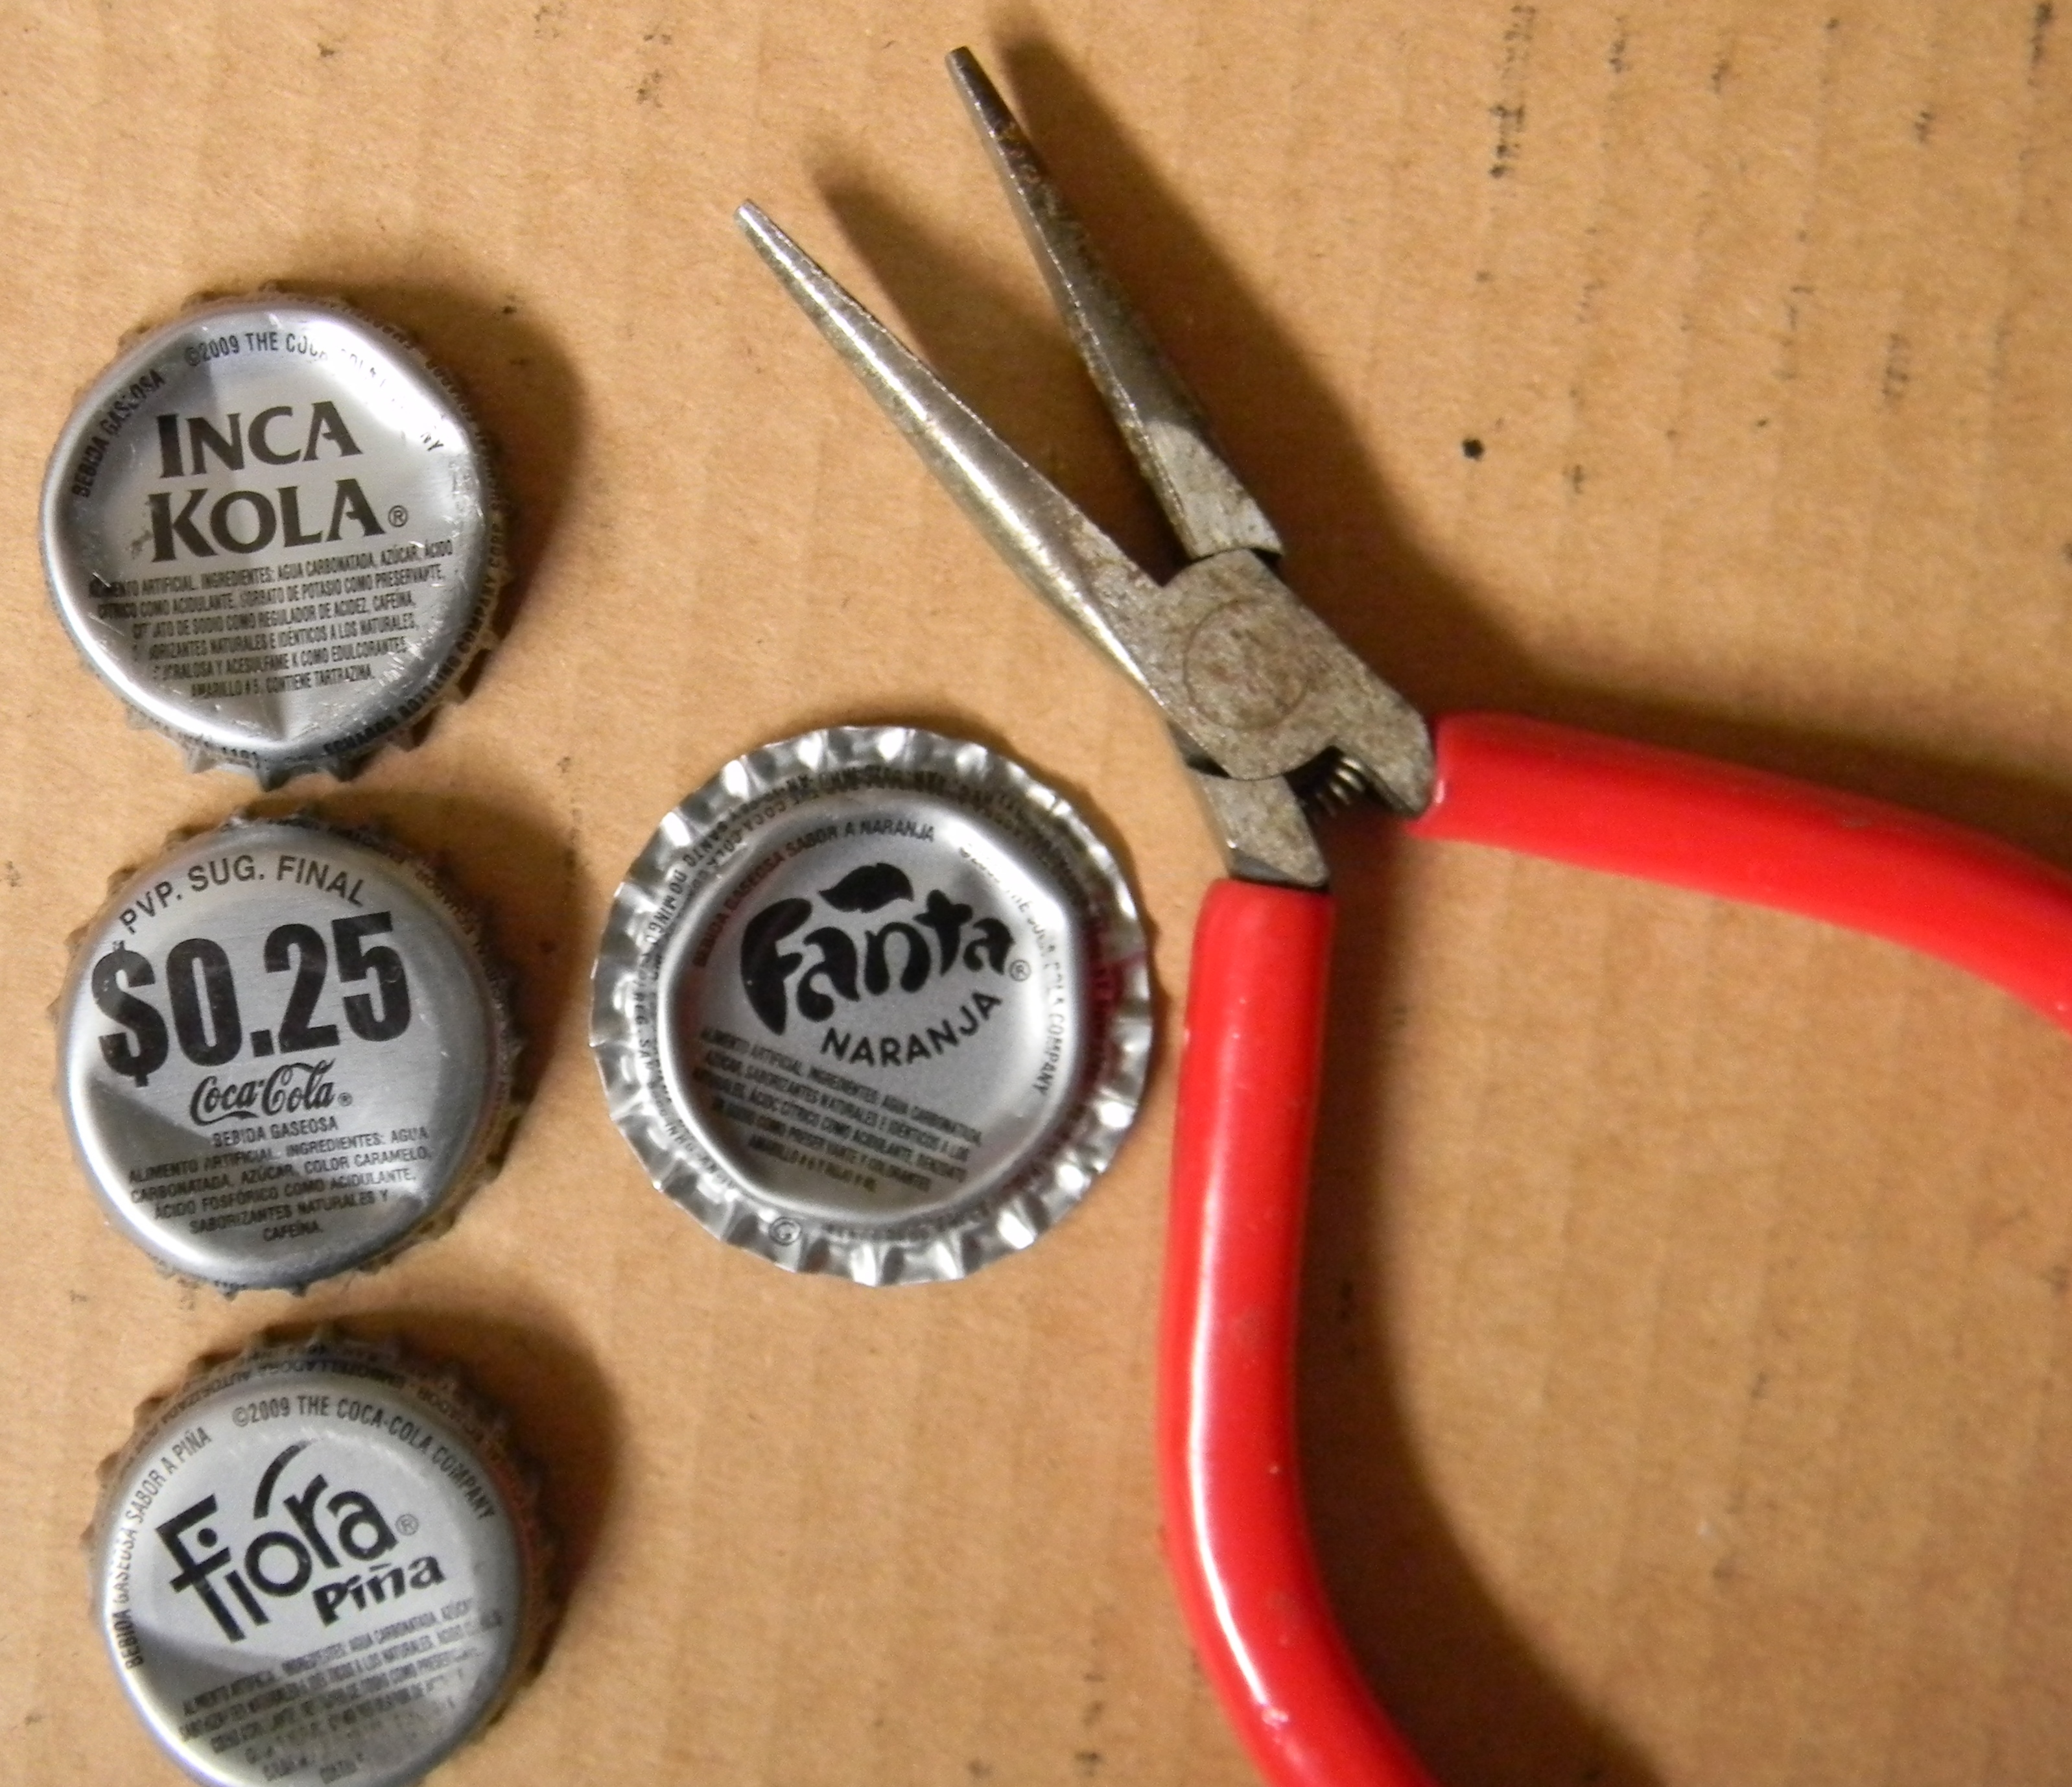
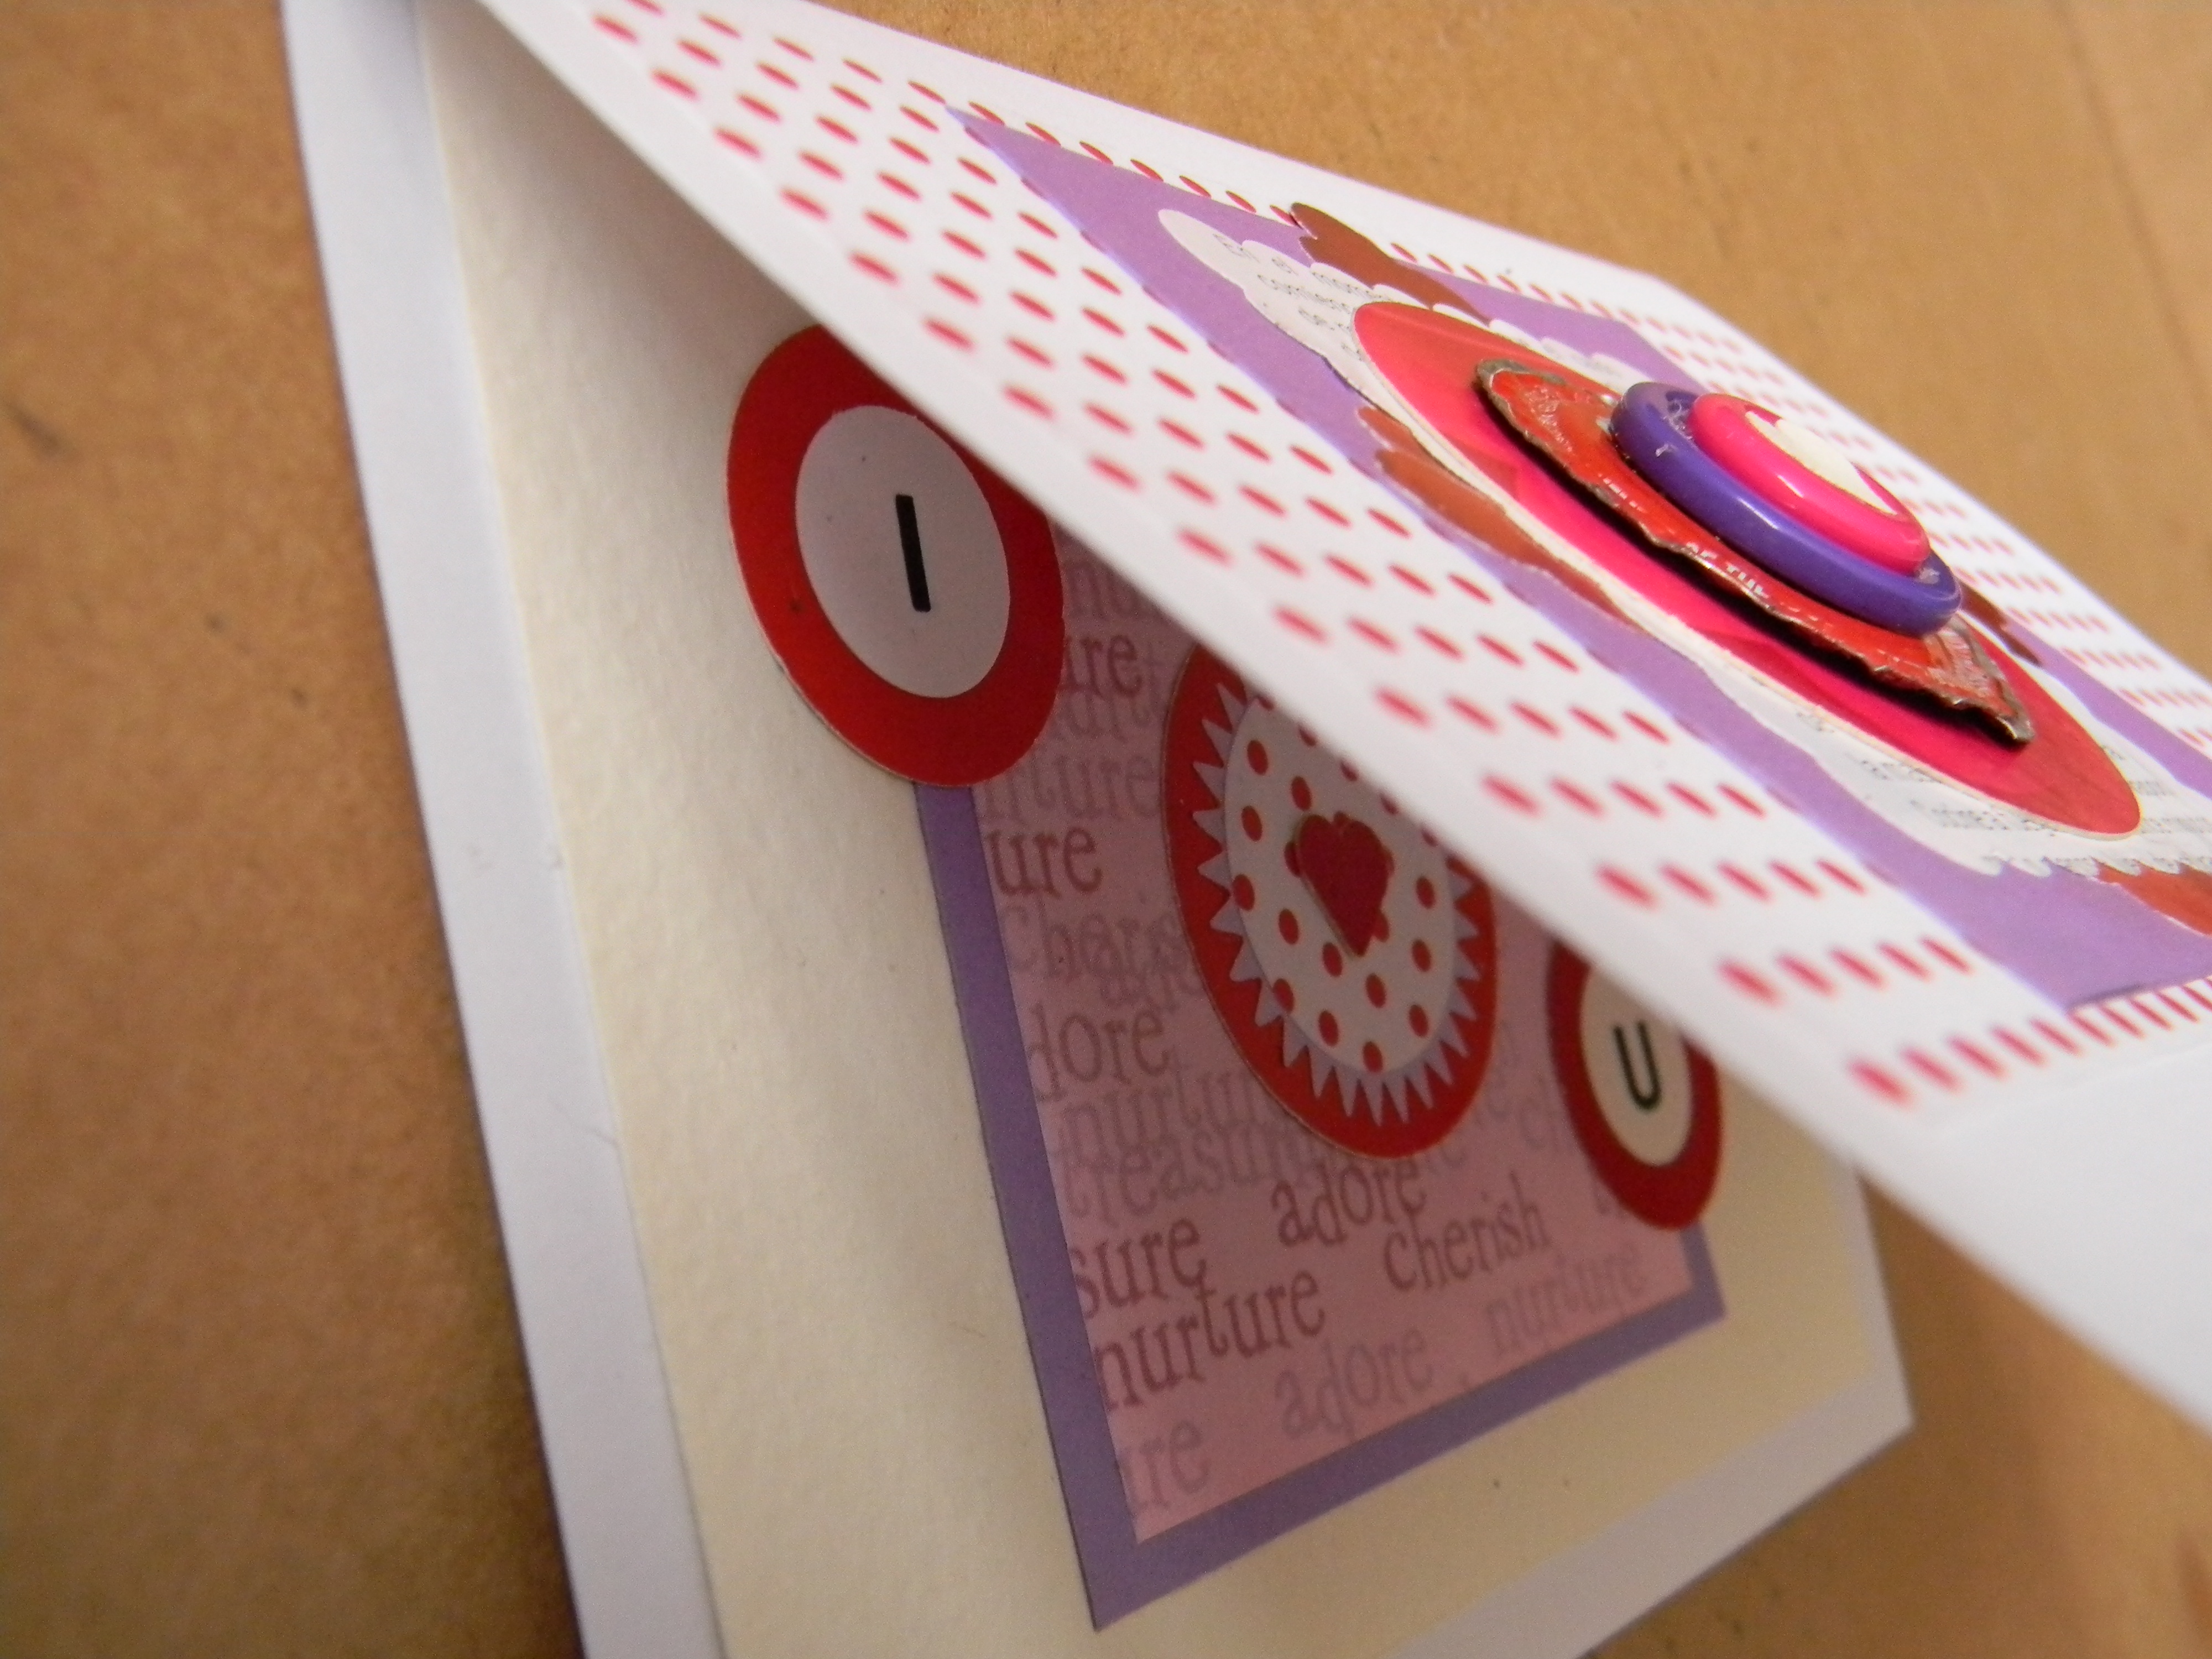
This step involves assembling the bottle-cap-button-heart ornament that will anchor the front of your card.
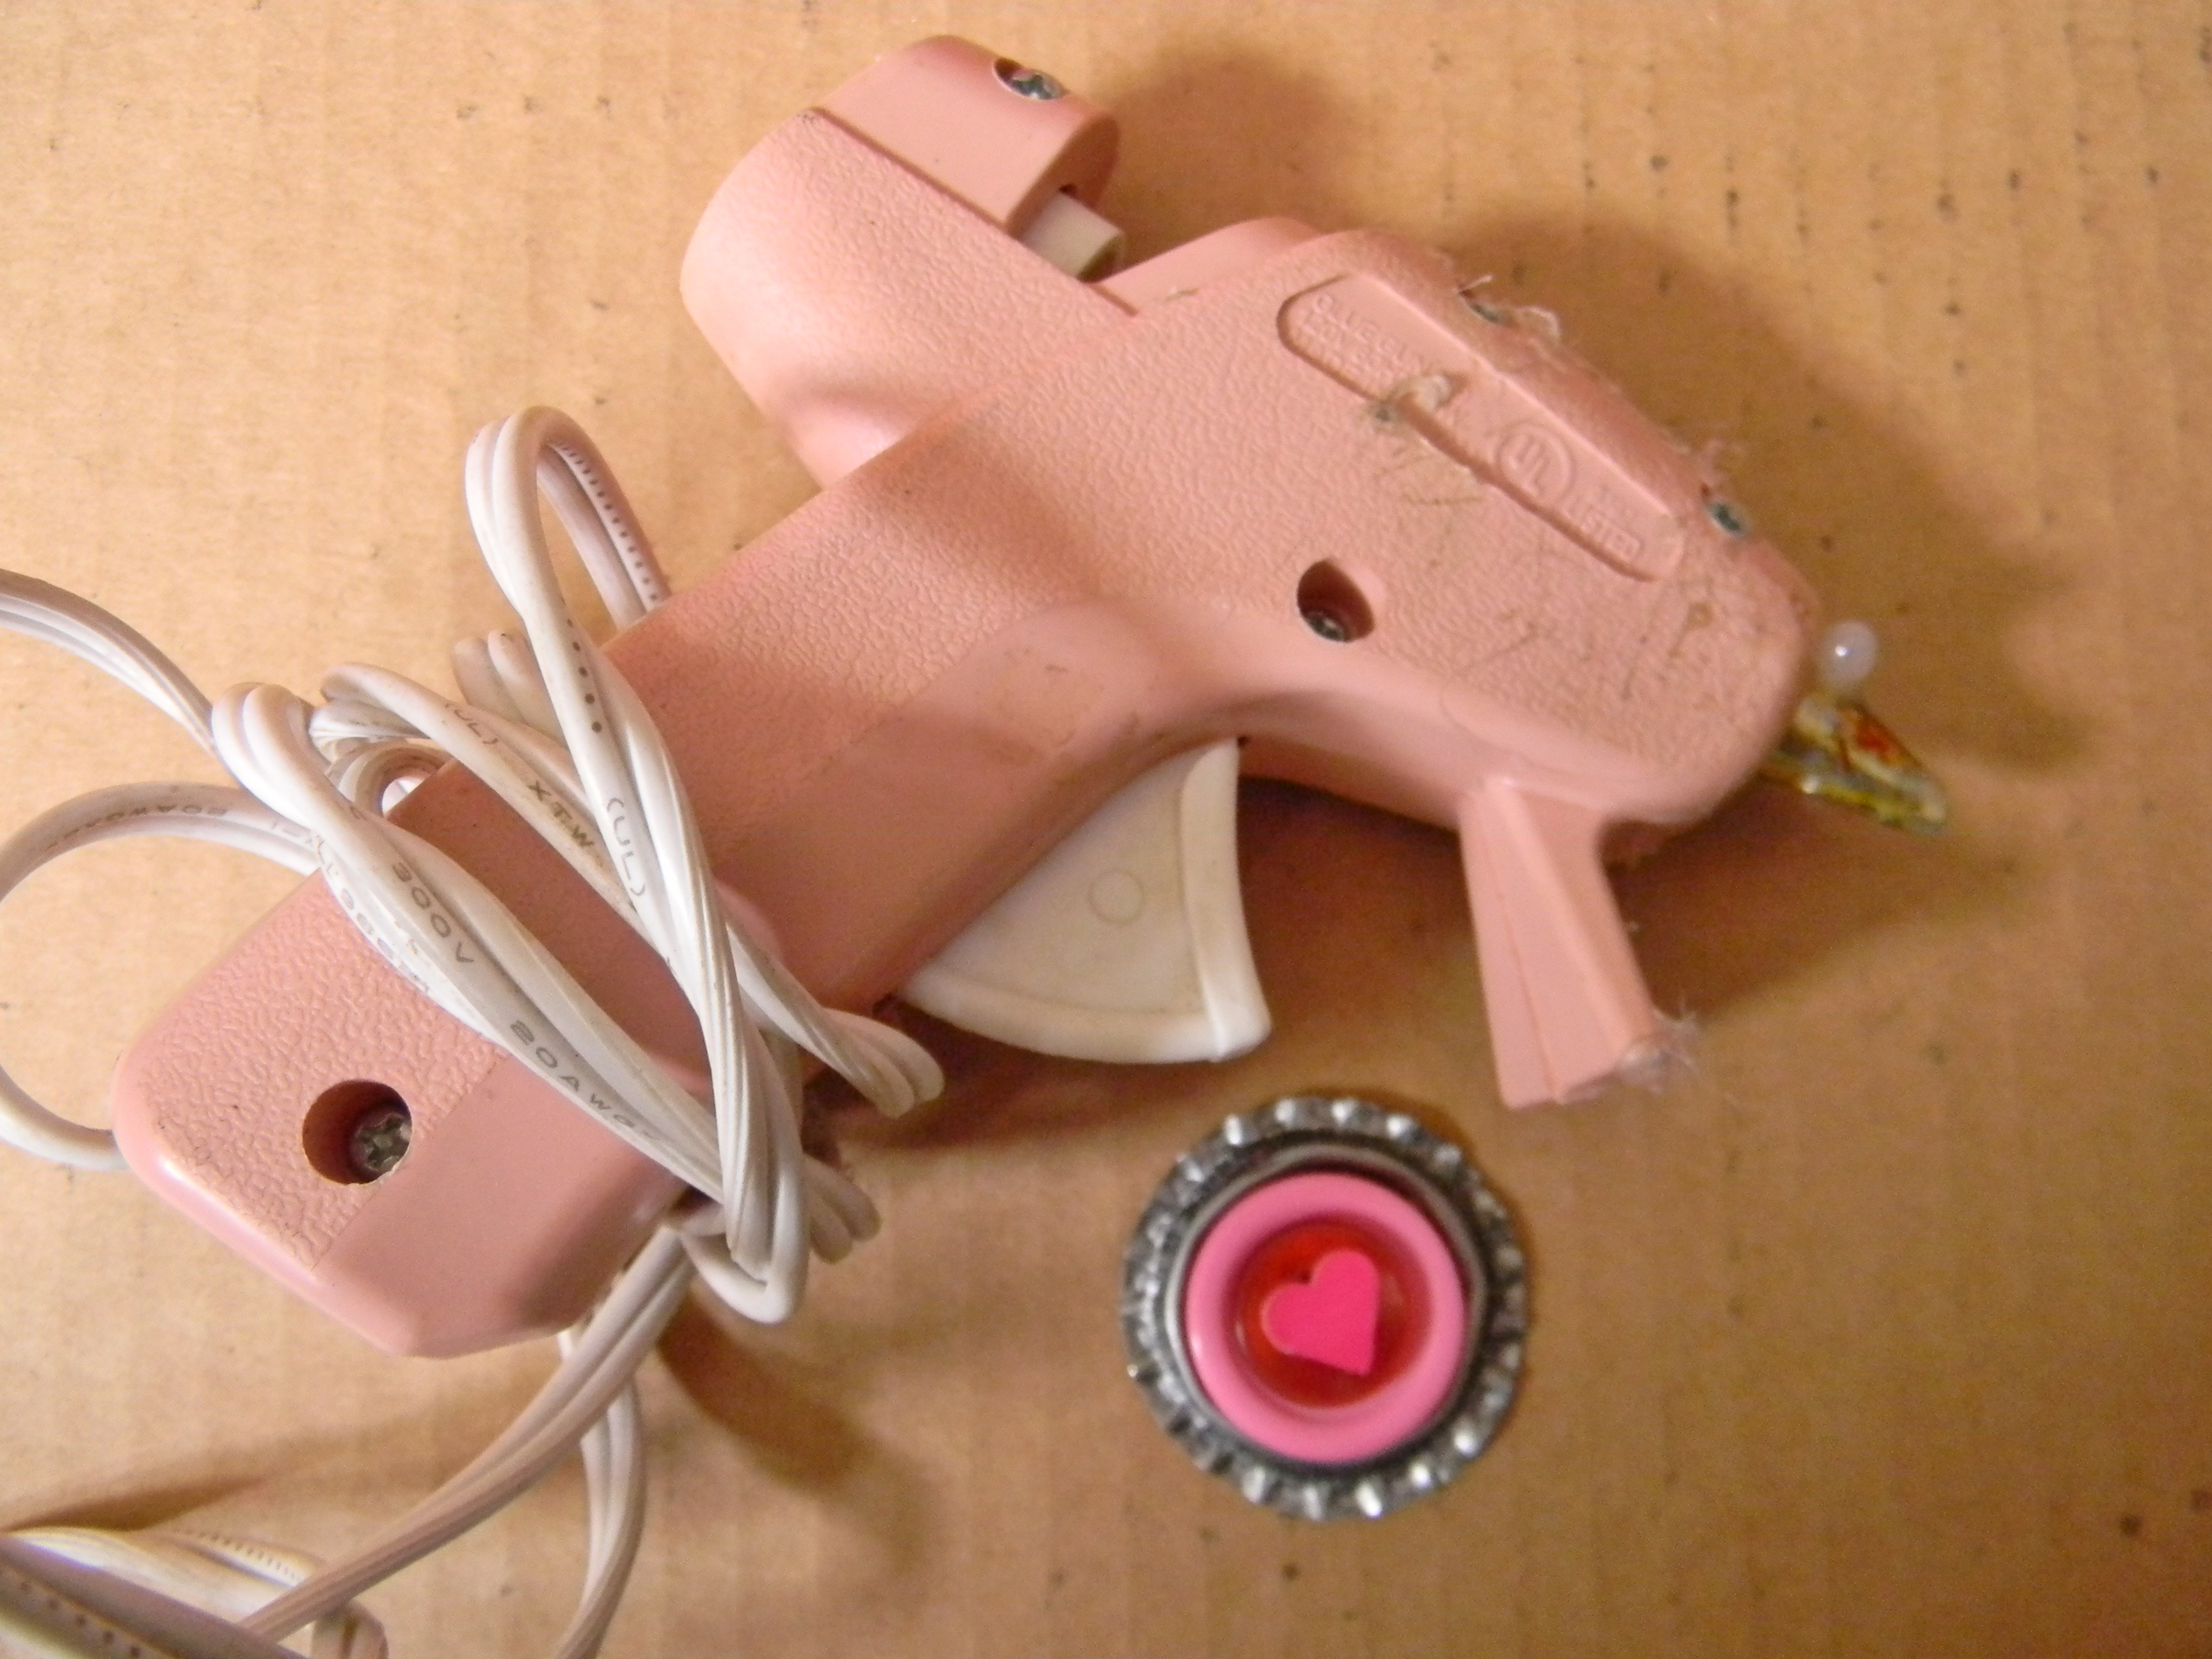
First, flatten a metal bottle can, using needle-nose pliers. If you don't have pliers, try a hammer or anything else that will allow you to "ruffle" the cap's edges.
Next, find buttons (I chose pink and red) that are approximately 1 inch and a half-inch each. Eventually, you will glue these to the top of the bottle cap, with the larger button beneath the smaller. Again, use whatever buttons you have on hand, in any colors or patterns that evoke Valentine's Day for you.


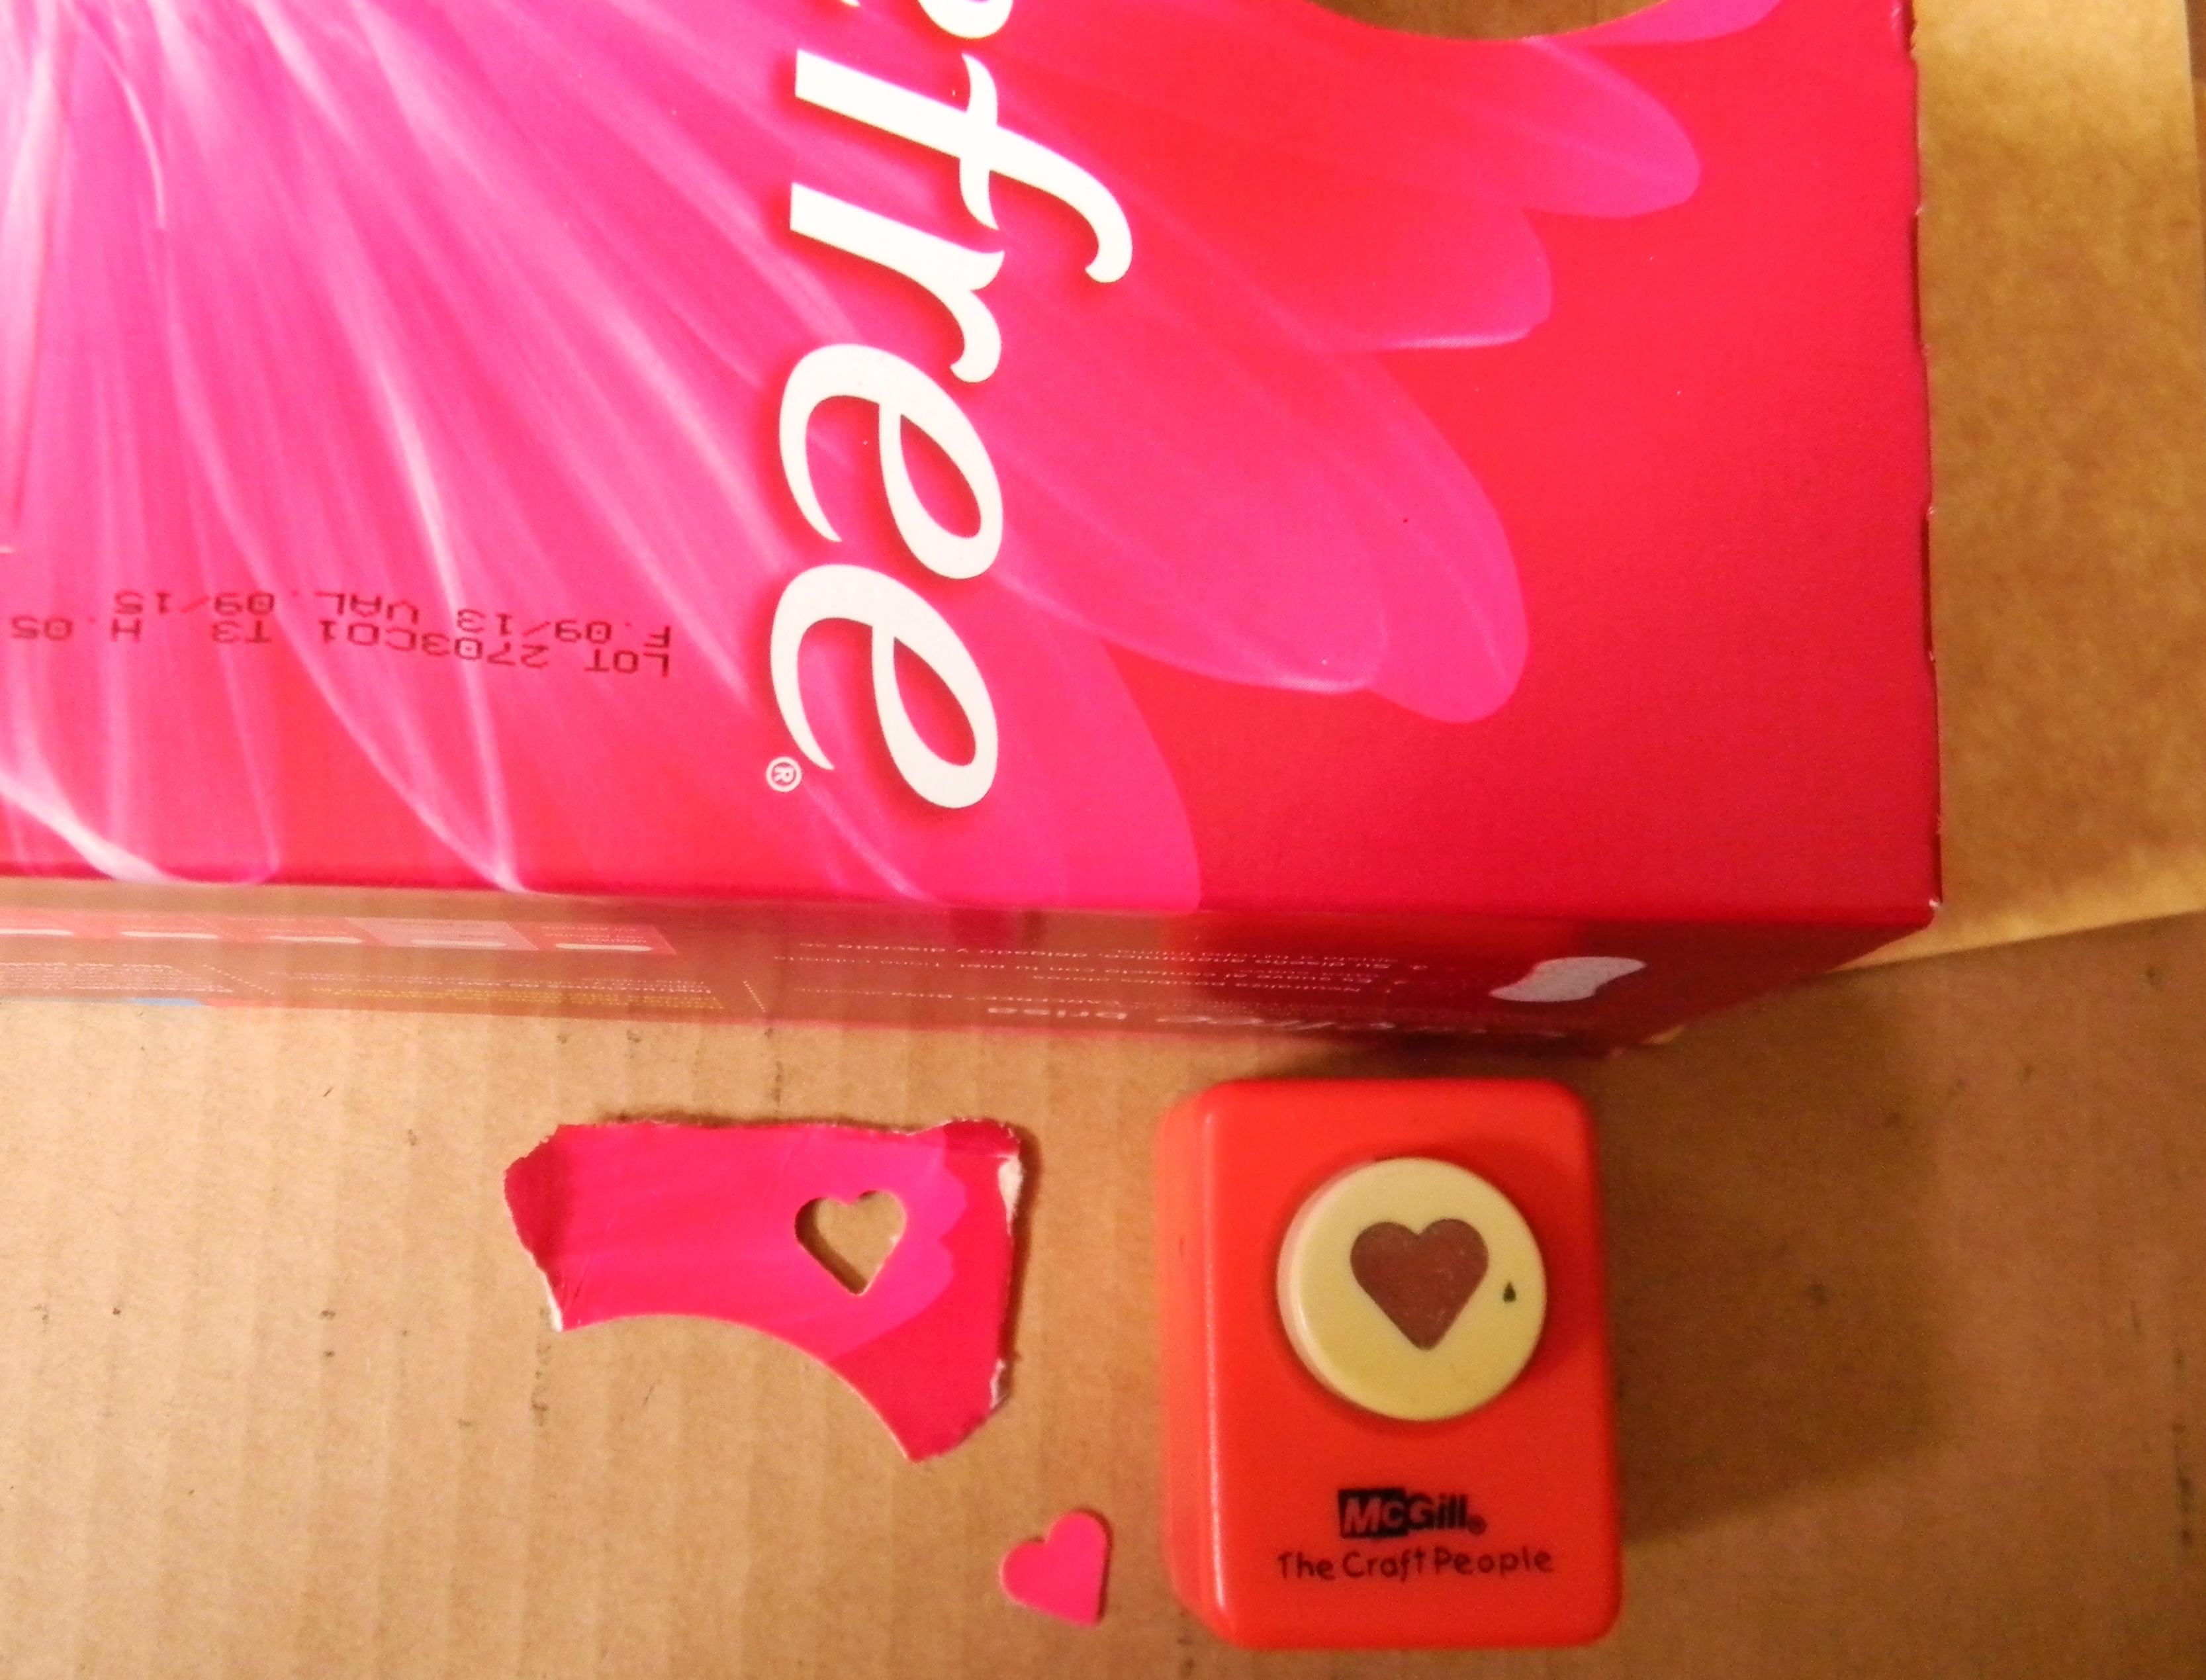
Next, cut out a tiny heart, smaller than the smaller of your two buttons. I used a paper punch, but it will work just as well to draw one and cut it out with scissors. I recycled a discarded box that just happened to be pink, the color I wanted my heart to be.
Finally, assemble your ornament and glue it to the front of your card, in the center of the red circle you cut out in step 3. I used a glue gun for this assemblage process, but a white glue like Elmer's will work, as well, as long as you give it enough time to dry.

Step 5
Cut out two 3/8 inch white circles. Again, I used a paper punch, but tracing the size circle you need and cutting it out with scissors works, too. I cut my circles from a flyer that was distributed as part of the annual Christmas Eve parade here in Ecuador. Use whatever white paper you have.

Finally, write the letters "I" and "U" on the circles and attach them to either side of the red circle, so your card front reads "I heart U." I experimented at this stage, stamping my letters, cutting them out of magazines, and, finally, using a pre-cut alphabet we happened to have available. I also dotted my "I" with a small red heart, drawn with a fine point marker.


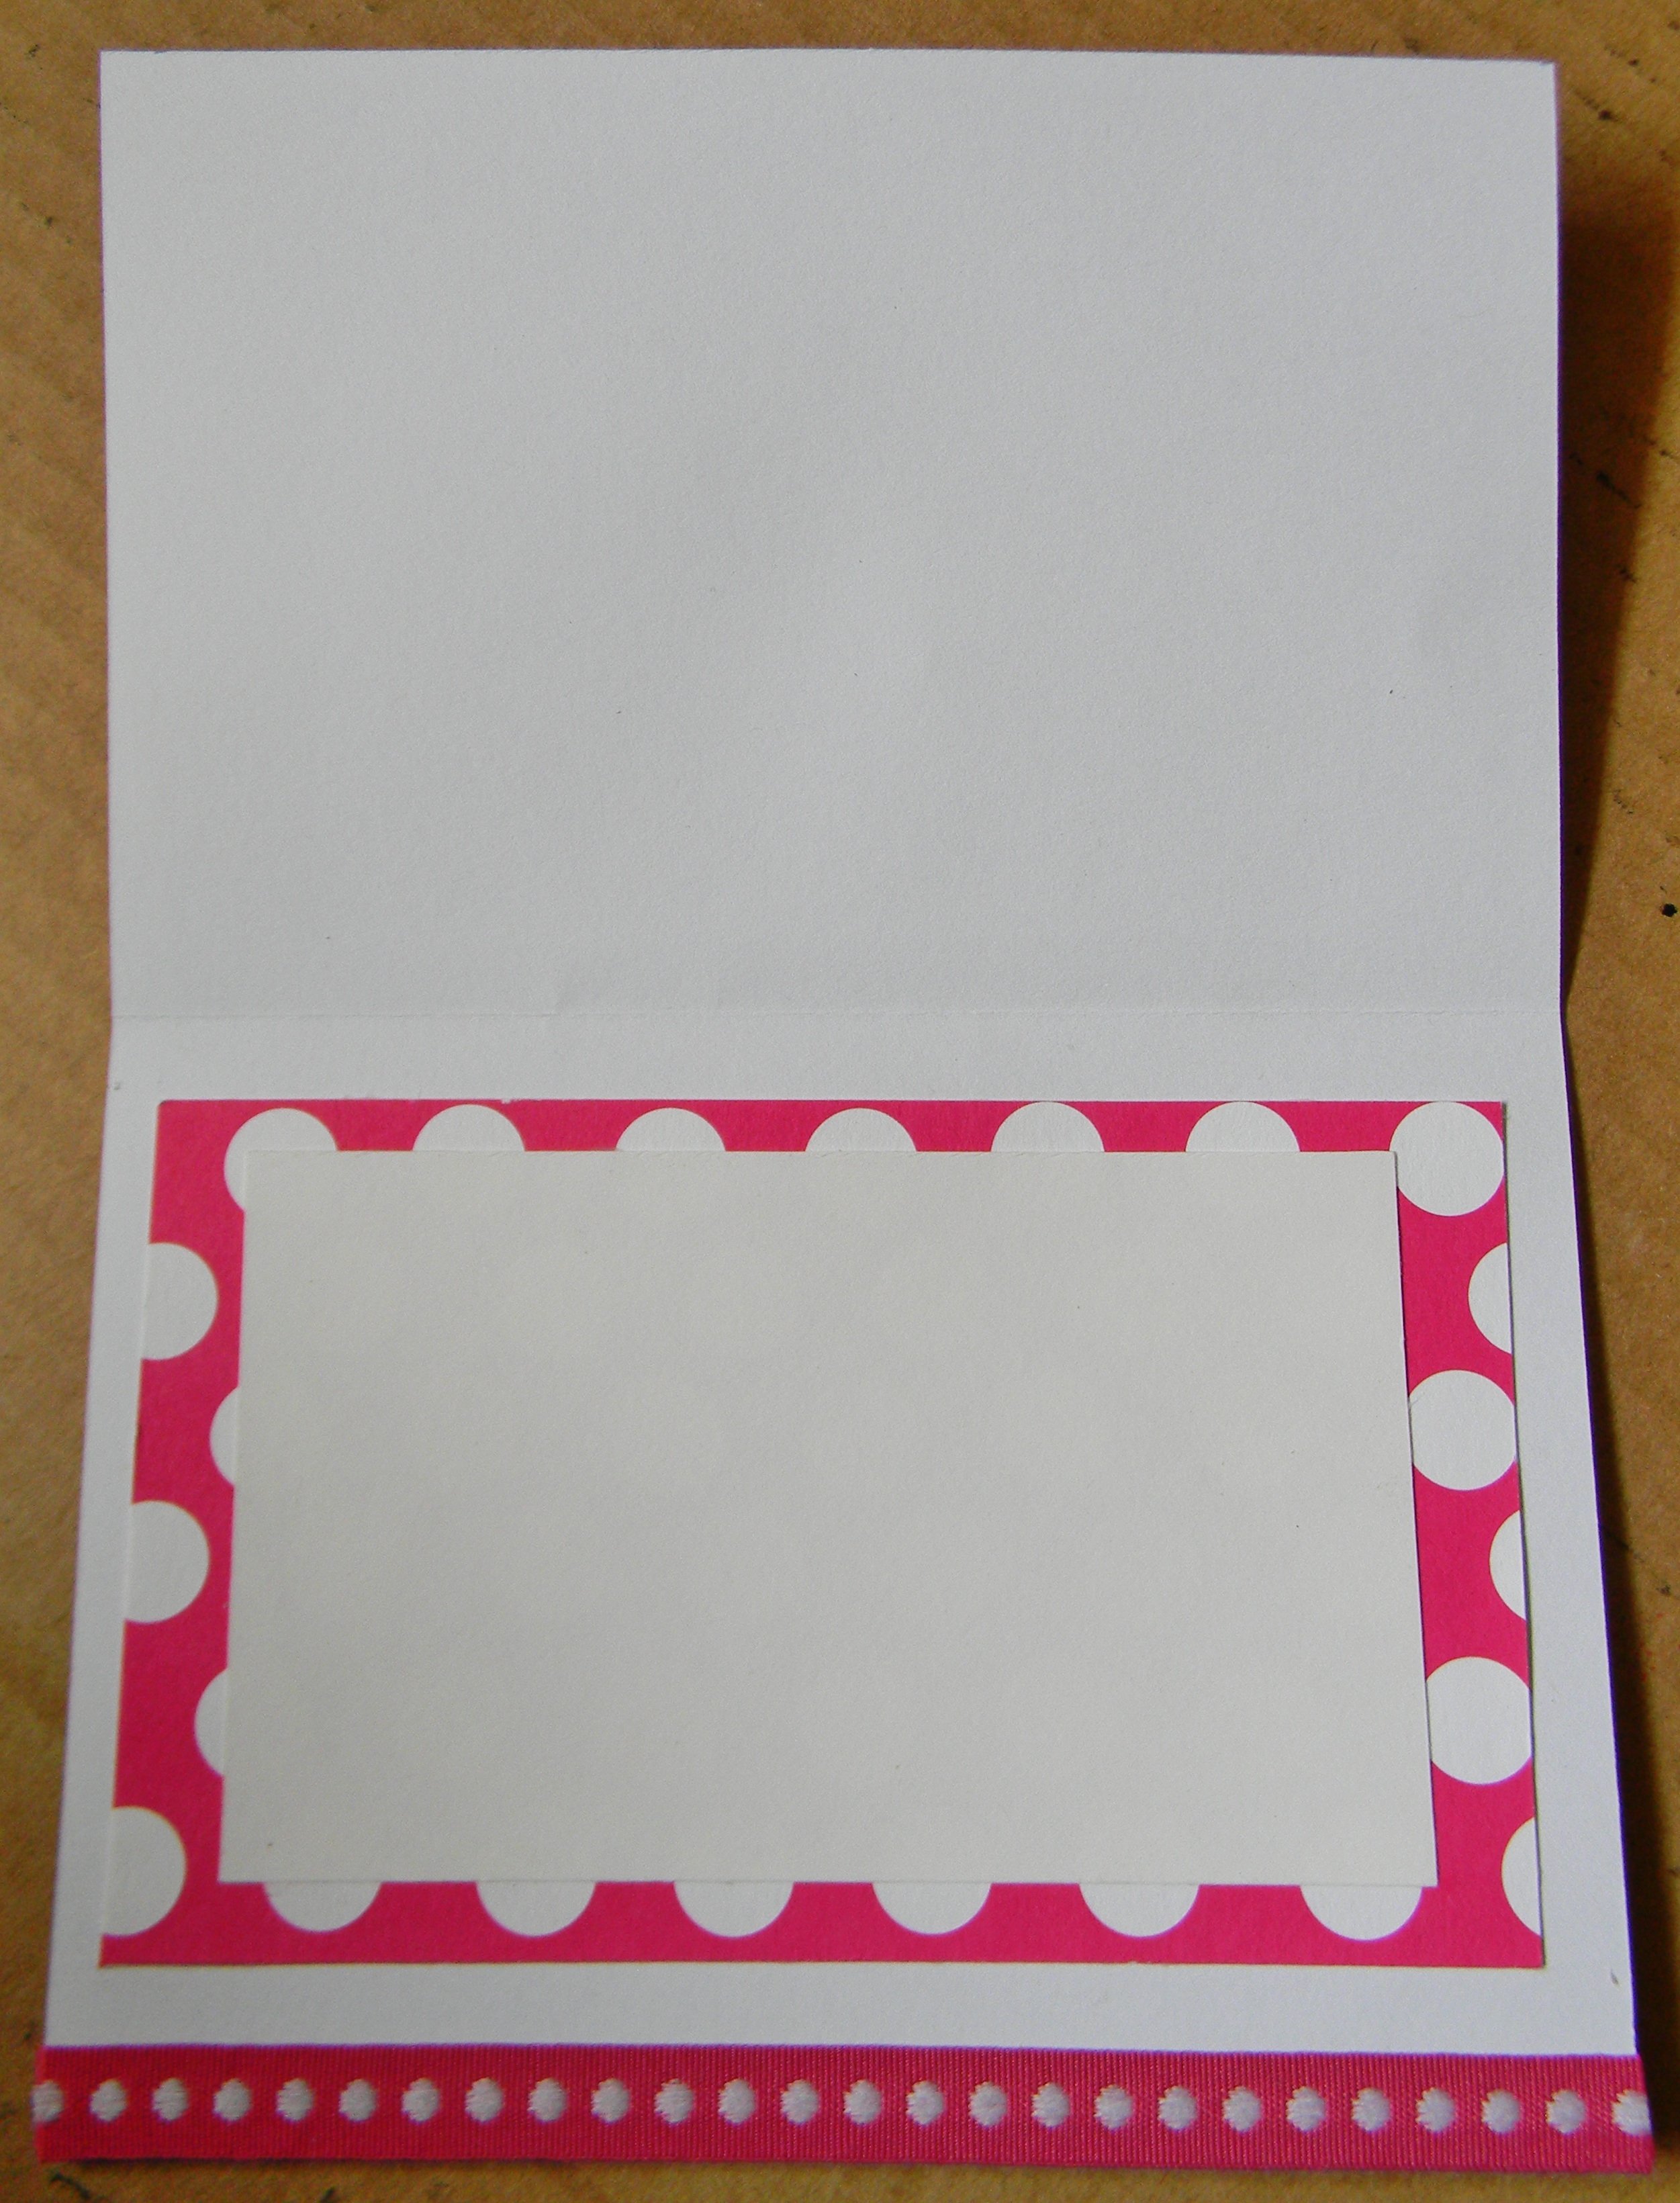
Step 6
This final step helps your create a designated place on the inside of your card to write a personal message. Note, you can leave the inside completely blank and eliminate this step. You might also experiment with card interiors, trying variations of the ones shown at the end of this post.
However, I cut two pieces of paper, that I glued together and then attached to the inside. Note the sizes I selected in the photo below. You can use any size you like, just be sure the smaller of the two is fairly simple, so you can tell your Valentine how much he or she means to you. It will become your writing surface.
Step 7 (Optional)
To create a finished look, consider gluing your business card to the rear of your completed Valentine.

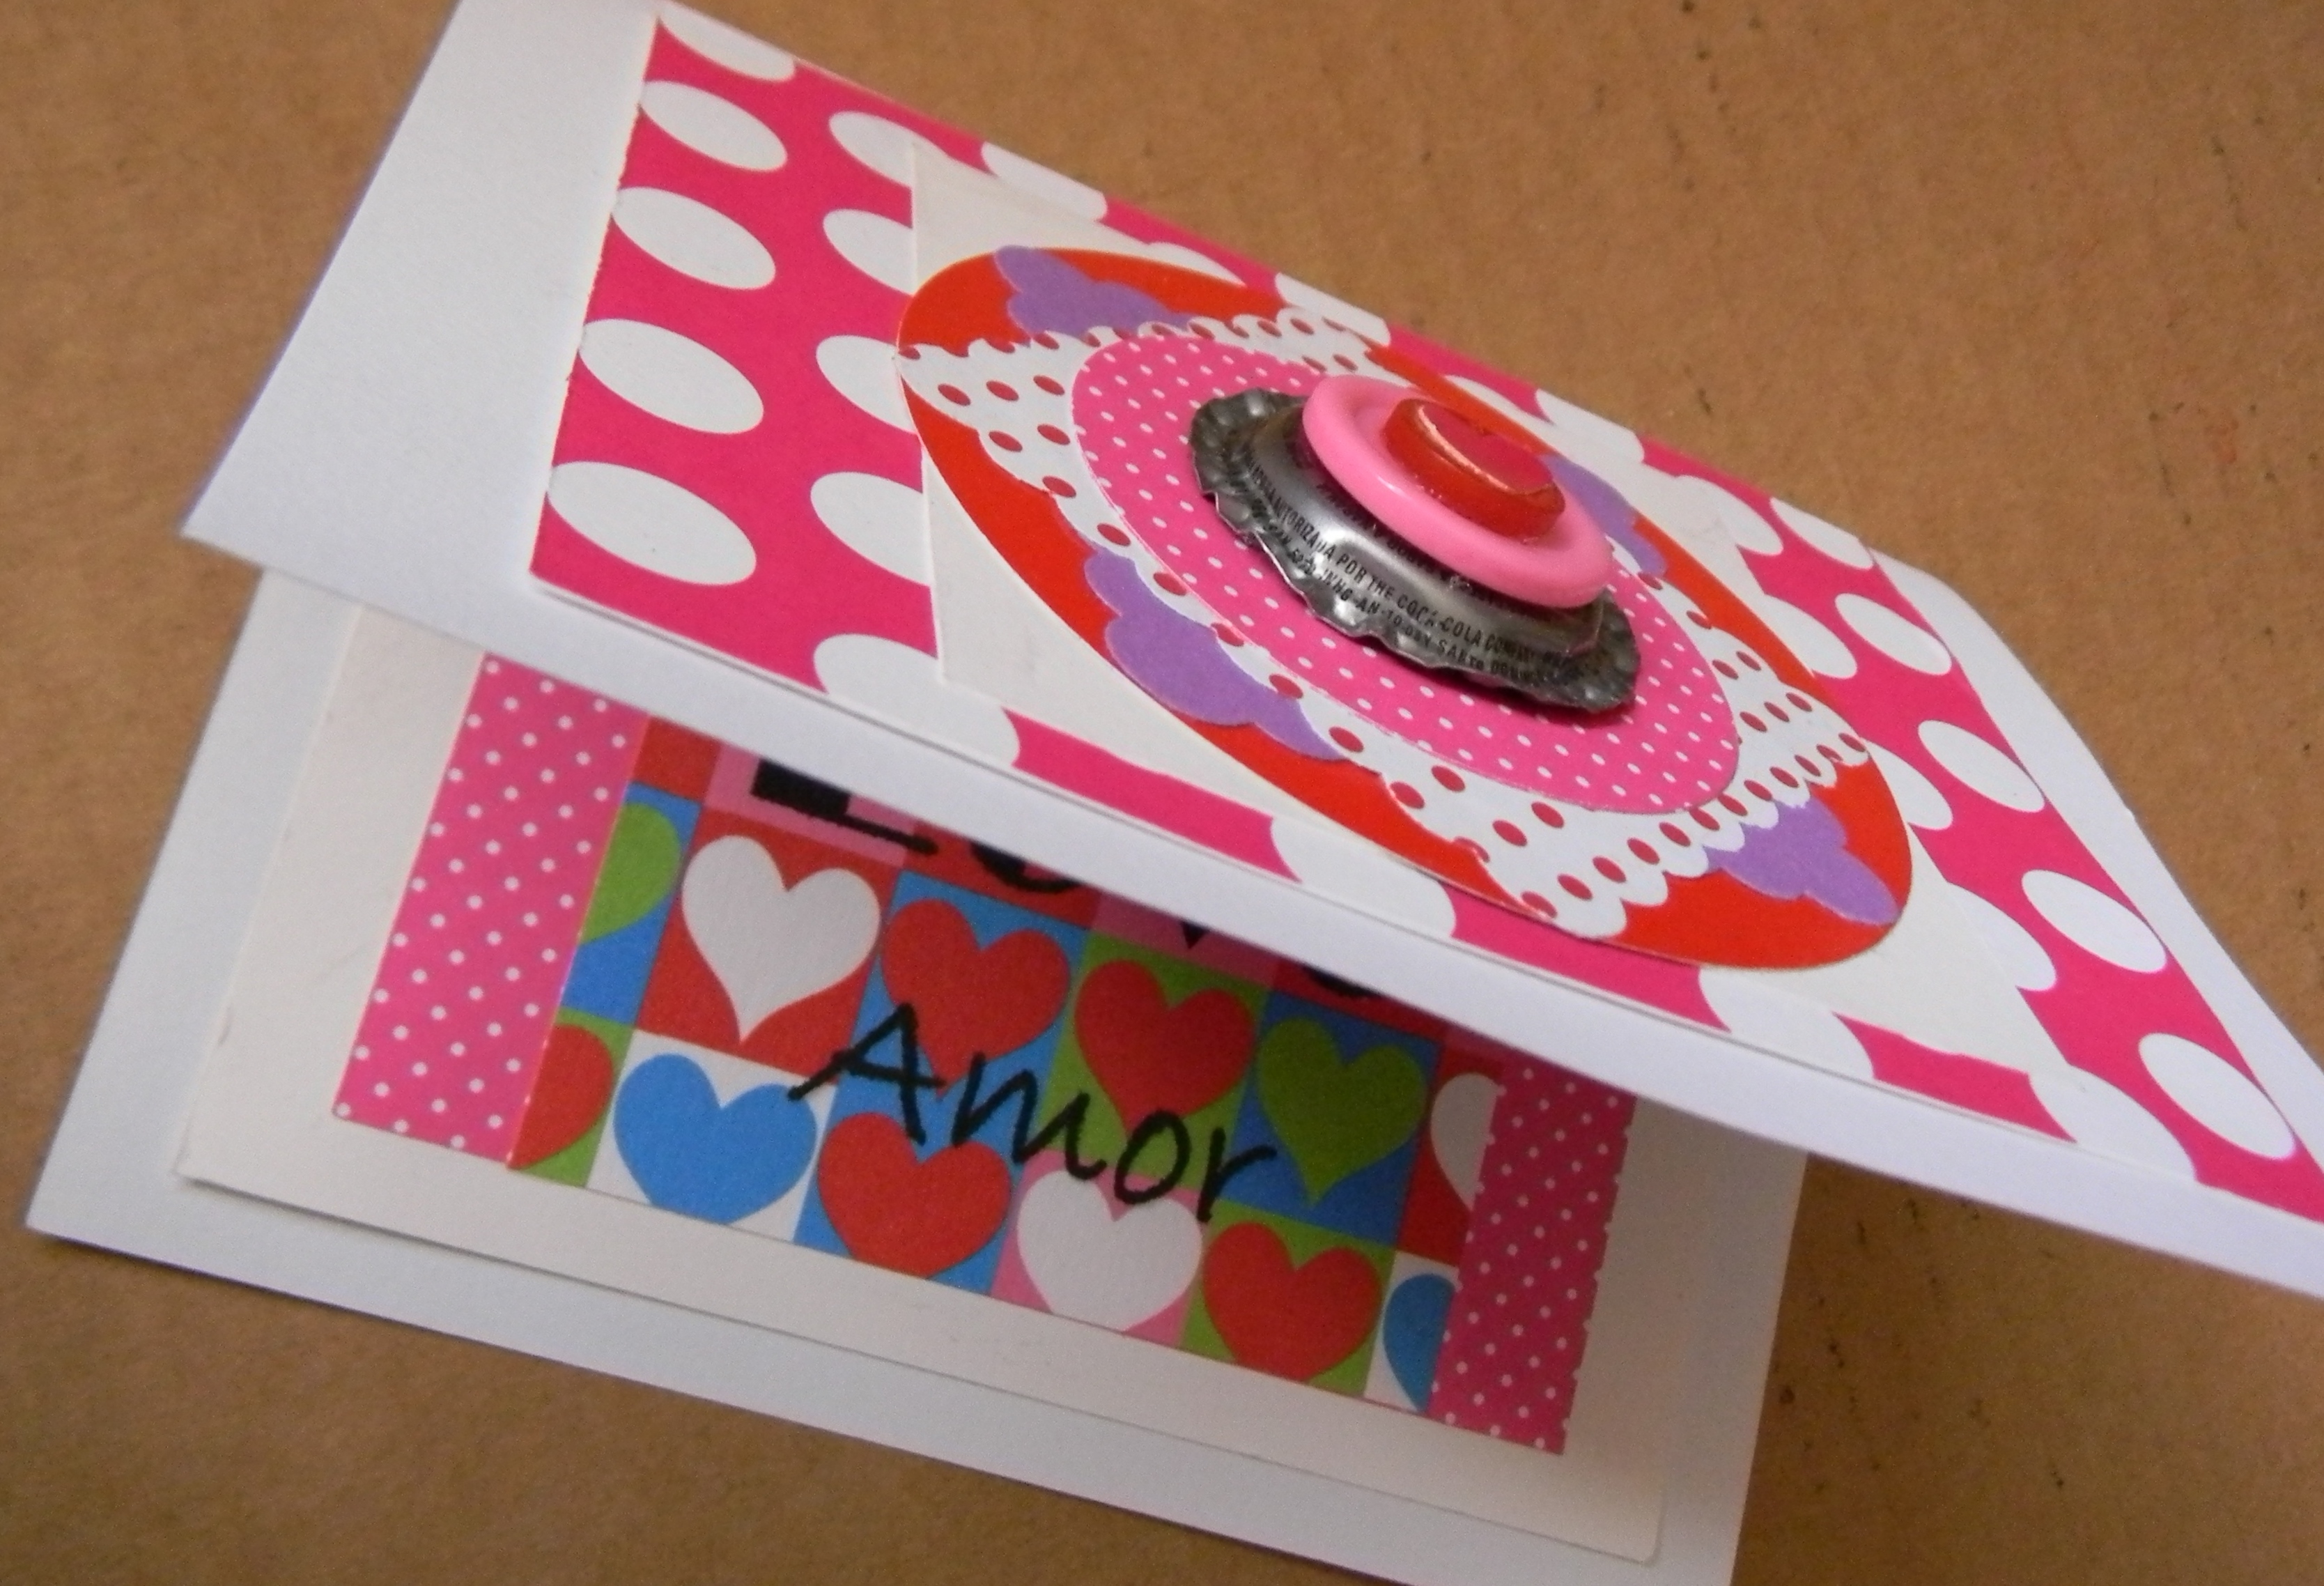
My completed card:

Additional Valentine Designs
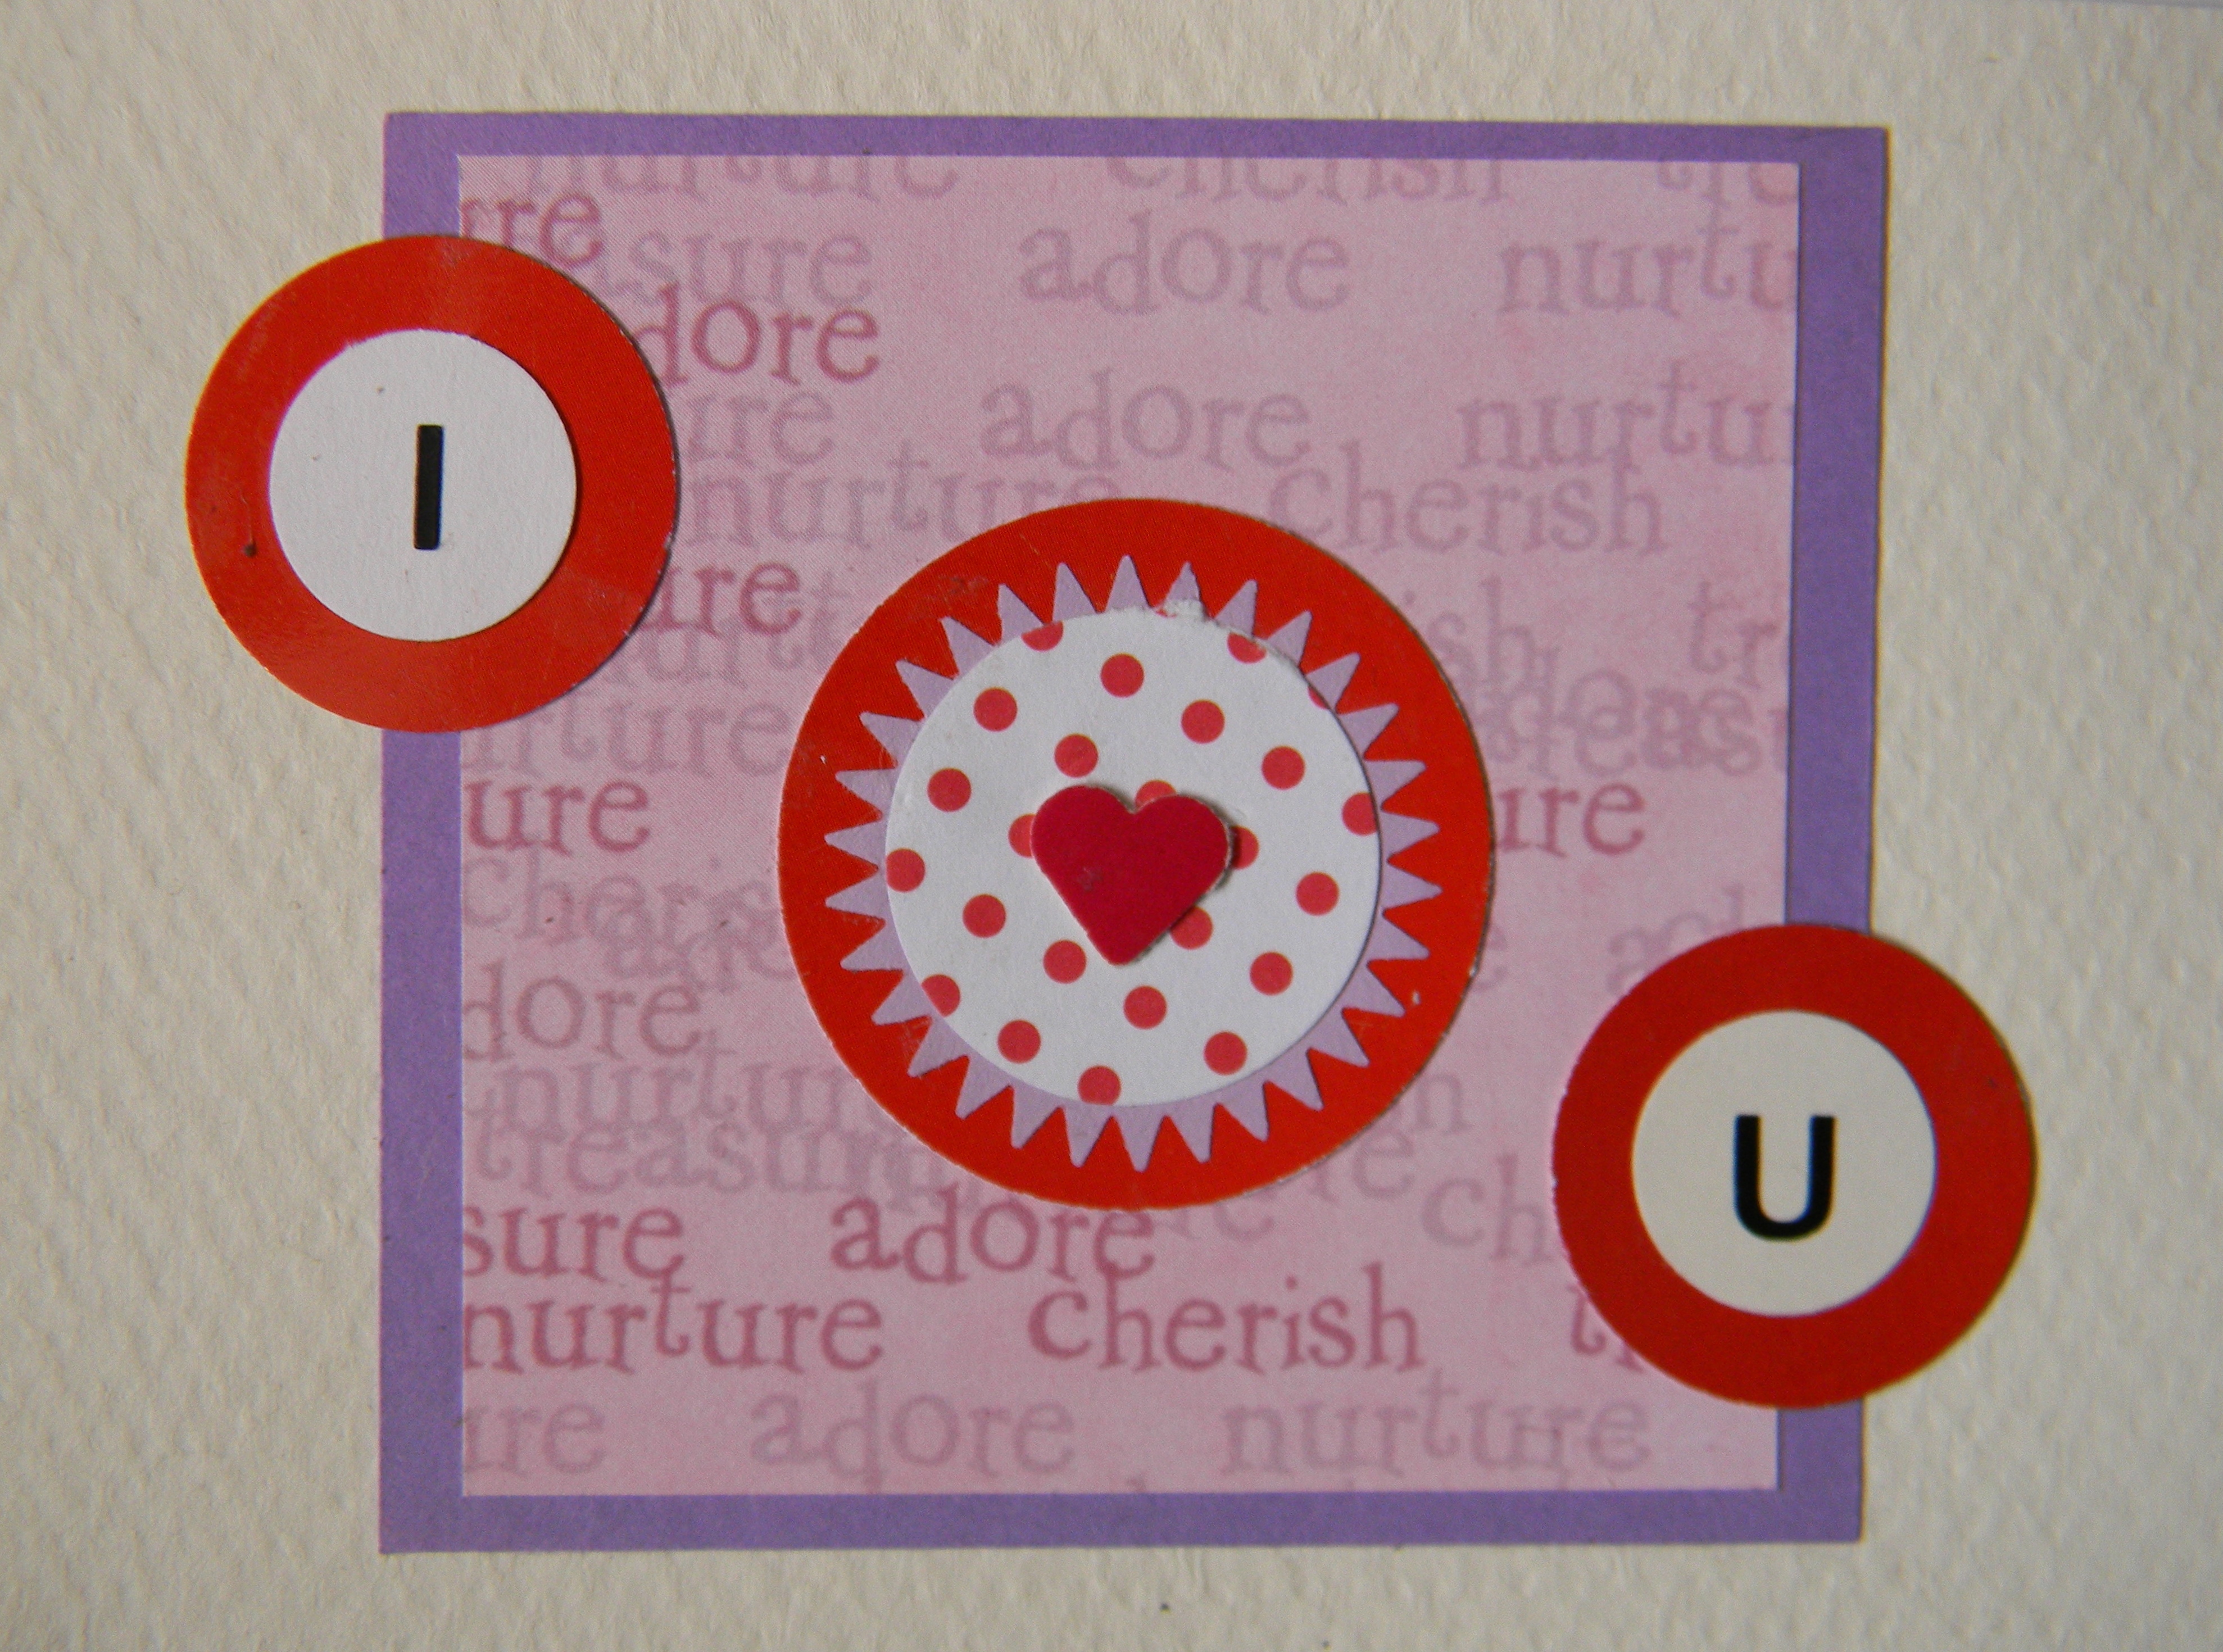
Check out the cards below for other ideas, especially variations on card interiors.
Design 1


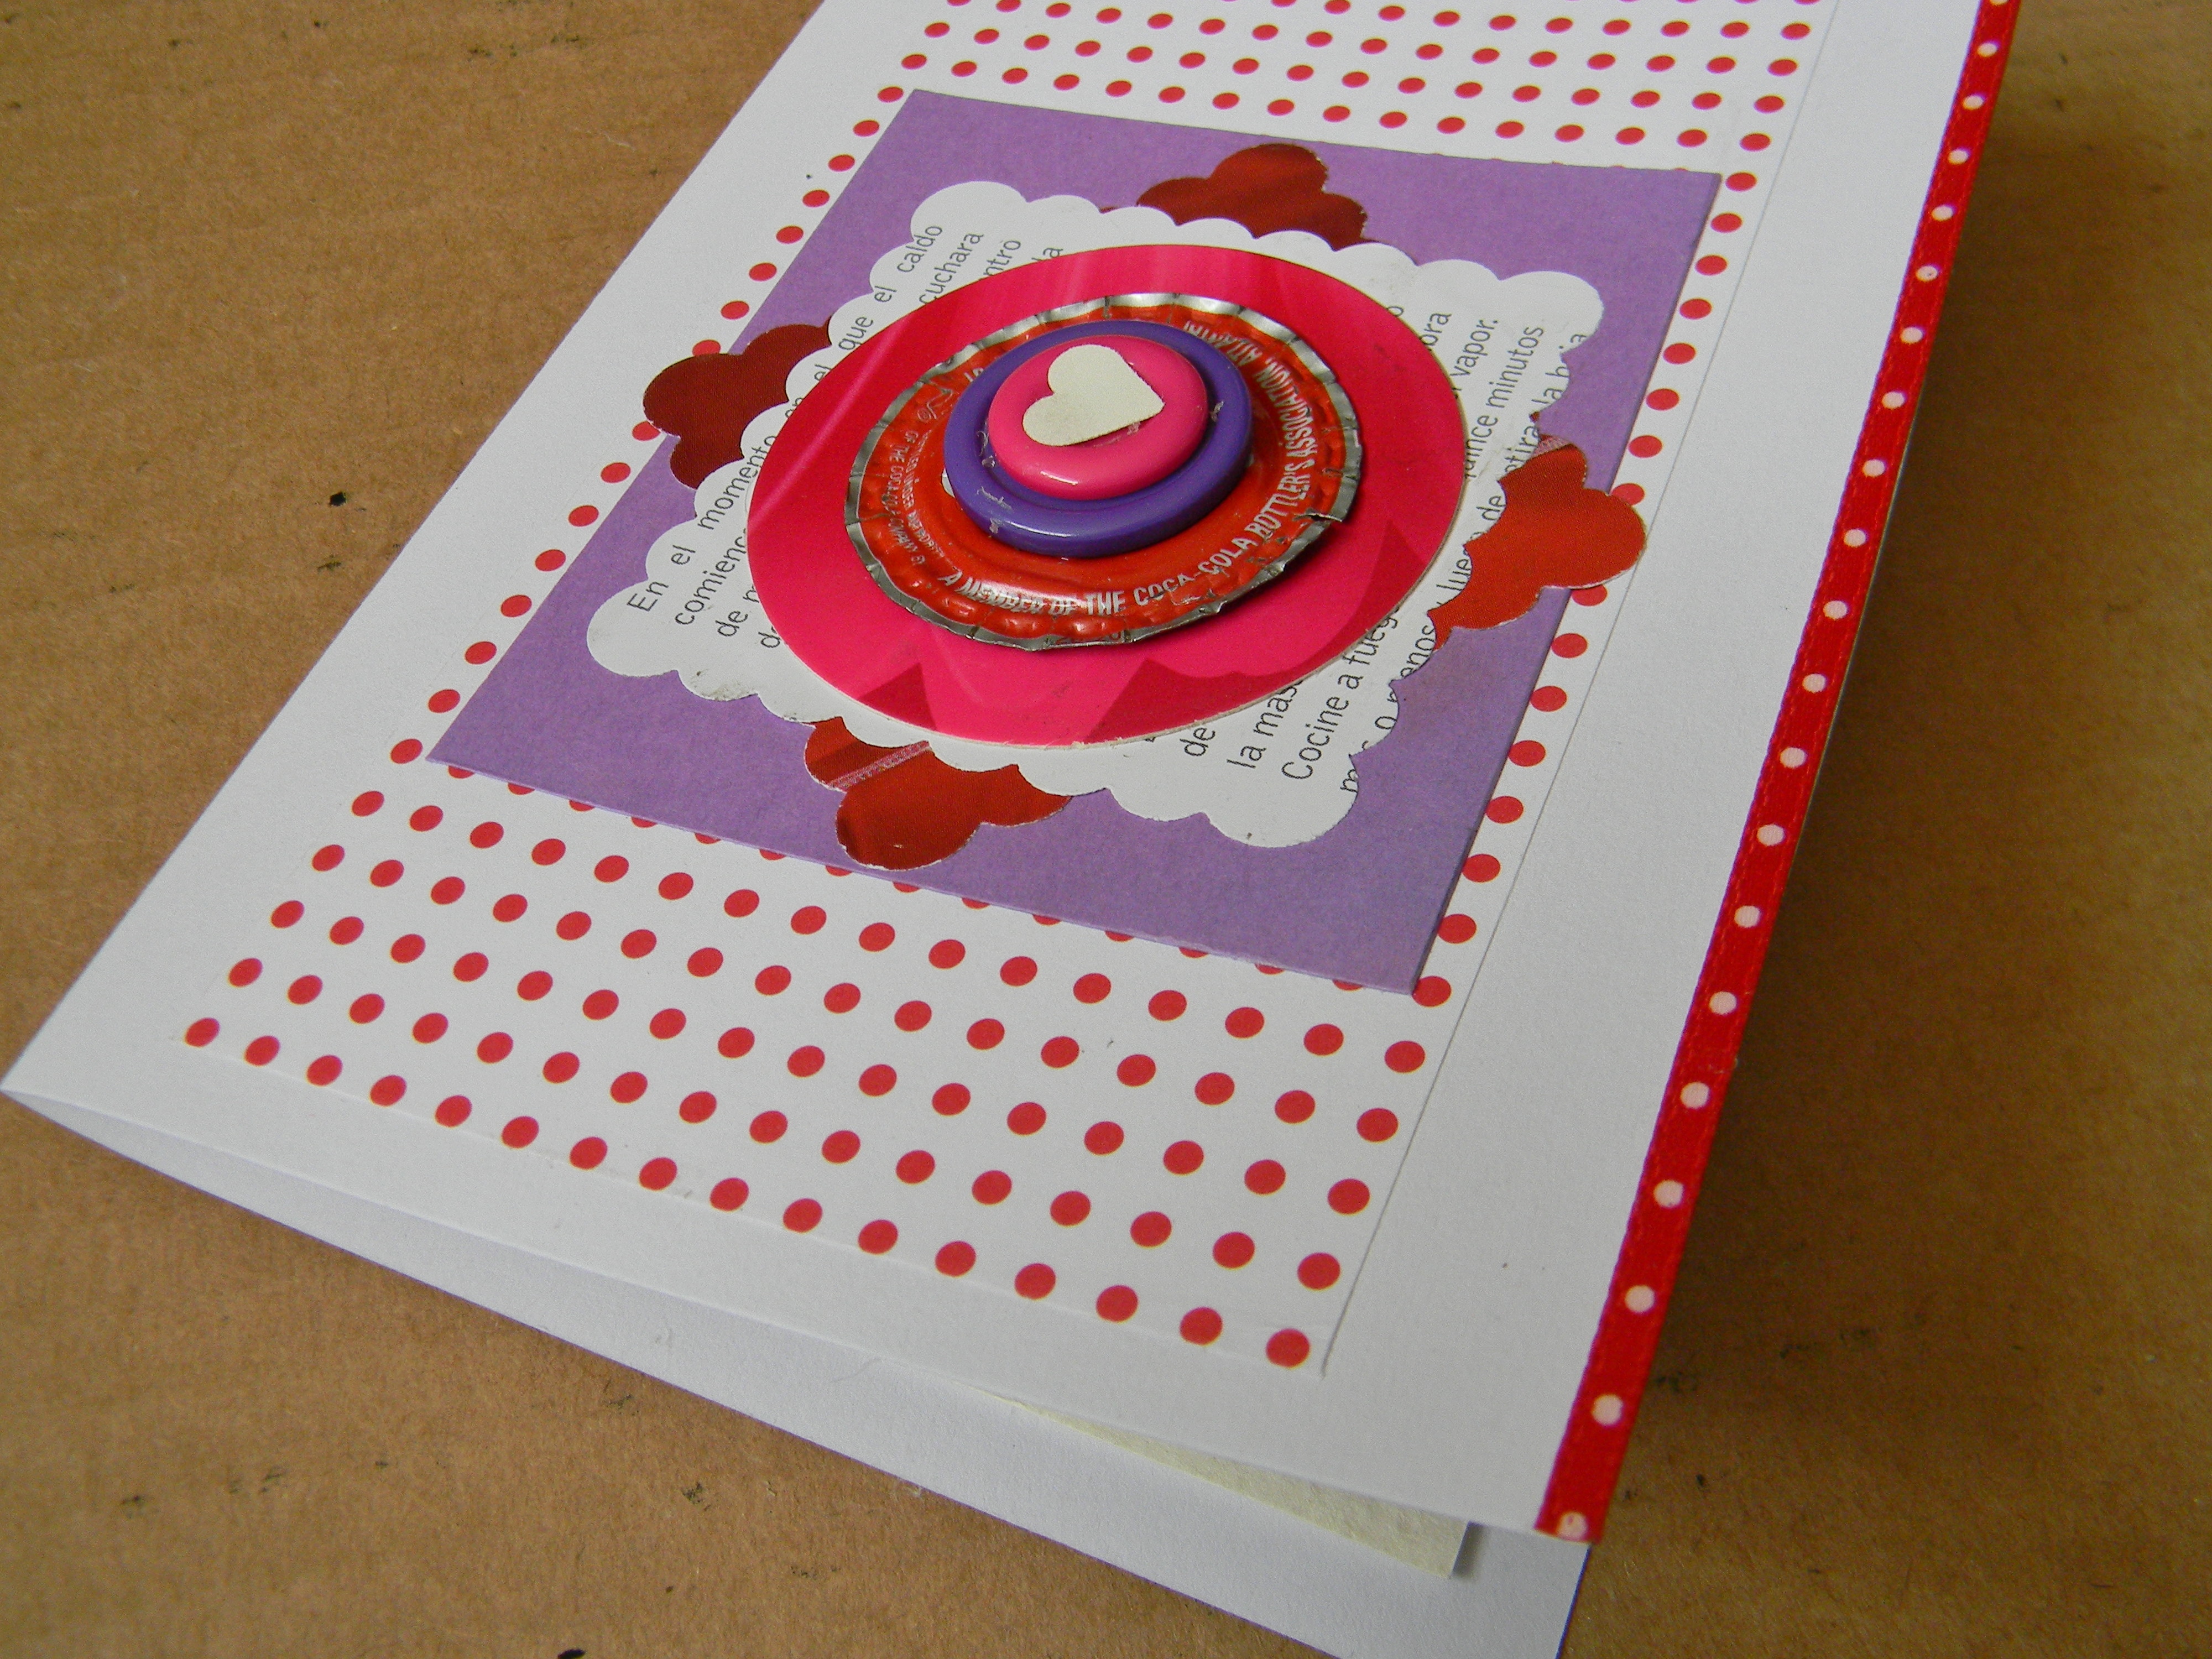
Design 2


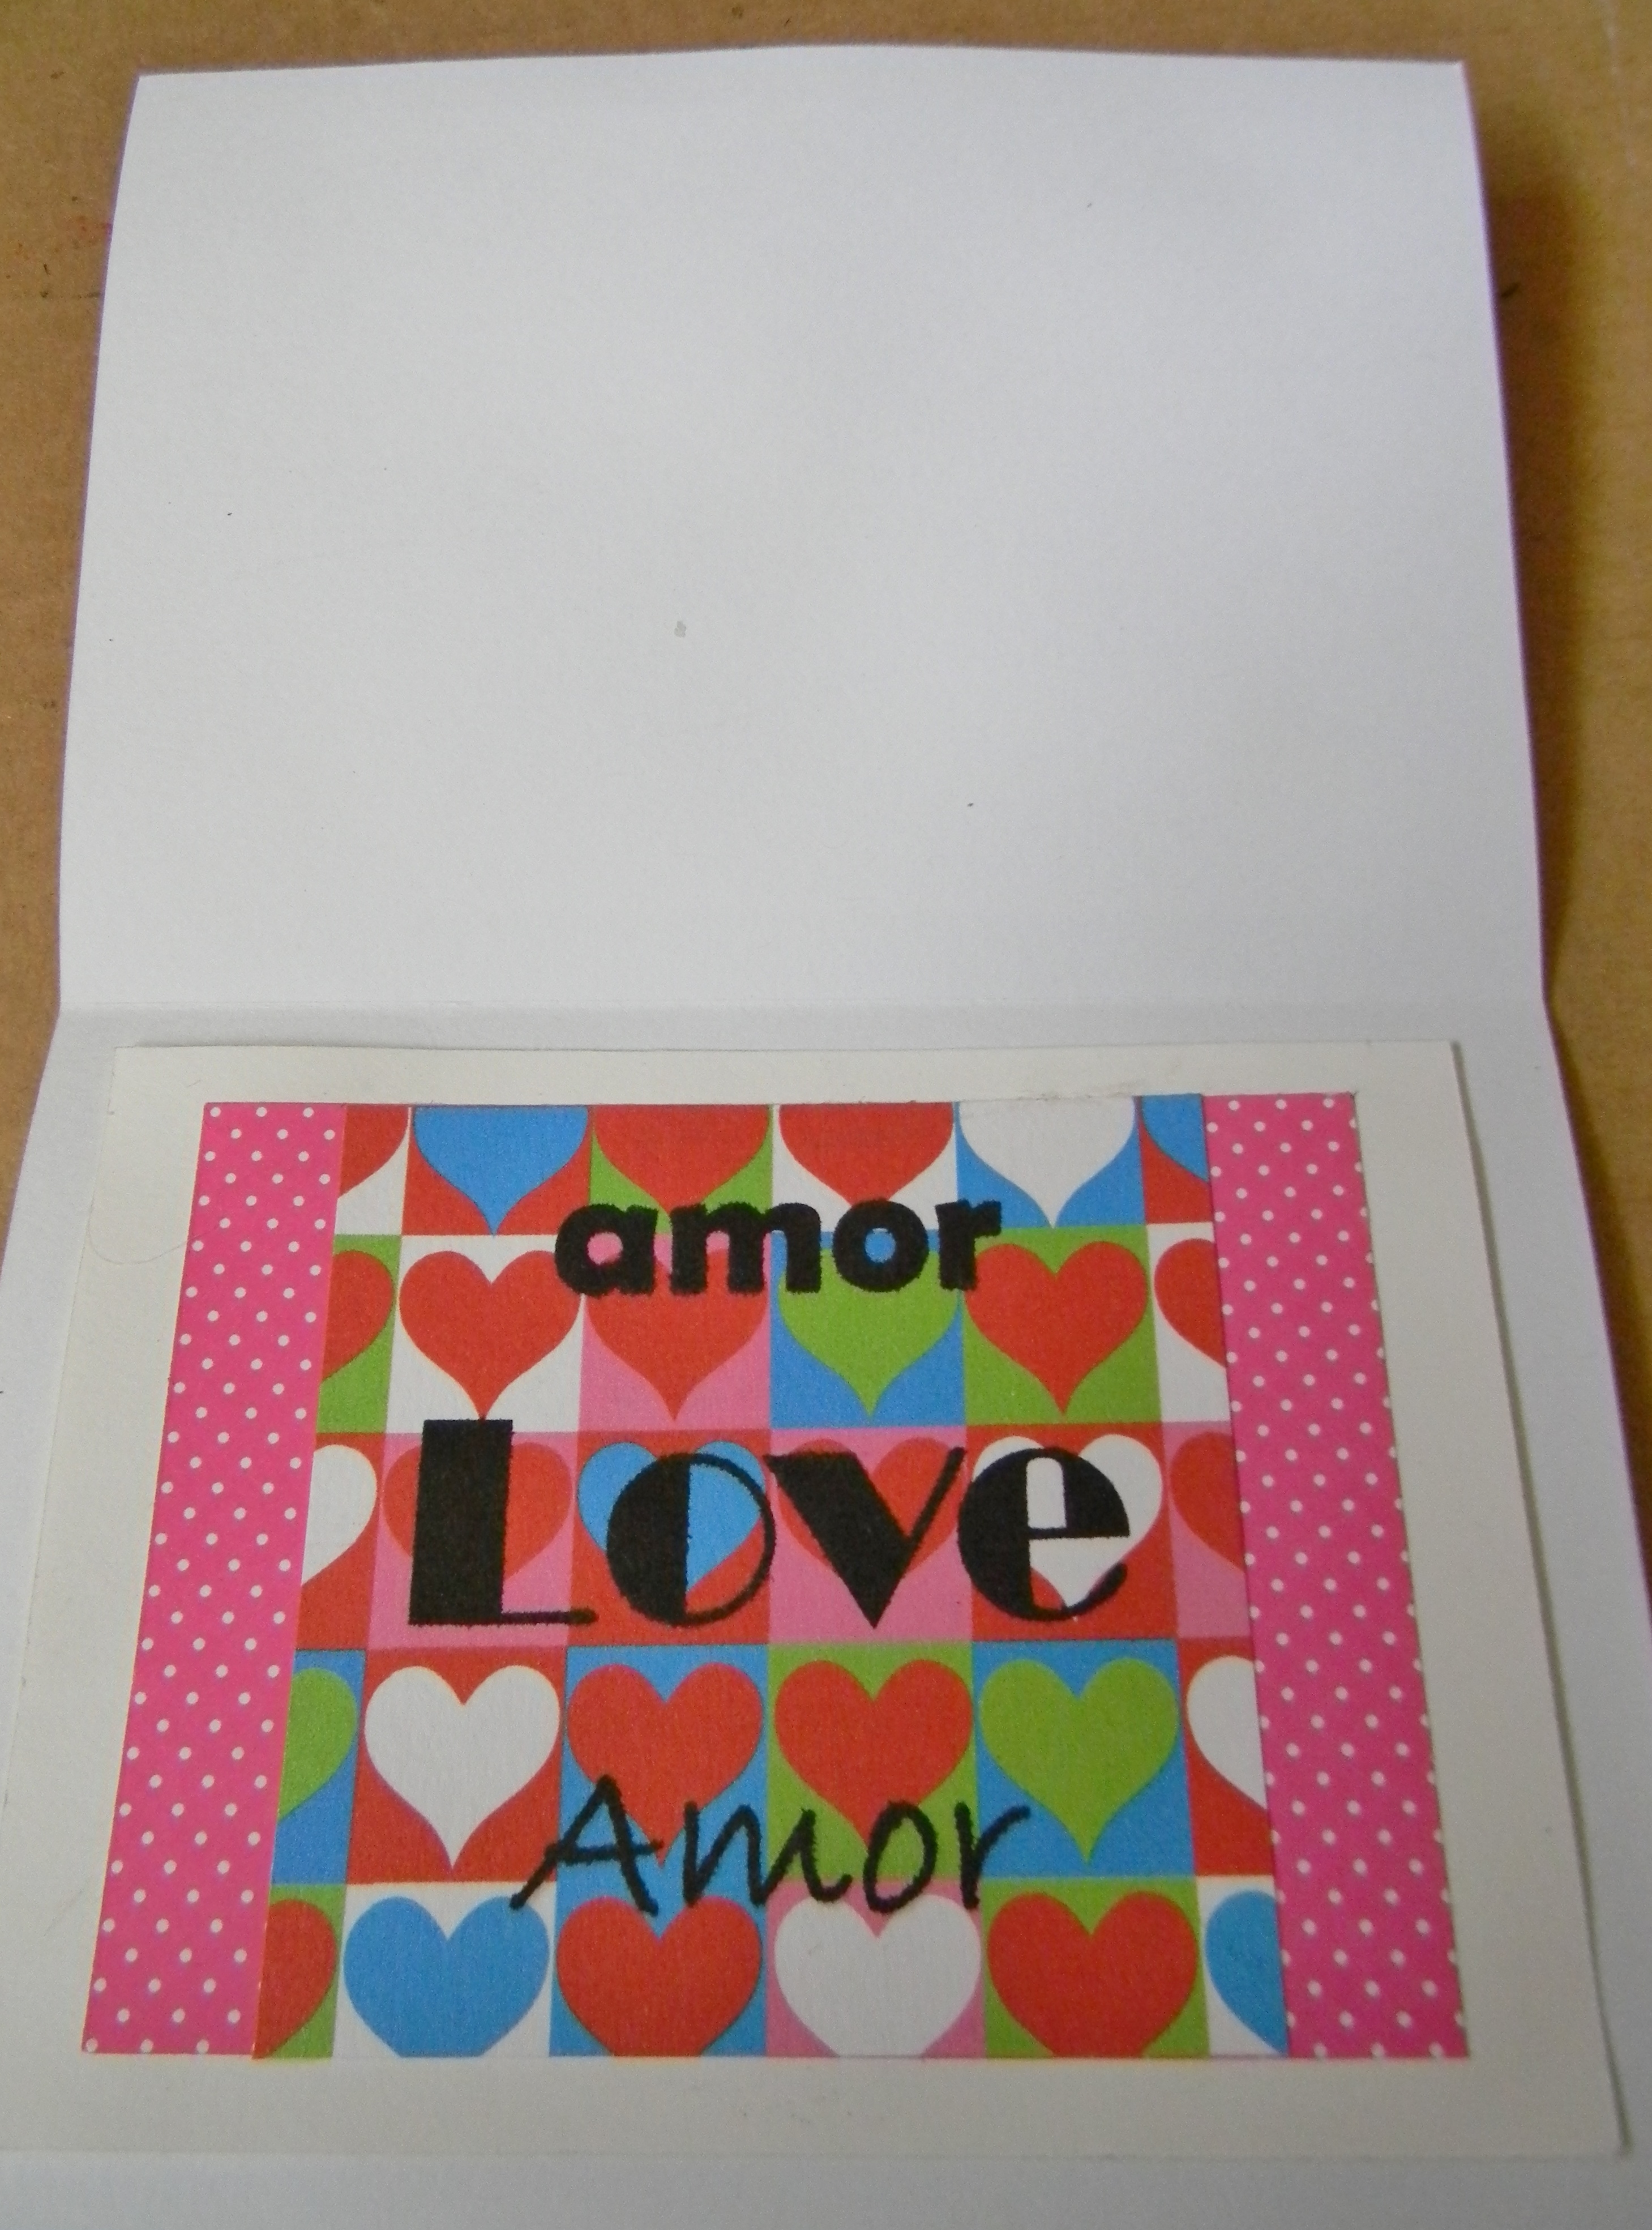
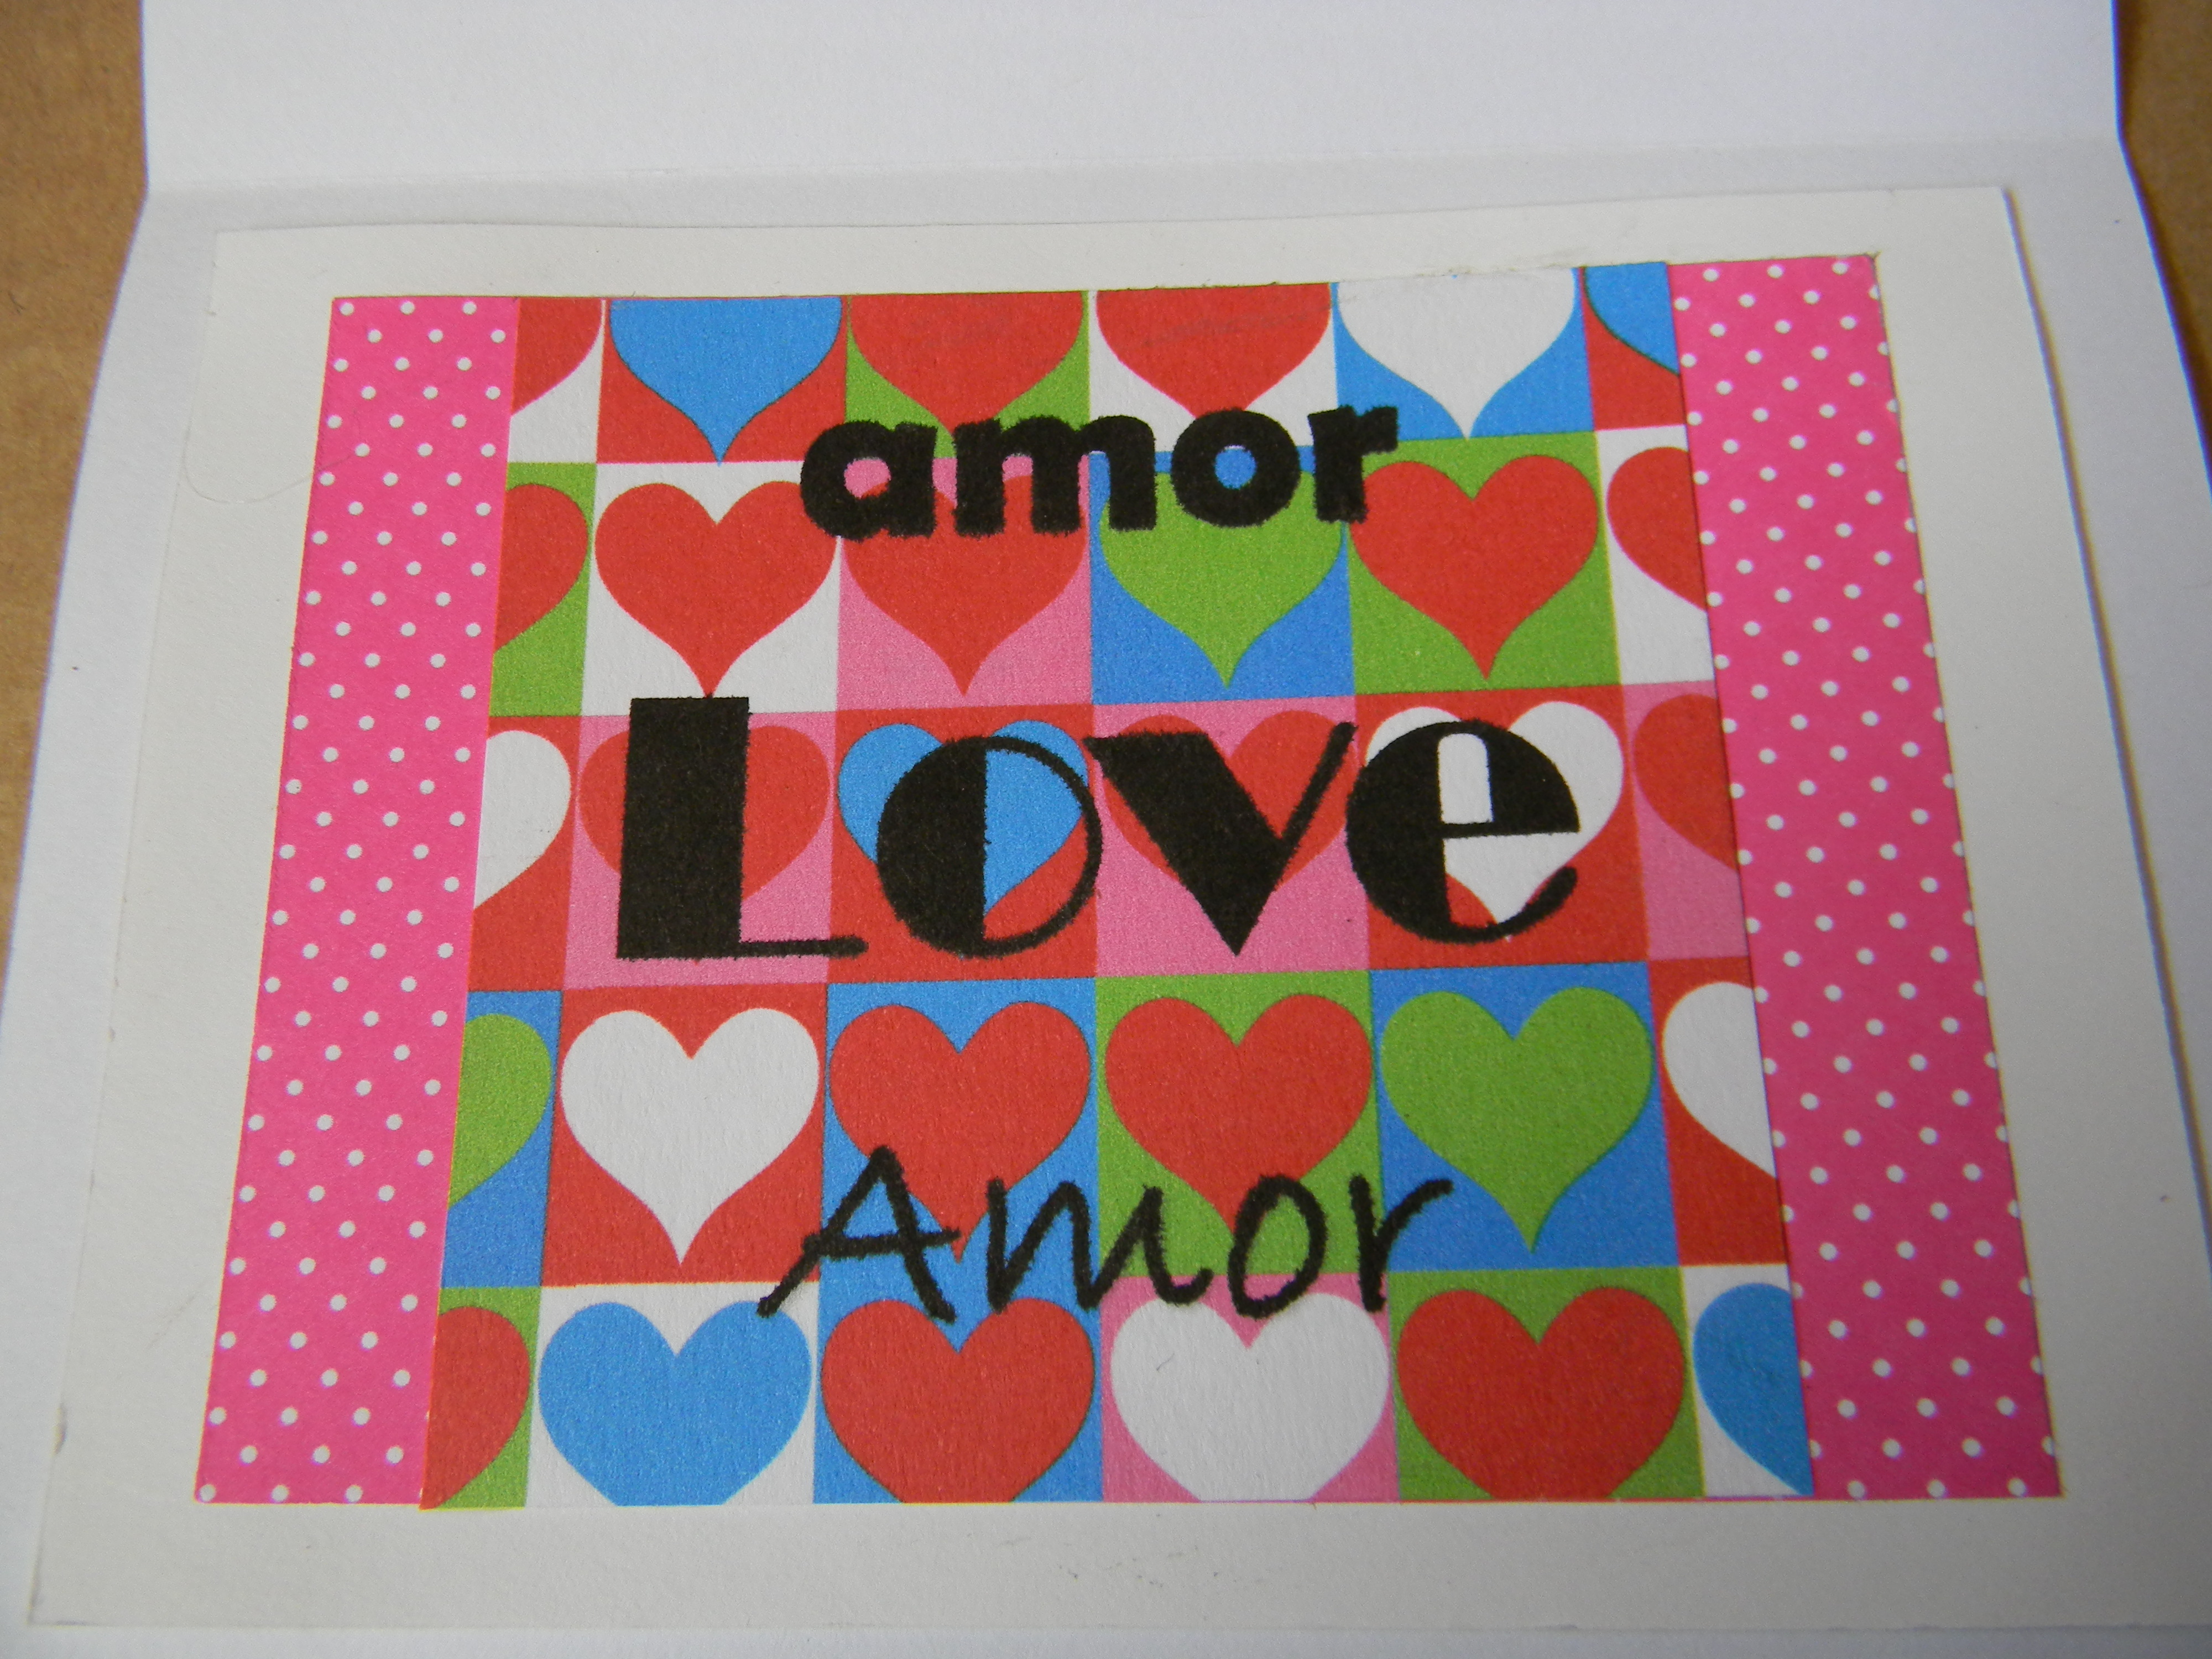
Don't forget to personalize the inside of the card with a note your loved-one will appreciate. Tell her how much she means to you, or, perhaps, share your fondest memory of her.
So, which design is your favorite?

When's the last time you created a home-made card, especially one from trash? How will you celebrate Valentine's Day this year?
Another version of this post appears on the writer's personal blog, Reinventing the Event Horizon.